

Deploying an ELK Stack on the Google Tau T2A Instance
Powered by Ampere Altra Processors
Overview
Ampere® Altra® processors are designed to deliver exceptional performance for Cloud Native applications such as NGINX. They do so by using an innovative architectural design, operating at consistent frequencies, and using single-threaded cores that make applications more resistant to noisy neighbor issues. This allows workloads to run in a predictable manner with minimal variance under increasing loads. The processors are also designed to deliver exceptional energy efficiency. This translates to industry leading performance/watt capabilities and a lower carbon footprint.
Google Cloud offers the cost-optimized Tau T2A VMs powered by Ampere Altra processors for scale-out Cloud Native workloads in multiple predetermined VM shapes – up to 48 vCPUS per VM, 4 GB of memory per vCPU, up to 32 Gbps networking bandwidth, and a wide range of network-attached storage options. Google Kubernetes Engine (GKE), which is a key infrastructure for containerized workloads, has supported the Tau T2A VMs since day one.
A traditional ELK stack is comprised of Elasticsearch, Logstash, and Kibana. Since 2015, the Beats family of lightweight data shippers has been an unofficial component of the ELK stack. The ELK stack gives developers the end-to-end ability to aggregate application and system logs, analyze those logs, and visualize insights for monitoring, troubleshooting, and analytics.
In this white paper, we will demonstrate how to deploy an ELK stack on a Google Cloud Tau T2A GKE cluster to collect logs from pods inside a Kubernetes cluster.
Ready…
Before starting, we will assume the following:
- You have a Google Cloud account.
- Your Cloud Shell has been activated.
- gcloud CLI has been downloaded and set up.
- Compute Engine and Kubernetes Engine APIs have been enabled via Cloud Shell.
If all these prerequisites have been fulfilled, congratulations! We can now move to the next phase - setting up a GKE cluster.
Set…
The Google Cloud T2A VMs currently support version 1.24 of GKE or later. Three Google Cloud regions and several zones are now available for T2A-based GKE cluster creation: us-central1 (Iowa - Zone A, B, F), europe-west4 (Netherlands - Zone A, B), and asia-southeast1 (Singapore - Zone B, C).
In this tutorial, we configure a three-node GKE T2A cluster in the us-central1-a region using the following gcloud command:
$ gcloud container clusters create "eck-tutorial" --project=<YOUR_PROJECT_NAME> --zone us-central1-a --node-locations "us-central1-a" --machine-type "t2a-standard-4" --num-nodes "3" --enable-gvnic --cluster-version "1.24.3-gke.200"
After the gcloud CLI, confirm the creation of the Kubernetes cluster and the status as shown below:
$ kubeconfig entry generated for eck-tutorial. NAME LOCATION MASTER_VERSION MASTER_IP MACHINE_TYPE NODE_VERSION NUM_NODES STATUS eck-tutorial us-central1-a 1.24.3-gke.200 34.133.94.220 t2a-standard-4 1.24.3-gke.200 3 RUNNING
After cluster creation, gcloud saves the cluster authentication credentials to a config file in $HOME/.kube directory, so kubectl can also be used to interact with the cluster.
Note: GKE release 1.24.3-gke.200 will automatically taint arm64 nodes to avoid x86-only application pods scheduled to arm64 nodes.
$ kubectl describe node <NODE_NAME> … Taints: kubernetes.io/arch=arm64:NoSchedule …
We can now schedule workloads to the T2A nodes by adding node selector or node affinity in the object spec. Another option is to remove the NoSchedule taints tag from worker nodes If there is only arm64 architecture in the cluster. In this tutorial, we will remove the taints tag for nodes as our cluster is made up exclusively of T2A arm64 nodes.
$ kubectl taint nodes <NODE_NAME> kubernetes.io/arch=arm64:NoSchedule- node/<NODE_NAME> untainted
At this point, we should be able to continue the Elastic stack deployment on the newly created T2A Kubernetes cluster.
Go
Operator Deployment
Install custom resource definitions and the operator with its RBAC rules from the Elastic website.
$ kubectl create -f https://download.elastic.co/downloads/eck/2.4.0/crds.yaml $ kubectl apply -f https://download.elastic.co/downloads/eck/2.4.0/operator.yaml
Next, the elastic-operator pod should be up and running after some time.
$ kubectl get pods -n elastic-system NAME READY STATUS RESTARTS AGE elastic-operator-0 1/1 Running 0 2m
Elasticsearch Node Deployment
Once the operator is ready, it should be able to create an Elasticsearch cluster and achieve the desired status based on the following cluster yaml specification:
$ cat <<EOF | kubectl apply -f - apiVersion: elasticsearch.k8s.elastic.co/v1 kind: Elasticsearch metadata: name: quickstart spec: version: 8.4.1 nodeSets: - name: default count: 1 config: node.store.allow_mmap: false EOF
The Elasticsearch node is ready when the Health status is set to green, and Phase is set to Ready as shown below:
$ kubectl get elasticsearch NAME HEALTH NODES VERSION PHASE AGE quickstart green 1 8.4.1 Ready 1m
Filebeat Deployment
In this tutorial, we will use filebeat to collect logs of containers on the Kubernetes nodes. The following command line was employed to deploy Filebeat as a daemonSet as the data stream to Elasticsearch.
$ cat <<EOF | kubectl apply -f - apiVersion: beat.k8s.elastic.co/v1beta1 kind: Beat metadata: name: quickstart spec: type: filebeat version: 8.4.1 elasticsearchRef: name: quickstart config: filebeat.inputs: - type: container paths: - /var/log/containers/*.log daemonSet: podTemplate: spec: dnsPolicy: ClusterFirstWithHostNet hostNetwork: true securityContext: runAsUser: 0 containers: - name: filebeat volumeMounts: - name: varlogcontainers mountPath: /var/log/containers - name: varlogpods mountPath: /var/log/pods - name: varlibdockercontainers mountPath: /var/lib/docker/containers volumes: - name: varlogcontainers hostPath: path: /var/log/containers - name: varlogpods hostPath: path: /var/log/pods - name: varlibdockercontainers hostPath: path: /var/lib/docker/containers EOF
Again, we wait for the beat Health status to turn green.
$ kubectl get beat NAME HEALTH AVAILABLE EXPECTED TYPE VERSION AGE quickstart green 3 3 filebeat 8.4.1 2m
Kibana Instance Deployment
After the Elasticsearch deployment, we need Kibana to search, observe, and analyze your data. To deploy a Kibana instance associated with our existing Elasticsearch cluster, use the following specification:
$ cat <<EOF | kubectl apply -f - apiVersion: kibana.k8s.elastic.co/v1 kind: Kibana metadata: name: quickstart spec: version: 8.4.1 count: 1 elasticsearchRef: name: quickstart EOF
Check Kibana’s health:
$ kubectl get kibana NAME HEALTH NODES VERSION AGE quickstart green 1 8.4.1 2m
After Kibana’s health turns green, we expose an external IP address to access Kibana.
$ kubectl expose deployment quickstart-kb \ --type=LoadBalancer \ --port 5601 \ --target-port 5601 service/quickstart-kb exposed
GKE then provisions a LoadBalancer type service object to direct traffic outside the Kubernetes cluster and backend Kibana pod.
$ kubectl get services NAME TYPE CLUSTER-IP EXTERNAL-IP PORT(S) AGE kubernetes ClusterIP 10.28.0.1 <none> 443/TCP 1h quickstart-es-default ClusterIP None <none> 9200/TCP 1h quickstart-es-http ClusterIP 10.28.0.145 <none> 9200/TCP 1h quickstart-es-internal-http ClusterIP 10.28.3.117 <none> 9200/TCP 1h quickstart-es-transport ClusterIP None <none> 9300/TCP 1h quickstart-kb LoadBalancer 10.28.5.239 34.70.116.77 5601:30503/TCP 40s quickstart-kb-http ClusterIP 10.28.3.84 <none> 5601/TCP 1h
In this example, an external IP (34.70.116.77) has been created to access the Kibana instance.
The Kibana login information can be obtained by the following command:
$ kubectl get secret quickstart-es-elastic-user -o=jsonpath='{.data.elastic}' | base64 --decode; echo
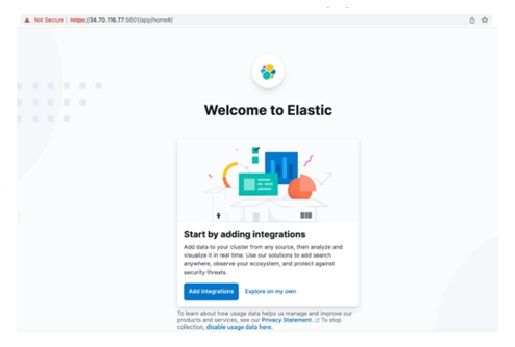
Next, we access the Kibana instance from the browser with the username elastic.
Kibana Configuration
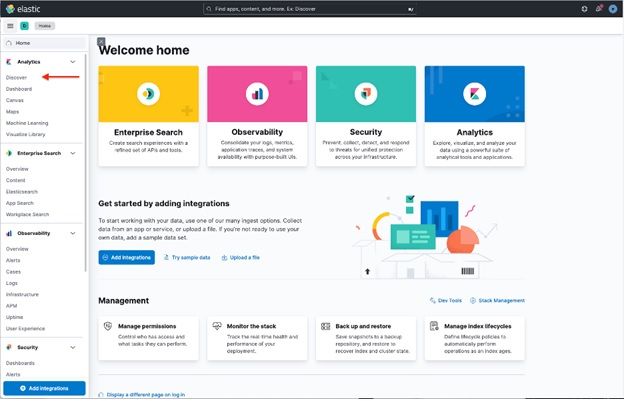
- Click on Discover to import a data stream from Elasticsearch with Filebeat deployed.
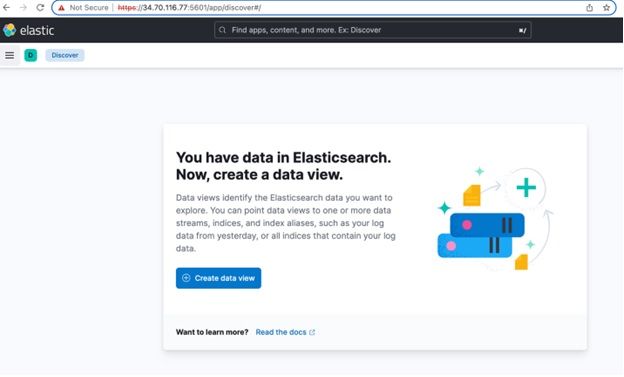
2. Click Create data view.
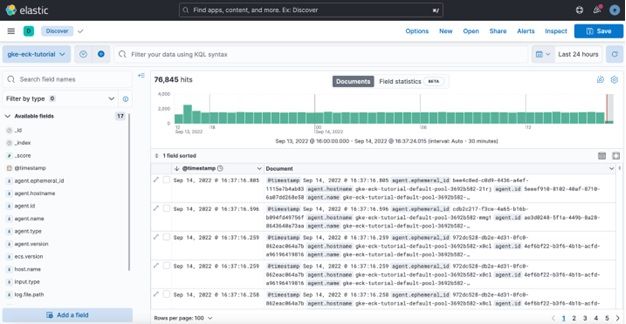
3. Name the newly created data view and enter an index pattern. For example, gke-eck-tutorial. Import Index pattern from filebeat-8.4.1 data stream.

4. We can explore pods’ logs from the Kubernetes cluster created.
Conclusion
As demonstrated in this tutorial, popular end-to-end CNCF software stacks such as ELK are Ampere Altra and arm64-ready. Deployment on the Google Tau T2A instances is seamless with little effort spent on transition software from legacy architectures such as x86.
For more information about the Google Tau T2D Virtual Machines with Ampere Altra processors, visit the Google Cloud blog.
Footnotes
All data and information contained herein is for informational purposes only and Ampere reserves the right to change it without notice. This document may contain technical inaccuracies, omissions and typographical errors, and Ampere is under no obligation to update or correct this information. Ampere makes no representations or warranties of any kind, including but not limited to express or implied guarantees of noninfringement, merchantability, or fitness for a particular purpose, and assumes no liability of any kind. All information is provided “AS IS.” This document is not an offer or a binding commitment by Ampere. Use of the products contemplated herein requires the subsequent negotiation and execution of a definitive agreement or is subject to Ampere’s Terms and Conditions for the Sale of Goods.
System configurations, components, software versions, and testing environments that differ from those used in Ampere’s tests may result in different measurements than those obtained by Ampere.
©2022 Ampere Computing. All Rights Reserved. Ampere, Ampere Computing, Altra and the ‘A’ logo are all registered trademarks or trademarks of Ampere Computing. Arm is a registered trademark of Arm Limited (or its subsidiaries). All other product names used in this publication are for identification purposes only and may be trademarks of their respective companies.
Ampere Computing® / 4655 Great America Parkway, Suite 601 / Santa Clara, CA 95054 / amperecomputing.com
Ampere Computing LLC
4655 Great America Parkway Suite 601
Santa Clara, CA 95054


