

Deploying VOD on Canonical MicroK8s Multi-Node Cluster
on Ampere Altra platform
Overview
Ampere is pleased to showcase a cloud-native open source Video-on-Demand (VOD) Service tutorial. This setup runs on Canonical MicroK8s, an open-source lightweight Kubernetes system for automating deployment, scaling, and management of containerized applications. This specific combination of Ampere Altra Family processors and Canonical MicroK8s is ideal for video services, such as VOD streaming, as it provides a scalable platform (from single node to high-availability multi-node production clusters) all while minimizing physical footprint.
We understand the need to support effective and scalable VOD streaming workloads for a variety of clients, such as video service providers and digital service providers. This customer base requires a consistent workload lifecycle and predictable performance to accommodate their rapidly growing audience across the web. Ampere Altra and Ampere Altra Max processors are based on a low-power Arm64 architecture, thus offering high core counts per socket along with more scalable and predictable performance. As such, they are ideal for power-sensitive edge locations as well as large-scale datacenters.
MicroK8s can run on edge devices as well as large scale HA deployments. Multi-node deployments are versatile in that they can be used for pre-production environments such as prototyping or benchmarking, but they are also suitable for smaller-scale production deployments. The following are the main software components for this VOD cloud-native reference architecture on a MicroK8s multi-node cluster:
- Canonical MicroK8s: a lightweight Kubernetes platform with full-stack automated operations for containerized deployments.
- NGINX Ingress controller: a production‑grade Ingress controller that can run alongside NGINX Open Source instances in Kubernetes environments.
- MinIO: a high-performance, open-source, S3 compatible Object Storage system.
MicroK8s provides the functionality of core Kubernetes components, in a small footprint, scalable from a single node to a high-availability production cluster. It's a Zero-ops, pure-upstream Kubernetes, from developer workstations to production, it enables developers to get a fully featured, conformant and secure Kubernetes system. It’s also designed for local development, IoT appliances, CI/CD, and use at the edge.
The combination of Ampere Altra processors and Canonical MicroK8s in a 4-node Compact Cluster lends itself well to the below use cases, among others:
- Distributed CDN
- Video Service Providers
- Digital Service Providers
- Small & Medium businesses deploying cloud native software
- 5G User Plane Function (UPF)
Prerequisites
-
4 Ampere Altra or Ampere Altra Max based platforms provisioned with Canonical Ubuntu 22.04 server LTS operating system (including ssh server at a minimum) with the following hardware components:
- CPU: 1 x Ampere Altra or Altra Max up to 128 cores 3.0 GHz
- Memory: 8x 32GB DDR4 DIMMs
- NIC: 1x Mellanox ConnectX-6 (minimum single port)
- Storage: 1x M.2 NVMe drive and 5x U.2 NVMe drives
-
A laptop or workstation configured as the Bastion node for deploying VOD PoC and preparing VOD demo files
-
A DNS service like Bind (named) running on the bastion node
-
Executable files on a laptop or workstation. Including:
- git
- kubectl version 1.26.x or later
- tar
- docker or podman
Prerequisites for MinIO
While MinIO is hardware agnostic and can function on consumer-grade hardware, the following recommendations for each worker node provide a baseline for high performance object storage:
- 8 vCPU cores: CPU availability primarily affects performance related to hashing and encryption operations, including TLS connections.
- 128 GiB of available (unused) RAM: Memory primarily affects the number of concurrent network connections per pod.
- 25 GbE Network Interface Card (NIC): Network is a primary performance factor and is most likely to constrain performance if throughput cannot satisfy the total aggregated storage of the MinIO tenant. For NVMe drives, 100 GbE NICs are recommended.
- Locally-attached storage drives: Ensure all drives intended for use by the MinIO tenant are the same type and capacity (e.g., 1 TiB NVMe drives) for consistent performance. MinIO should have exclusive access to these drives for best results.
The MinIO Operator enforces the following requirements for each tenant:
- The tenant must consist of at least 4 nodes (4 MinIO pods).
- The tenant must contain at least 1 disk per server.
- Each worker node must have at least 2 GiB of RAM available.
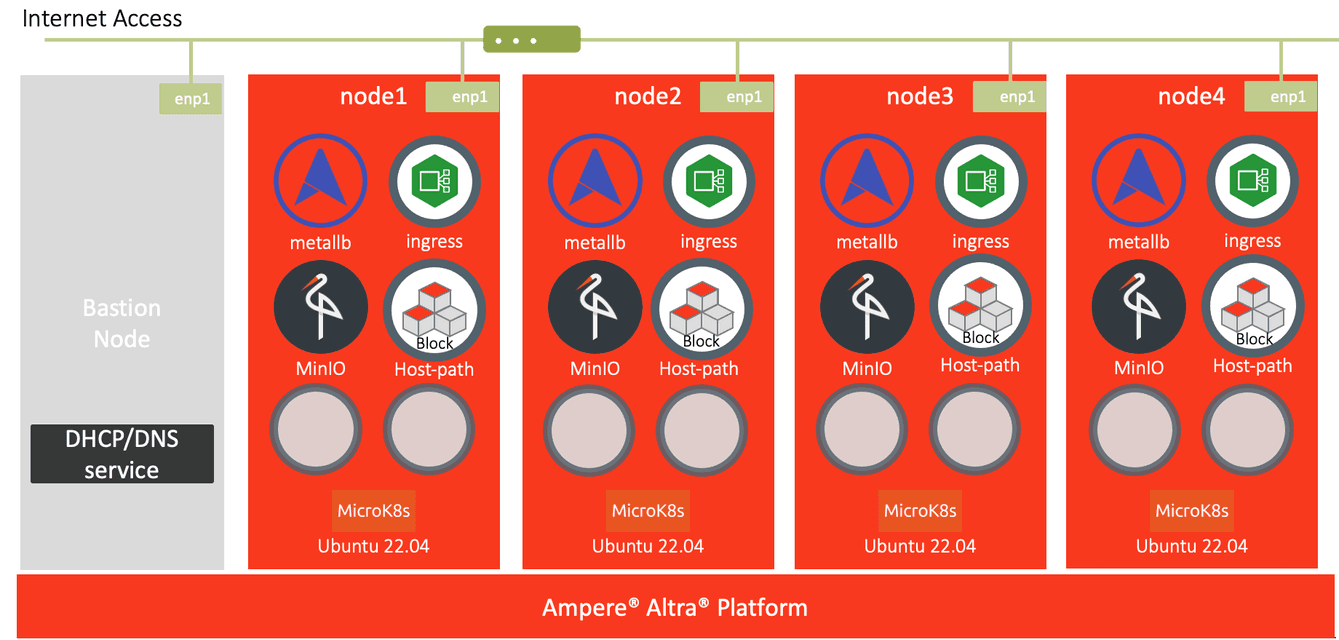 Fig1. Canonical MicroK8s 4-node cluster Network Overview
Instructions
Prepare and deploy Canonical MicroK8s with HostPath storage on Ampere Altra Family processors
1.Set up the reserved IP addresses for each of the 4 nodes under “LAN setup” of ADVANCED on a router web console
2.Open Terminal with multiple tabs and use ipmitool to access SOL on each BMC (node1 - node4)
[node1 terminal] ipmitool -I lanplus -H 192.168.1.11 -U root -P 0penBmc sol activate
[node2 terminal] ipmitool -I lanplus -H 192.168.1.12 -U root -P 0penBmc sol activate
[node3 terminal] ipmitool -I lanplus -H 192.168.1.13 -U root -P 0penBmc sol activate
[node4 terminal] ipmitool -I lanplus -H 192.168.1.14 -U root -P 0penBmc sol activate3.Verify the Ubuntu distribution version
ubuntu@node1:~$ cat /etc/os-release
PRETTY_NAME="Ubuntu 22.04.3 LTS"
NAME="Ubuntu"
VERSION_ID="22.04"
VERSION="22.04.3 LTS (Jammy Jellyfish)"
VERSION_CODENAME=jammy
ID=ubuntu
ID_LIKE=debian
HOME_URL="https://www.ubuntu.com/"
SUPPORT_URL="https://help.ubuntu.com/"
BUG_REPORT_URL="https://bugs.launchpad.net/ubuntu/"
PRIVACY_POLICY_URL="https://www.ubuntu.com/legal/terms-and-policies/privacy-policy"
UBUNTU_CODENAME=jammy4.Access each of the 4 Ubuntu 22.04 servers and add their IP addresses into the hosts file under /etc
echo "192.168.1.101 node1" | sudo tee -a /etc/hosts
echo "192.168.1.102 node2" | sudo tee -a /etc/hosts
echo "192.168.1.103 node3" | sudo tee -a /etc/hosts
echo "192.168.1.104 node4" | sudo tee -a /etc/hosts5.To make the access to the 4 servers smooth, generate SSH keys on the bastion node and 4 servers, then add the public keys into the file, authorized_keys, under the operator account’s “.ssh” directory on those 4 servers
[bastion node] $ ssh-keygen -t ed25519
[node1] $ ssh-keygen -t ed25519
[node2] $ ssh-keygen -t ed25519
[node3] $ ssh-keygen -t ed25519
[node4] $ ssh-keygen -t ed25519
[bastion node] $ scp id_ed25519.pub ubuntu@node1:./.ssh/authorized_keys
[node1] $ cat ~/.ssh/id_ed25519.pub >> ~/.ssh/authorized_keys
[node1] $ ssh node2 'cat ~/.ssh/id_ed25519.pub' >> ~/.ssh/authorized_keys
[node1] $ ssh node3 'cat ~/.ssh/id_ed25519.pub' >> ~/.ssh/authorized_keys
[node1] $ ssh node4 'cat ~/.ssh/id_ed25519.pub' >> ~/.ssh/authorized_keys
[node2] $ scp node1:./.ssh/authorized_keys ~/.ssh/
[node3] $ scp node1:./.ssh/authorized_keys ~/.ssh/
[node4] $ scp node1:./.ssh/authorized_keys ~/.ssh/6.Based on the requirements for enabling the hugepages support in Kubernetes cluster for PostgreSQL, update Ubuntu 22.04 servers by the steps below:
- Enable HugePages on each server.
sudo sysctl vm.nr_hugepages=2048
echo 'vm.nr_hugepages=2048' | sudo tee -a /etc/sysctl.conf- Reboot each server
sudo reboot
- Once those servers are up and running, log in to each system and verify the module, nvme_tcp, is loaded and vm.nr_hugepages= 2048
$ lsmod | grep nvme
nvme_tcp 40960 0
nvme_fabrics 32768 1 nvme_tcp
nvme 49152 2
nvme_core 139264 5 nvme_tcp,nvme,nvme_fabrics
$ sudo sysctl vm.nr_hugepages
vm.nr_hugepages = 20487.Verify MicroK8s stable releases containing v1.26/stable. Note: MicroK8s v1.26 officially supports MinIO
$ snap info microk8s | grep stable | head -n8
1.27/stable: v1.27.4 2023-07-31 (5650) 156MB classic
latest/stable: v1.27.4 2023-08-01 (5650) 156MB classic
1.28/stable: --
1.27-strict/stable: v1.27.4 2023-08-03 (5665) 156MB -
1.26-strict/stable: v1.26.7 2023-08-09 (5706) 149MB -
1.26/stable: v1.26.7 2023-08-07 (5705) 149MB classic
1.25-strict/stable: v1.25.11 2023-07-11 (5473) 146MB -
1.25-eksd/stable: v1.25-18 2023-07-30 (5632) 148MB classic8.Install MicroK8s on each server
$ sudo snap install microk8s --classic --channel=1.26/stable
microk8s (1.26/stable) v1.26.7 from Canonical✓ installed9.Check that the MicroK8s instance ‘is running'; notice that datastore is localhost
$ sudo microk8s status --wait-ready | head -n4 microk8s is running high-availability: no datastore master nodes: 127.0.0.1:19001 datastore standby nodes: none
10.Add user to MicroK8s group
$ sudo usermod -a -G microk8s $USER $ sudo chown -f -R $USER ~/.kube
11.Create an alias for MicroK8s embedded kubectl. We can simply call kubectl after run newgrp microk8s
$ sudo snap alias microk8s.kubectl kubectl $ newgrp microk8s
12.Run kubectl get node on each server
ubuntu@node1:~$ kubectl get node -owide -L kubernetes.io/arch
NAME STATUS ROLES AGE VERSION INTERNAL-IP EXTERNAL-IP OS-IMAGE KERNEL-VERSION CONTAINER-RUNTIME ARCH
node1 Ready <none> 5m31s v1.26.7 192.168.1.101 <none> Ubuntu 22.04.3 LTS 5.15.0-78-generic containerd://1.6.15 arm64
ubuntu@node2:~$ kubectl get node -owide -L kubernetes.io/arch
NAME STATUS ROLES AGE VERSION INTERNAL-IP EXTERNAL-IP OS-IMAGE KERNEL-VERSION CONTAINER-RUNTIME ARCH
node2 Ready <none> 5m59s v1.26.7 192.168.1.102 <none> Ubuntu 22.04.3 LTS 5.15.0-78-generic containerd://1.6.15 arm64
ubuntu@node3:~$ kubectl get node -owide -L kubernetes.io/arch
NAME STATUS ROLES AGE VERSION INTERNAL-IP EXTERNAL-IP OS-IMAGE KERNEL-VERSION CONTAINER-RUNTIME ARCH
node3 Ready <none> 5m55s v1.26.7 192.168.1.103 <none> Ubuntu 22.04.3 LTS 5.15.0-78-generic containerd://1.6.15 arm64
ubuntu@node4:~$ kubectl get node -owide -L kubernetes.io/arch
NAME STATUS ROLES AGE VERSION INTERNAL-IP EXTERNAL-IP OS-IMAGE KERNEL-VERSION CONTAINER-RUNTIME ARCH
node4 Ready <none> 5m57s v1.26.7 192.168.1.104 <none> Ubuntu 22.04.3 LTS 5.15.0-78-generic containerd://1.6.15 arm6413.Ensure the firewall is not blocking the below ports:
- TCP : 80, 443, 6443, 16443, 10250, 10255, 25000, 12379, 10257, 10259, 19001, 32000
- UDP : 4789
$ sudo iptables -L # Warning: iptables-legacy tables present, use iptables-legacy to see them Chain INPUT (policy ACCEPT) target prot opt source destination Chain FORWARD (policy ACCEPT) target prot opt source destination ACCEPT all -- 10.1.0.0/16 anywhere /* generated for MicroK8s pods */ ACCEPT all -- anywhere 10.1.0.0/16 /* generated for MicroK8s pods */ Chain OUTPUT (policy ACCEPT) target prot opt source destination
14.Join all 4 MicroK8s instances (3 control plane nodes + 1 worker node) to the cluster.
ubuntu@node1:~$ sudo microk8s add-node
From the node you wish to join to this cluster, run the following:
microk8s join 192.168.1.101:25000/b389ec6e63c6c28e6f7b32a5e0c7f09d/4dd1c9b2dcbe
Use the '--worker' flag to join a node as a worker not running the control plane, eg:
microk8s join 192.168.1.101:25000/b389ec6e63c6c28e6f7b32a5e0c7f09d/4dd1c9b2dcbe --worker
If the node you are adding is not reachable through the default interface you can use one of the following:
microk8s join 192.168.1.101:25000/b389ec6e63c6c28e6f7b32a5e0c7f09d/4dd1c9b2dcbe
microk8s join 172.19.0.1:25000/b389ec6e63c6c28e6f7b32a5e0c7f09d/4dd1c9b2dcbe
microk8s join 172.17.0.1:25000/b389ec6e63c6c28e6f7b32a5e0c7f09d/4dd1c9b2dcbe
microk8s join 172.18.0.1:25000/b389ec6e63c6c28e6f7b32a5e0c7f09d/4dd1c9b2dcbe15.Switch to node2, and join it to the cluster. Wait for 20-30 seconds.
ubuntu@node2:~$ microk8s join 192.168.1.101:25000/b389ec6e63c6c28e6f7b32a5e0c7f09d/4dd1c9b2dcbe
Contacting cluster at 192.168.1.101
Waiting for this node to finish joining the cluster. .. .. .. . 16.Once completed, check the cluster’s status
ubuntu@node1:~$ kubectl get node -owide -L kubernetes.io/arch
NAME STATUS ROLES AGE VERSION INTERNAL-IP EXTERNAL-IP OS-IMAGE KERNEL-VERSION CONTAINER-RUNTIME ARCH
node1 Ready <none> 11m v1.26.7 192.168.1.101 <none> Ubuntu 22.04.3 LTS 5.15.0-78-generic containerd://1.6.15 arm64
node2 Ready <none> 26s v1.26.7 192.168.1.102 <none> Ubuntu 22.04.3 LTS 5.15.0-78-generic containerd://1.6.15 arm6417.Repeat step 8 - 13 to generate the token and join the 3rd node to the cluster
19.Switch to node3 and node4, and join then to the cluster. Wait for 20-30 seconds
ubuntu@node3:~$ microk8s join 192.168.1.101:25000/fa965429b5a35ded79642c24f741fb0a/4dd1c9b2dcbe
Contacting cluster at 192.168.1.101
Waiting for this node to finish joining the cluster. .. .. ..
ubuntu@node1:~$ kubectl get node -owide -L kubernetes.io/arch
NAME STATUS ROLES AGE VERSION INTERNAL-IP EXTERNAL-IP OS-IMAGE KERNEL-VERSION CONTAINER-RUNTIME ARCH
node1 Ready <none> 14m v1.26.7 192.168.1.101 <none> Ubuntu 22.04.3 LTS 5.15.0-78-generic containerd://1.6.15 arm64
node2 Ready <none> 3m45s v1.26.7 192.168.1.102 <none> Ubuntu 22.04.3 LTS 5.15.0-78-generic containerd://1.6.15 arm64
node3 Ready <none> 99s v1.26.7 192.168.1.103 <none> Ubuntu 22.04.3 LTS 5.15.0-78-generic containerd://1.6.15 arm64
ubuntu@node4:~$ microk8s join 192.168.1.101:25000/006407f8d5ad2433064ef270f0d2167c/4dd1c9b2dcbe --worker
Contacting cluster at 192.168.1.101
The node has joined the cluster and will appear in the nodes list in a few seconds.
This worker node gets automatically configured with the API server endpoints.
If the API servers are behind a loadbalancer please set the '--refresh-interval' to '0s' in:
/var/snap/microk8s/current/args/apiserver-proxy
and replace the API server endpoints with the one provided by the loadbalancer in:
/var/snap/microk8s/current/args/traefik/provider.yaml19.Then check the cluster on node1, 4 nodes successfully joined the cluster
ubuntu@node1:~$ kubectl get node -owide -L kubernetes.io/arch
NAME STATUS ROLES AGE VERSION INTERNAL-IP EXTERNAL-IP OS-IMAGE KERNEL-VERSION CONTAINER-RUNTIME ARCH
node1 Ready <none> 15m v1.26.7 192.168.1.101 <none> Ubuntu 22.04.3 LTS 5.15.0-78-generic containerd://1.6.15 arm64
node2 Ready <none> 4m58s v1.26.7 192.168.1.102 <none> Ubuntu 22.04.3 LTS 5.15.0-78-generic containerd://1.6.15 arm64
node3 Ready <none> 2m52s v1.26.7 192.168.1.103 <none> Ubuntu 22.04.3 LTS 5.15.0-78-generic containerd://1.6.15 arm64
node4 Ready <none> 30s v1.26.7 192.168.1.104 <none> Ubuntu 22.04.3 LTS 5.15.0-78-generic containerd://1.6.15 arm64
ubuntu@node1:~$ kubectl get node --show-labels
NAME STATUS ROLES AGE VERSION LABELS
node3 Ready <none> 3m16s v1.26.7 beta.kubernetes.io/arch=arm64,beta.kubernetes.io/os=linux,kubernetes.io/arch=arm64,kubernetes.io/hostname=node3,kubernetes.io/os=linux,microk8s.io/cluster=true,node.kubernetes.io/microk8s-controlplane=microk8s-controlplane
node4 Ready <none> 54s v1.26.7 beta.kubernetes.io/arch=arm64,beta.kubernetes.io/os=linux,kubernetes.io/arch=arm64,kubernetes.io/hostname=node4,kubernetes.io/os=linux,microk8s.io/cluster=true,node.kubernetes.io/microk8s-worker=microk8s-worker
node1 Ready <none> 16m v1.26.7 beta.kubernetes.io/arch=arm64,beta.kubernetes.io/os=linux,kubernetes.io/arch=arm64,kubernetes.io/hostname=node1,kubernetes.io/os=linux,microk8s.io/cluster=true,node.kubernetes.io/microk8s-controlplane=microk8s-controlplane
node2 Ready <none> 5m22s v1.26.7 beta.kubernetes.io/arch=arm64,beta.kubernetes.io/os=linux,kubernetes.io/arch=arm64,kubernetes.io/hostname=node2,kubernetes.io/os=linux,microk8s.io/cluster=true,node.kubernetes.io/microk8s-controlplane=microk8s-controlplane20.Then run microk8s status. Notice that it reports back as high-availability: yes and the datastore master nodes list has all the nodes in the cluster after adding the 3rd node to the cluster.
ubuntu@node1:~$ microk8s status
microk8s is running
high-availability: yes
datastore master nodes: 192.168.1.101:19001 192.168.1.102:19001 192.168.1.103:19001
datastore standby nodes: none
addons:
enabled:
ha-cluster # (core) Configure high availability on the current node
helm # (core) Helm - the package manager for Kubernetes
helm3 # (core) Helm 3 - the package manager for Kubernetes
disabled:
cert-manager # (core) Cloud native certificate management
community # (core) The community addons repository
dashboard # (core) The Kubernetes dashboard
dns # (core) CoreDNS
host-access # (core) Allow Pods connecting to Host services smoothly
hostpath-storage # (core) Storage class; allocates storage from host directory
ingress # (core) Ingress controller for external access
kube-ovn # (core) An advanced network fabric for Kubernetes
mayastor # (core) OpenEBS MayaStor
metallb # (core) Loadbalancer for your Kubernetes cluster
metrics-server # (core) K8s Metrics Server for API access to service metrics
minio # (core) MinIO object storage
observability # (core) A lightweight observability stack for logs, traces and metrics
prometheus # (core) Prometheus operator for monitoring and logging
rbac # (core) Role-Based Access Control for authorisation
registry # (core) Private image registry exposed on localhost:32000
storage # (core) Alias to hostpath-storage add-on, deprecated21.Enable add-ons dns, helm3, and ingress
ubuntu@node1:~$ microk8s enable helm3 dns ingress Infer repository core for addon helm3 Infer repository core for addon dns Infer repository core for addon ingress Addon core/helm3 is already enabled Enabling DNS Using host configuration from /run/systemd/resolve/resolv.conf Applying manifest serviceaccount/coredns created configmap/coredns created deployment.apps/coredns created service/kube-dns created clusterrole.rbac.authorization.k8s.io/coredns created clusterrolebinding.rbac.authorization.k8s.io/coredns created Restarting kubelet Adding argument --cluster-domain to nodes. Adding argument --cluster-dns to nodes. Restarting nodes. DNS is enabled Enabling Ingress ingressclass.networking.k8s.io/public created ingressclass.networking.k8s.io/nginx created namespace/ingress created serviceaccount/nginx-ingress-microk8s-serviceaccount created clusterrole.rbac.authorization.k8s.io/nginx-ingress-microk8s-clusterrole created role.rbac.authorization.k8s.io/nginx-ingress-microk8s-role created clusterrolebinding.rbac.authorization.k8s.io/nginx-ingress-microk8s created rolebinding.rbac.authorization.k8s.io/nginx-ingress-microk8s created configmap/nginx-load-balancer-microk8s-conf created configmap/nginx-ingress-tcp-microk8s-conf created configmap/nginx-ingress-udp-microk8s-conf created daemonset.apps/nginx-ingress-microk8s-controller created Ingress is enabled
22.Enable add-on MetalLB with the hosts' IP addresses (192.168.1.101-192.168.1.03)
ubuntu@node1:~$ microk8s enable metallb:192.168.1.101-192.168.1.103
Infer repository core for addon metallb
Enabling MetalLB
Applying Metallb manifest
customresourcedefinition.apiextensions.k8s.io/addresspools.metallb.io created
customresourcedefinition.apiextensions.k8s.io/bfdprofiles.metallb.io created
customresourcedefinition.apiextensions.k8s.io/bgpadvertisements.metallb.io created
customresourcedefinition.apiextensions.k8s.io/bgppeers.metallb.io created
customresourcedefinition.apiextensions.k8s.io/communities.metallb.io created
customresourcedefinition.apiextensions.k8s.io/ipaddresspools.metallb.io created
customresourcedefinition.apiextensions.k8s.io/l2advertisements.metallb.io created
namespace/metallb-system created
serviceaccount/controller created
serviceaccount/speaker created
clusterrole.rbac.authorization.k8s.io/metallb-system:controller created
clusterrole.rbac.authorization.k8s.io/metallb-system:speaker created
role.rbac.authorization.k8s.io/controller created
role.rbac.authorization.k8s.io/pod-lister created
clusterrolebinding.rbac.authorization.k8s.io/metallb-system:controller created
clusterrolebinding.rbac.authorization.k8s.io/metallb-system:speaker created
rolebinding.rbac.authorization.k8s.io/controller created
secret/webhook-server-cert created
service/webhook-service created
rolebinding.rbac.authorization.k8s.io/pod-lister created
daemonset.apps/speaker created
deployment.apps/controller created
validatingwebhookconfiguration.admissionregistration.k8s.io/validating-webhook-configuration created
Waiting for Metallb controller to be ready.
error: timed out waiting for the condition on deployments/controller
MetalLB controller is still not ready
deployment.apps/controller condition met
ipaddresspool.metallb.io/default-addresspool created
l2advertisement.metallb.io/default-advertise-all-pools created
MetalLB is enabled23.Edit DaemonSet nginx-ingress-microk8s-controller
$ kubectl edit ds -n ingress nginx-ingress-microk8s-controller
## the original
--publish-status-address=127.0.0.1
## replace 127.0.0.1 with the hosts' IP addresses
--publish-status-address=192.168.1.101,192.168.1.102,192.168.1.103,192.168.1.104
daemonset.apps/nginx-ingress-microk8s-controller edited24.Run microk8s status to verify the add-ons status
ubuntu@node1:~$ microk8s status
microk8s is running
high-availability: yes
datastore master nodes: 192.168.1.101:19001 192.168.1.102:19001 192.168.1.103:19001
datastore standby nodes: none
addons:
enabled:
dns # (core) CoreDNS
ha-cluster # (core) Configure high availability on the current node
helm3 # (core) Helm 3 - Kubernetes package manager
ingress # (core) Ingress controller for external access
metallb # (core) Loadbalancer for your Kubernetes cluster
disabled:
community # (core) The community addons repository
dashboard # (core) The Kubernetes dashboard
helm # (core) Helm 2 - the package manager for Kubernetes
host-access # (core) Allow Pods connecting to Host services smoothly
hostpath-storage # (core) Storage class; allocates storage from host directory
metrics-server # (core) K8s Metrics Server for API access to service metrics
mayastor # (core) OpenEBS MayaStor
minio # (core) MinIO object storage
prometheus # (core) Prometheus operator for monitoring and logging
rbac # (core) Role-Based Access Control for authorisation
registry # (core) Private image registry exposed on localhost:32000
storage # (core) Alias to hostpath-storage add-on, deprecated25.Clean up the target storage devices on each node in the MicroK8s cluster
$ sudo su -
# umount /dev/nvme1n1 /dev/nvme2n1 /dev/nvme3n1 /dev/nvme4n1 /dev/nvme5n1
# for DISK in "/dev/nvme1n1" "/dev/nvme2n1" "/dev/nvme3n1" "/dev/nvme4n1" "/dev/nvme5n1" ;
do echo $DISK && \
sgdisk --zap-all $DISK && \
dd if=/dev/zero of="$DISK" bs=1M count=100 oflag=direct,dsync && \
blkdiscard $DISK
done
# exit26.Prepare /dev/nvme1n1 for hostpath storage
$ sudo mkfs.ext4 /dev/nvme1n1 mke2fs 1.46.5 (30-Dec-2021) Discarding device blocks: done Creating filesystem with 468843606 4k blocks and 117211136 inodes Filesystem UUID: 43b6d451-8678-4e3d-a2b8-c1e8e6435697 Superblock backups stored on blocks: 32768, 98304, 163840, 229376, 294912, 819200, 884736, 1605632, 2654208, 4096000, 7962624, 11239424, 20480000, 23887872, 71663616, 78675968, 102400000, 214990848 Allocating group tables: done Writing inode tables: done Creating journal (262144 blocks): done Writing superblocks and filesystem accounting information: done $ sudo mkdir -p /mnt/fast-data $ sudo mount /dev/nvme1n1 /mnt/fast-data/ $ lsblk NAME MAJ:MIN RM SIZE RO TYPE MOUNTPOINTS loop0 7:0 0 49.1M 1 loop /snap/core18/2755 loop1 7:1 0 49.1M 1 loop /snap/core18/2788 loop2 7:2 0 59.2M 1 loop /snap/core20/1953 loop3 7:3 0 59.2M 1 loop /snap/core20/1977 loop4 7:4 0 71.8M 1 loop /snap/lxd/22927 loop5 7:5 0 109.6M 1 loop /snap/lxd/24326 loop6 7:6 0 142.2M 1 loop /snap/microk8s/5705 loop8 7:8 0 46.4M 1 loop /snap/snapd/19365 loop9 7:9 0 46.4M 1 loop /snap/snapd/19459 nvme0n1 259:0 0 894.3G 0 disk ├─nvme0n1p1 259:1 0 1G 0 part /boot/efi └─nvme0n1p2 259:2 0 893.2G 0 part / nvme1n1 259:3 0 1.7T 0 disk /mnt/fast-data nvme2n1 259:5 0 1.7T 0 disk nvme3n1 259:5 0 1.7T 0 disk nvme4n1 259:5 0 1.7T 0 disk nvme5n1 259:5 0 1.7T 0 disk $ echo '/dev/nvme1n1 /mnt/fast-data ext4 defaults,nofail,discard 0 0' | sudo tee -a /etc/fstab
27.Enable microk8s hostpath-storage add-on
ubuntu@node1:~$ $ microk8s enable hostpath-storage Infer repository core for addon hostpath-storage Enabling default storage class. WARNING: Hostpath storage is not suitable for production environments. deployment.apps/hostpath-provisioner created storageclass.storage.k8s.io/microk8s-hostpath created serviceaccount/microk8s-hostpath created clusterrole.rbac.authorization.k8s.io/microk8s-hostpath created clusterrolebinding.rbac.authorization.k8s.io/microk8s-hostpath created Storage will be available soon. ubuntu@node1:~$ cd microservices/kube-system ubuntu@node1:~/microservices/kube-system$ kubectl get sc NAME PROVISIONER RECLAIMPOLICY VOLUMEBINDINGMODE ALLOWVOLUMEEXPANSION AGE microk8s-hostpath (default) microk8s.io/hostpath Delete WaitForFirstConsumer false 6s ubuntu@node1:~/microservices/kube-system$ cat << EOF> fast-data-hostpath-sc.yaml kind: StorageClass apiVersion: storage.k8s.io/v1 metadata: name: fastdata-hostpath provisioner: microk8s.io/hostpath reclaimPolicy: Delete parameters: pvDir: /mnt/fast-data volumeBindingMode: WaitForFirstConsumer EOF ubuntu@node1:~/microservices/kube-system$ kubectl apply -f fast-data-hostpath-sc.yaml storageclass.storage.k8s.io/fastdata-hostpath created ubuntu@node1:~/microservices/kube-system$ kubectl patch storageclass fastdata-hostpath -p '{"metadata": {"annotations":{"storageclass.kubernetes.io/is-default-class":"true"}}}' ubuntu@node1:~/microservices/kube-system$ kubectl patch storageclass microk8s-hostpath -p '{"metadata": {"annotations":{"storageclass.kubernetes.io/is-default-class":"false"}}}'
28.Check Storage Classes, fastdata-hostpath is default
ubuntu@node1:~/microservices/kube-system$ kubectl get sc NAME PROVISIONER RECLAIMPOLICY VOLUMEBINDINGMODE ALLOWVOLUMEEXPANSION AGE fastdata-hostpath (default) microk8s.io/hostpath Delete WaitForFirstConsumer false 6s microk8s-hostpath microk8s.io/hostpath Delete WaitForFirstConsumer false 1m2s
29.Test the storage class via the YAML file,_ test-pod-with-pvc.yaml_, to create Persistent Volume Claim for a NGINX container
ubuntu@node1:~$ cd ~/microservices/tests ubuntu@node1:~/microservices/tests$ cat << EOF > test-pod-with-pvc.yaml --- apiVersion: v1 kind: PersistentVolumeClaim metadata: name: test-pvc spec: #storageClassName: accessModes: [ReadWriteOnce] resources: { requests: { storage: 5Gi } } --- apiVersion: v1 kind: Pod metadata: name: test-nginx spec: volumes: - name: pvc persistentVolumeClaim: claimName: test-pvc containers: - name: nginx image: nginx ports: - containerPort: 80 volumeMounts: - name: pvc mountPath: /usr/share/nginx/html EOF
30.Create a Persistent Volume Claim (PVC) on fastdata-hostpath storage class and a pod with NGINX container
ubuntu@node1:~/microservices/tests$ kubectl apply -f test-pod-with-pvc.yaml persistentvolumeclaim/test-pvc created pod/test-nginx created ubuntu@node1:~/microservices/tests$ kubectl get pod -owide NAME READY STATUS RESTARTS AGE IP NODE NOMINATED NODE READINESS GATES test-nginx 1/1 Running 0 4m8s 10.1.166.138 node1 <none> <none> ubuntu@node1:~/microservices/tests$ kubectl get pvc NAME STATUS VOLUME CAPACITY ACCESS MODES STORAGECLASS AGE persistentvolumeclaim/test-pvc Bound pvc-57e2338d-e551-4539-8d18-b2db00a0b857 5Gi RWO fastdata-hostpath 19s ubuntu@node1:~/microservices/tests$ kubectl describe pv Name: pvc-57e2338d-e551-4539-8d18-b2db00a0b857 Labels: <none> Annotations: hostPathProvisionerIdentity: node2 pv.kubernetes.io/provisioned-by: microk8s.io/hostpath Finalizers: [kubernetes.io/pv-protection] StorageClass: fastdata-hostpath Status: Bound Claim: default/test-pvc Reclaim Policy: Delete Access Modes: RWO VolumeMode: Filesystem Capacity: 5Gi Node Affinity: Required Terms: Term 0: kubernetes.io/hostname in [node1] Message: Source: Type: HostPath (bare host directory volume) Path: /mnt/fast-data/default-test-pvc-pvc-57e2338d-e551-4539-8d18-b2db00a0b857 HostPathType: DirectoryOrCreate Events: <none>
31.Run kubectl exec -it pod/test-nginx -- sh to access the NGINX container inside pod/test-nginx to verify the PVC being bound with NGINX container inside the pod
ubuntu@node1:~/microservices/tests$ kubectl exec -it pod/test-nginx -- sh # cd /usr/share/nginx/html # ls -al total 8 drwxrwxrwx 2 root root 4096 Aug 11 03:17 . drwxr-xr-x 3 root root 4096 Jul 28 14:03 .. # mount | grep nginx /dev/nvme1n1 on /usr/share/nginx/html type ext4 (rw,relatime,stripe=32) # lsblk | grep nvme0n1p2 nvme1n1 259:3 0 1.7T 0 disk /usr/share/nginx/html # exit
32.Check storage pool usage and delete the PVC and NGINX container
ubuntu@node1:~/microservices/tests$ kubectl delete -f test-pod-with-pvc.yaml persistentvolumeclaim "test-pvc" deleted pod "test-nginx" deleted ubuntu@node1:~/microservices/tests$ kubectl get pvc No resources found in default namespace.
NOTE: If you’d prefer to use kubectl command on your desktop or laptop, execute the following command will output the kubeconfig file from MicroK8s.
% ssh ubuntu@node1 microk8s config
The authenticity of host '192.168.1.101 (192.168.1.101)' can't be established.
ED25519 key fingerprint is SHA256:u56z4taDYoM7dB+a6Eec9eS1navkrYfBjpzjWrMX0iM.
This host key is known by the following other names/addresses:
~/.ssh/known_hosts:1: node1
Are you sure you want to continue connecting (yes/no/[fingerprint])? yes
Warning: Permanently added '192.168.1.101' (ED25519) to the list of known hosts.
apiVersion: v1
clusters:
- cluster:
certificate-authority-data: LS0tLS1CRUdJTiBDRVJUSUZJQ0FURS0tLS0tCk1JSUREekNDQWZlZ0F3SUJBZ0lVVlB3ejYwbTN6cng5dVoyL08rM1JOdW90Yjgwd0RRWUpLb1pJaHZjTkFRRUwKQlFBd0Z6RVZNQk1HQTFVRUF3d01NVEF1TVRVeUxqRTRNeTR4TUI0WERUSXpNREl5TWpBeE5UY3pObG9YRFRNegpNREl4T1RBeE5UY3pObG93RnpFVk1CTUdBMVVFQXd3TU1UQXVNVFV5TGpFNE15NHhNSUlCSWpBTkJna3Foa2lHCjl3MEJBUUVGQUFPQ0FROEFNSUlCQ2dLQ0FRRUE2c3FsS09jVEJ4eC9jTGlrSkw4cndMbTgycVo1UjdYaXBFenYKZVIyYXBkUVlOZmRTRlV3cXRBT09iWDNpUDMwSWNRUklLL05yZll5VUsybXN0eXpJSU84d0hiWS92dys2U0lGSwo5clUrRUZjV0YzVkpQVm9oMEJWQkw0dGJiN1RPS2ZjU1ZOYmwxOWE3NWhad25wOGJaaTRtdXdmYTZONkQzYkVPCmZUK3ROOFF6Y1dKK1dQYm4vc2tIVTVJaVpuL3p6ZEtLQjV3eWd5OWVjckpWUWhGdzVNb3VNczg2Y3JCdE11Ui8KWWkzSEduYmZGZWIzWDZxOTN3ZE5iN0pLcXh3L212U0M5T1plL0p2aDUvS2VmbkJVVGJ3c2F2VnMrNzBwZmNUcQorcTF0Zi94aUNKcDZVUG9neEo5RngwYTN5UXNHM1g3bnJQSXpFeTNQODhKT0RZNUJDd0lEQVFBQm8xTXdVVEFkCkJnTlZIUTRFRmdRVTBhSWNraGxGOEw4TVgvdC9DUXQ5bE5vMFY1Z3dId1lEVlIwakJCZ3dGb0FVMGFJY2tobEYKOEw4TVgvdC9DUXQ5bE5vMFY1Z3dEd1lEVlIwVEFRSC9CQVV3QXdFQi96QU5CZ2txaGtpRzl3MEJBUXNGQUFPQwpBUUVBdFdqVHpJZ1p1K2NtbW1wSDN2SlFlSTFwUVJ6VDdLckZQVUFZcGRHK0VxVEprckVySDRTdTdRSG52ZHVqCjJqZTdQeW9UdGVUa0xtdkh6SjhTZmlFM3pPZFpYK2ZEWnFIeXNIRDZXeDZjOGdzU2ZlUnZjRVZyMHp4RzhzQXQKdTMrUEdMWTNLTVFrUEJpbEd4VnRKTUFtVzY0VTYwN2NQYVpkMG9TbE1objBLT2pZZjRuckhpUmU3SUJ0b3dSeAorUll6Z2duT2J3MVp4VFhKbXU5V09NN1VHNHJJd01xMzYveExBTVd2SmxtZ3VtN0kvZDhtRXNwM2oxN0w0QmlnCjFMVndZNys2VXN1YTdZa2c5eVRxdWRLVkpmSTIxODZKQUh6aDYzVmM5N3l4RFB0My9qWUhtYWEzMVlIUmVIdkwKVEY2ZUdwWTBuZmY5K2l4YXY2bUphYVVyUEE9PQotLS0tLUVORCBDRVJUSUZJQ0FURS0tLS0tCg==
server: https://192.168.1.101:16443
name: microk8s-cluster
contexts:
- context:
cluster: microk8s-cluster
user: admin
name: microk8s
current-context: microk8s
kind: Config
preferences: {}
users:
- name: admin
user:
token: YnlaN25Hc0NYV0wxYkZVbmRPclRhVE1HSlpqeDJKYnN3ZUY5aCt4SHFsMD0K
% ssh ubuntu@192.168.1.101 microk8s config > ~/Documents/kubeconfig
% mkdir ~/.kube
% ssh ubuntu@192.168.1.101 microk8s config > ~/.kube/config
% kubectl get nodes
NAME STATUS ROLES AGE VERSION
node4 Ready <none> 23m v1.26.7
node1 Ready <none> 30m v1.26.7
node3 Ready <none> 20m v1.26.7
node2 Ready <none> 22m v1.26.7
% kubectl get node -owide -L kubernetes.io/arch
NAME STATUS ROLES AGE VERSION INTERNAL-IP EXTERNAL-IP OS-IMAGE KERNEL-VERSION CONTAINER-RUNTIME ARCH
node1 Ready <none> 15m v1.26.7 192.168.1.101 <none> Ubuntu 22.04.3 LTS 5.15.0-78-generic containerd://1.6.15 arm64
node2 Ready <none> 4m58s v1.26.7 192.168.1.102 <none> Ubuntu 22.04.3 LTS 5.15.0-78-generic containerd://1.6.15 arm64
node3 Ready <none> 2m52s v1.26.7 192.168.1.103 <none> Ubuntu 22.04.3 LTS 5.15.0-78-generic containerd://1.6.15 arm64
node4 Ready <none> 30s v1.26.7 192.168.1.104 <none> Ubuntu 22.04.3 LTS 5.15.0-78-generic containerd://1.6.15 arm64
% kubectl get node --show-labels
NAME STATUS ROLES AGE VERSION LABELS
node3 Ready <none> 3m16s v1.26.7 beta.kubernetes.io/arch=arm64,beta.kubernetes.io/os=linux,kubernetes.io/arch=arm64,kubernetes.io/hostname=node3,kubernetes.io/os=linux,microk8s.io/cluster=true,node.kubernetes.io/microk8s-controlplane=microk8s-controlplane
node4 Ready <none> 54s v1.26.7 beta.kubernetes.io/arch=arm64,beta.kubernetes.io/os=linux,kubernetes.io/arch=arm64,kubernetes.io/hostname=node4,kubernetes.io/os=linux,microk8s.io/cluster=true,node.kubernetes.io/microk8s-worker=microk8s-worker
node1 Ready <none> 16m v1.26.7 beta.kubernetes.io/arch=arm64,beta.kubernetes.io/os=linux,kubernetes.io/arch=arm64,kubernetes.io/hostname=node1,kubernetes.io/os=linux,microk8s.io/cluster=true,node.kubernetes.io/microk8s-controlplane=microk8s-controlplane
node2 Ready <none> 5m22s v1.26.7 beta.kubernetes.io/arch=arm64,beta.kubernetes.io/os=linux,kubernetes.io/arch=arm64,kubernetes.io/hostname=node2,kubernetes.io/os=linux,microk8s.io/cluster=true,node.kubernetes.io/microk8s-controlplane=microk8s-controlplaneEnable Kubernetes Dashboard add-on
1.Enable MicroK8s Dashboard add-on
ubuntu@node1:~$ microk8s enable dashboard Infer repository core for addon dashboard Enabling Kubernetes Dashboard Infer repository core for addon metrics-server Enabling Metrics-Server serviceaccount/metrics-server created clusterrole.rbac.authorization.k8s.io/system:aggregated-metrics-reader created clusterrole.rbac.authorization.k8s.io/system:metrics-server created rolebinding.rbac.authorization.k8s.io/metrics-server-auth-reader created clusterrolebinding.rbac.authorization.k8s.io/metrics-server:system:auth-delegator created clusterrolebinding.rbac.authorization.k8s.io/system:metrics-server created service/metrics-server created deployment.apps/metrics-server created apiservice.apiregistration.k8s.io/v1beta1.metrics.k8s.io created clusterrolebinding.rbac.authorization.k8s.io/microk8s-admin created Adding argument --authentication-token-webhook to nodes. Restarting nodes. Metrics-Server is enabled Applying manifest serviceaccount/kubernetes-dashboard created service/kubernetes-dashboard created secret/kubernetes-dashboard-certs created secret/kubernetes-dashboard-csrf created secret/kubernetes-dashboard-key-holder created configmap/kubernetes-dashboard-settings created role.rbac.authorization.k8s.io/kubernetes-dashboard created clusterrole.rbac.authorization.k8s.io/kubernetes-dashboard created rolebinding.rbac.authorization.k8s.io/kubernetes-dashboard created clusterrolebinding.rbac.authorization.k8s.io/kubernetes-dashboard created deployment.apps/kubernetes-dashboard created service/dashboard-metrics-scraper created deployment.apps/dashboard-metrics-scraper created secret/microk8s-dashboard-token created If RBAC is not enabled access the dashboard using the token retrieved with: microk8s kubectl describe secret -n kube-system microk8s-dashboard-token Use this token in the https login UI of the kubernetes-dashboard service. In an RBAC enabled setup (microk8s enable RBAC) you need to create a user with restricted permissions as shown in: https://github.com/kubernetes/dashboard/blob/master/docs/user/access-control/creating-sample-user.md ubuntu@node1:~$ kubectl get svc -n kube-system NAME TYPE CLUSTER-IP EXTERNAL-IP PORT(S) AGE kube-dns ClusterIP 10.152.183.10 <none> 53/UDP,53/TCP,9153/TCP 52m metrics-server ClusterIP 10.152.183.120 <none> 443/TCP 9m43s kubernetes-dashboard ClusterIP 10.152.183.138 <none> 443/TCP 9m36s dashboard-metrics-scraper ClusterIP 10.152.183.132 <none> 8000/TCP 9m36s ubuntu@node1:~$ kubectl create token -n kube-system default --duration=8544h {xxxyyyzzz}
2.Apply ingress YAML file for Kubernetes dashboard
ubuntu@node1:~/microservices/kube-system$ cat << EOF > dashboard-ingress.yaml kind: Ingress apiVersion: networking.k8s.io/v1 metadata: name: ingress-kubernetes-dashboard namespace: kube-system generation: 1 annotations: kubernetes.io/ingress.class: public nginx.ingress.kubernetes.io/backend-protocol: HTTPS nginx.ingress.kubernetes.io/configuration-snippet: | chunked_transfer_encoding off; nginx.ingress.kubernetes.io/proxy-body-size: '0' nginx.ingress.kubernetes.io/proxy-ssl-verify: 'off' nginx.ingress.kubernetes.io/rewrite-target: / nginx.ingress.kubernetes.io/server-snippet: | client_max_body_size 0; spec: rules: - host: console.microk8s.hhii.ampere http: paths: - path: / pathType: Prefix backend: service: name: kubernetes-dashboard port: number: 443 EOF ubuntu@node1:~/microservices/kube-system$ kubectl apply -f dashboard-ingress.yaml ingress.networking.k8s.io/kubernetes-dashboard-ingress created
3.Access dashboard web UI via https://console.microk8s.hhii.ampere/#/login and click “Advanced” tab to process
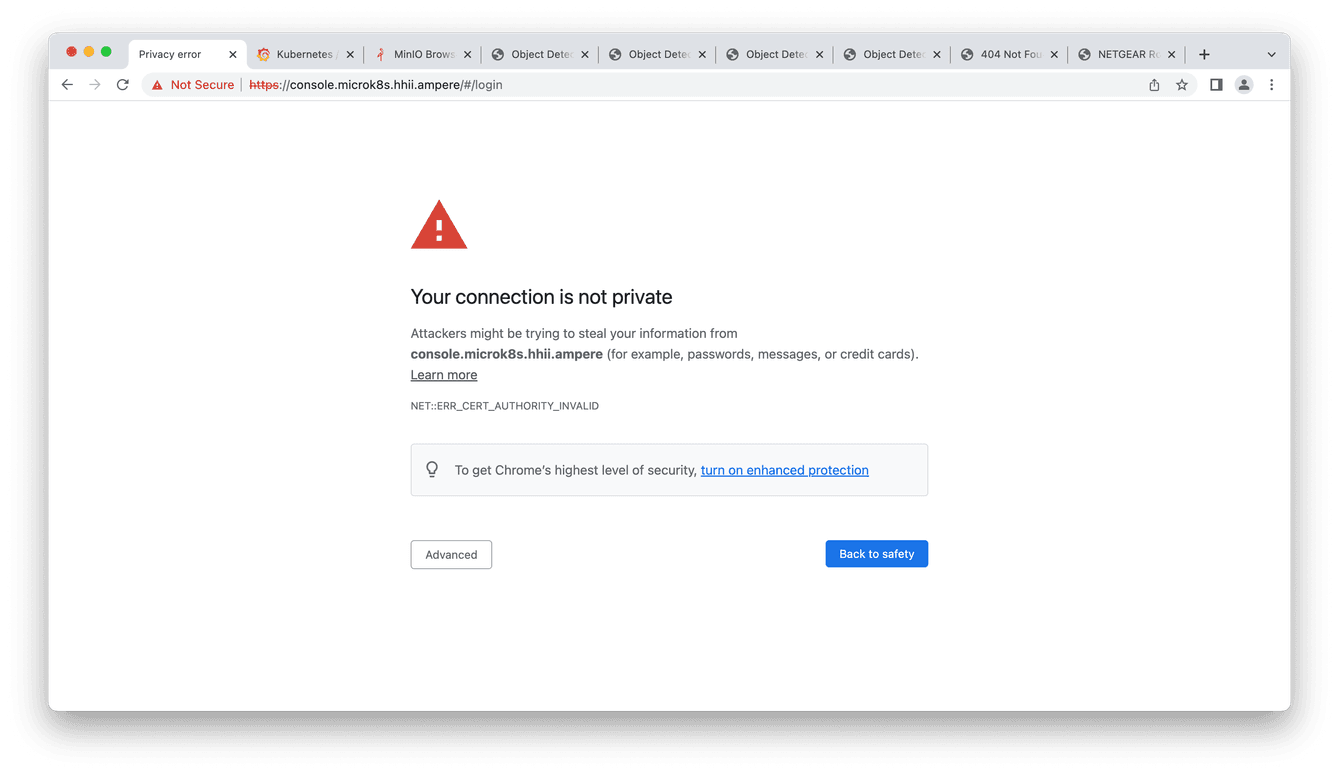 Fig2. Kubernetes dashboard web UI
4.Enter the token created from Step 1
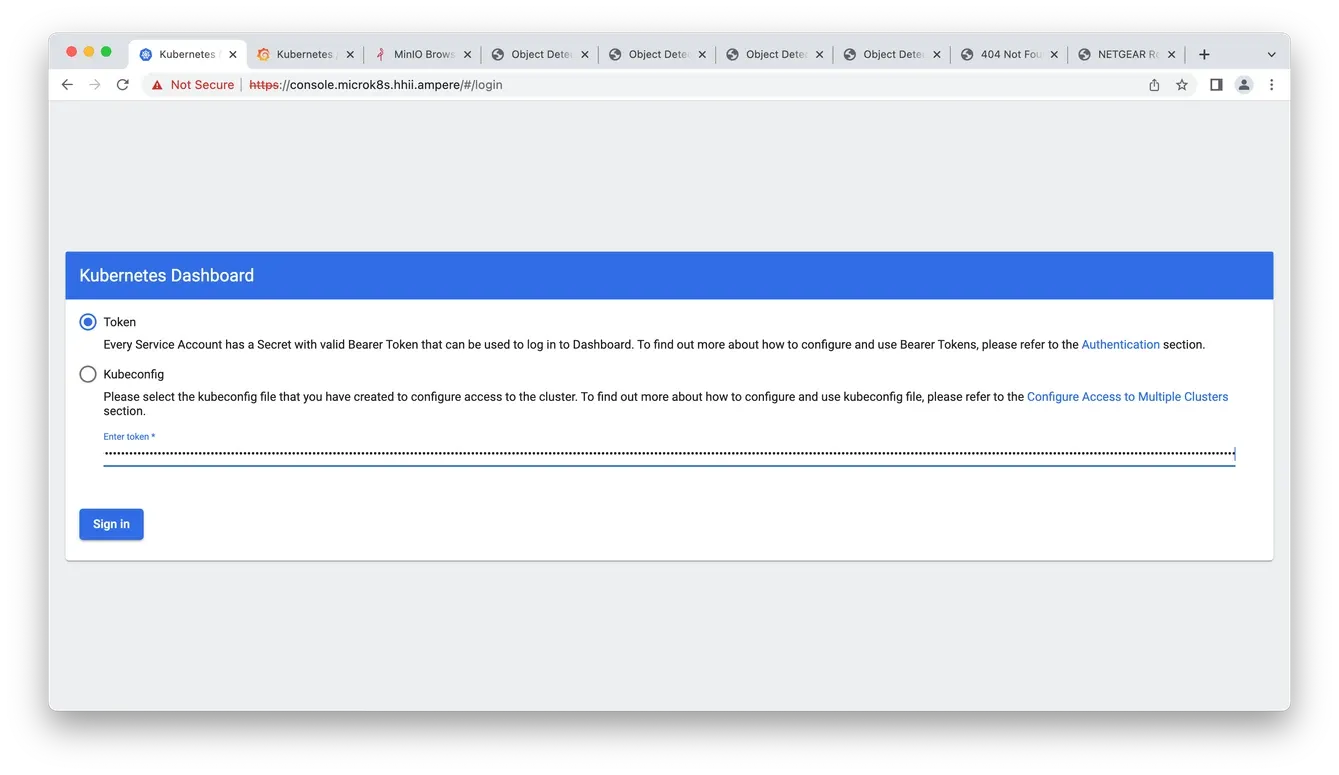 Fig3. Enter the token
5.Now you can access the MicroK8s dashboard
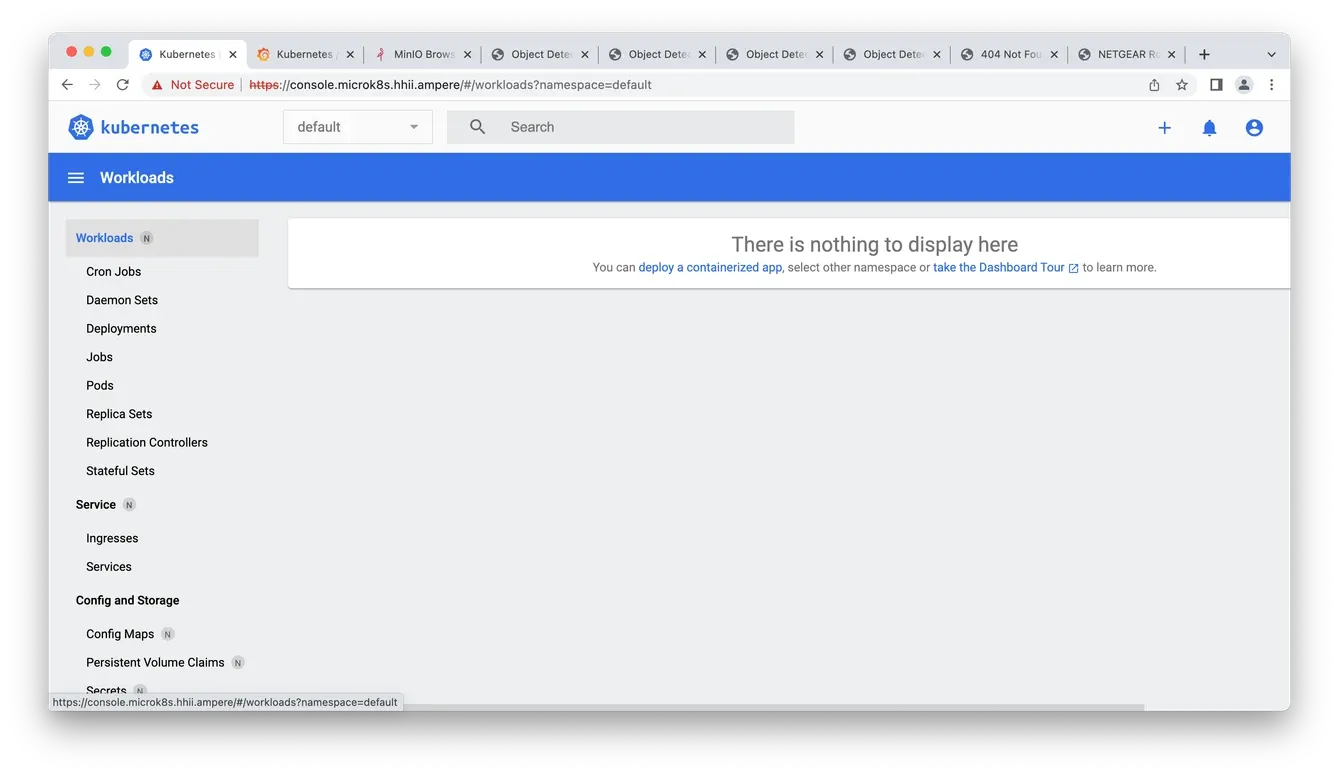 Fig4. Access the dashboard
Deploy MicroK8s Observability add-on
1.Enable MicroK8s Observability add-on
ubuntu@node1:~$ cd ~/microservices/observability ubuntu@node1:~/microservices/observability$ microk8s enable observability Infer repository core for addon observability Addon core/dns is already enabled Addon core/helm3 is already enabled Addon core/hostpath-storage is already enabled Enabling observability "prometheus-community" already exists with the same configuration, skipping "grafana" already exists with the same configuration, skipping Hang tight while we grab the latest from your chart repositories... ...Successfully got an update from the "minio" chart repository ...Successfully got an update from the "grafana" chart repository ...Successfully got an update from the "prometheus-community" chart repository Update Complete. ⎈Happy Helming!⎈ Release "kube-prom-stack" does not exist. Installing it now. NAME: kube-prom-stack LAST DEPLOYED: Fri Aug 11 03:22:36 2023 NAMESPACE: observability STATUS: deployed REVISION: 1 NOTES: kube-prometheus-stack has been installed. Check its status by running: kubectl --namespace observability get pods -l "release=kube-prom-stack" Visit https://github.com/prometheus-operator/kube-prometheus for instructions on how to create & configure Alertmanager and Prometheus instances using the Operator. Release "loki" does not exist. Installing it now. NAME: loki LAST DEPLOYED: Fri Aug 11 03:23:06 2023 NAMESPACE: observability STATUS: deployed REVISION: 1 NOTES: The Loki stack has been deployed to your cluster. Loki can now be added as a datasource in Grafana. See http://docs.grafana.org/features/datasources/loki/ for more detail. Release "tempo" does not exist. Installing it now. NAME: tempo LAST DEPLOYED: Fri Aug 11 03:23:08 2023 NAMESPACE: observability STATUS: deployed REVISION: 1 TEST SUITE: None Adding argument --authentication-kubeconfig to nodes. Adding argument --authorization-kubeconfig to nodes. Restarting nodes. Adding argument --authentication-kubeconfig to nodes. Adding argument --authorization-kubeconfig to nodes. Restarting nodes. Adding argument --metrics-bind-address to nodes. Restarting nodes. Note: the observability stack is setup to monitor only the current nodes of the MicroK8s cluster. For any nodes joining the cluster at a later stage this addon will need to be set up again. Observability has been enabled (user/pass: admin/prom-operator) ubuntu@node1:~/microservices/observability$ microk8s status microk8s is running high-availability: yes datastore master nodes: 192.168.1.101:19001 192.168.1.102:19001 192.168.1.103:19001 datastore standby nodes: none addons: enabled: dashboard # (core) The Kubernetes dashboard dns # (core) CoreDNS ha-cluster # (core) Configure high availability on the current node helm # (core) Helm - the package manager for Kubernetes helm3 # (core) Helm 3 - the package manager for Kubernetes hostpath-storage # (core) Storage class; allocates storage from host directory ingress # (core) Ingress controller for external access metallb # (core) Loadbalancer for your Kubernetes cluster metrics-server # (core) K8s Metrics Server for API access to service metrics observability # (core) A lightweight observability stack for logs, traces and metrics storage # (core) Alias to hostpath-storage add-on, deprecated disabled: cert-manager # (core) Cloud native certificate management community # (core) The community addons repository host-access # (core) Allow Pods connecting to Host services smoothly kube-ovn # (core) An advanced network fabric for Kubernetes mayastor # (core) OpenEBS MayaStor minio # (core) MinIO object storage prometheus # (core) Prometheus operator for monitoring and logging rbac # (core) Role-Based Access Control for authorisation registry # (core) Private image registry exposed on localhost:32000 ubuntu@node1:~/microservices/observability$ ubuntu@node1:~/microservices/observability$ kubectl get all -n observability NAME READY STATUS RESTARTS AGE pod/kube-prom-stack-kube-prome-operator-79cbdd7979-gjc5r 1/1 Running 0 3m18s pod/tempo-0 2/2 Running 0 3m3s pod/alertmanager-kube-prom-stack-kube-prome-alertmanager-0 2/2 Running 1 (3m11s ago) 3m14s pod/kube-prom-stack-kube-state-metrics-5bf874b44d-8b564 1/1 Running 0 3m18s pod/kube-prom-stack-prometheus-node-exporter-nkxdg 1/1 Running 0 3m18s pod/kube-prom-stack-prometheus-node-exporter-cttrq 1/1 Running 0 3m18s pod/kube-prom-stack-prometheus-node-exporter-lmqqc 1/1 Running 0 3m18s pod/prometheus-kube-prom-stack-kube-prome-prometheus-0 2/2 Running 0 3m13s pod/loki-promtail-5vj5r 1/1 Running 0 3m4s pod/loki-promtail-m97dt 1/1 Running 0 3m4s pod/loki-promtail-q7h87 1/1 Running 0 3m4s pod/kube-prom-stack-prometheus-node-exporter-fpxpf 1/1 Running 0 3m18s pod/kube-prom-stack-grafana-79bff66ffb-fq6x2 3/3 Running 0 3m18s pod/loki-promtail-frvfv 1/1 Running 0 3m4s pod/loki-0 1/1 Running 0 3m4s NAME TYPE CLUSTER-IP EXTERNAL-IP PORT(S) AGE service/kube-prom-stack-grafana ClusterIP 10.152.183.210 <none> 80/TCP 3m18s service/kube-prom-stack-kube-prome-prometheus ClusterIP 10.152.183.228 <none> 9090/TCP 3m18s service/kube-prom-stack-prometheus-node-exporter ClusterIP 10.152.183.242 <none> 9100/TCP 3m18s service/kube-prom-stack-kube-prome-alertmanager ClusterIP 10.152.183.200 <none> 9093/TCP 3m18s service/kube-prom-stack-kube-prome-operator ClusterIP 10.152.183.239 <none> 443/TCP 3m18s service/kube-prom-stack-kube-state-metrics ClusterIP 10.152.183.179 <none> 8080/TCP 3m18s service/alertmanager-operated ClusterIP None <none> 9093/TCP,9094/TCP,9094/UDP 3m15s service/prometheus-operated ClusterIP None <none> 9090/TCP 3m14s service/loki-headless ClusterIP None <none> 3100/TCP 3m4s service/loki-memberlist ClusterIP None <none> 7946/TCP 3m4s service/loki ClusterIP 10.152.183.19 <none> 3100/TCP 3m4s service/tempo ClusterIP 10.152.183.177 <none> 3100/TCP,16687/TCP,16686/TCP,6831/UDP,6832/UDP,14268/TCP,14250/TCP,9411/TCP,55680/TCP,55681/TCP,4317/TCP,4318/TCP,55678/TCP 3m3s NAME DESIRED CURRENT READY UP-TO-DATE AVAILABLE NODE SELECTOR AGE daemonset.apps/kube-prom-stack-prometheus-node-exporter 4 4 4 4 4 <none> 3m18s daemonset.apps/loki-promtail 4 4 4 4 4 <none> 3m4s NAME READY UP-TO-DATE AVAILABLE AGE deployment.apps/kube-prom-stack-kube-prome-operator 1/1 1 1 3m18s deployment.apps/kube-prom-stack-kube-state-metrics 1/1 1 1 3m18s deployment.apps/kube-prom-stack-grafana 1/1 1 1 3m18s NAME DESIRED CURRENT READY AGE replicaset.apps/kube-prom-stack-kube-prome-operator-79cbdd7979 1 1 1 3m18s replicaset.apps/kube-prom-stack-kube-state-metrics-5bf874b44d 1 1 1 3m18s replicaset.apps/kube-prom-stack-grafana-79bff66ffb 1 1 1 3m18s NAME READY AGE statefulset.apps/alertmanager-kube-prom-stack-kube-prome-alertmanager 1/1 3m16s statefulset.apps/prometheus-kube-prom-stack-kube-prome-prometheus 1/1 3m15s statefulset.apps/tempo 1/1 3m4s statefulset.apps/loki 1/1 3m5s
2.Add a 50GB PVC to Prometheus pod by patch CRD object kube-prom-stack-kube-prome-prometheus in observability namespace
kubectl -n observability patch prometheus/kube-prom-stack-kube-prome-prometheus --patch '{"spec": {"paused": true, "storage": {"volumeClaimTemplate": {"spec": {"storageClassName":"microk8s-hostpath","resources": {"requests": {"storage":"50Gi"}}}}}}}' --type merge kubectl -n observability patch prometheus/kube-prom-stack-kube-prome-prometheus --patch '{"spec": {"paused": true, "resources": {"requests": {"cpu": "1", "memory":"1.6Gi"}}, "retention": "60d"}}' --type merge kubectl -n observability patch prometheus/kube-prom-stack-kube-prome-prometheus --patch '{"spec": {"paused": false}}' --type merge
3.Apply Ingress YAML file for Grafana Loki, Prometheus and AlertManager for browser accessing
$ cat << EOF > observability-ingress.yaml --- kind: Ingress apiVersion: networking.k8s.io/v1 metadata: name: grafana-ingress annotations: nginx.ingress.kubernetes.io/ssl-redirect: "false" kubernetes.io/ingress.class: "public" nginx.ingress.kubernetes.io/rewrite-target: / #new spec: rules: - host: "grafana.microk8s.hhii.ampere" http: paths: - backend: service: name: kube-prom-stack-grafana port: number: 3000 path: / pathType: Prefix --- kind: Ingress apiVersion: networking.k8s.io/v1 metadata: name: prometheus-ingress annotations: nginx.ingress.kubernetes.io/ssl-redirect: "false" kubernetes.io/ingress.class: "public" nginx.ingress.kubernetes.io/rewrite-target: / #new spec: rules: - host: "prometheus.microk8s.hhii.ampere" http: paths: - backend: service: name: prometheus-operated port: number: 9090 path: / pathType: Prefix --- kind: Ingress apiVersion: networking.k8s.io/v1 metadata: name: alertmanager-ingress annotations: nginx.ingress.kubernetes.io/ssl-redirect: "false" kubernetes.io/ingress.class: "public" nginx.ingress.kubernetes.io/rewrite-target: / #new spec: rules: - host: "alertmanager.microk8s.hhii.ampere" http: paths: - backend: service: name: alertmanager-operated port: number: 9093 path: / pathType: Prefix EOF $ kubectl -n observability apply -f observability-ingress.yaml ingress.networking.k8s.io/grafana-ingress created ingress.networking.k8s.io/prometheus-ingress created ingress.networking.k8s.io/alertmanager-ingress created $ kubectl get ingress -n observability NAME CLASS HOSTS ADDRESS PORTS AGE alertmanager-ingress <none> alertmanager.microk8s.hhii.ampere 192.168.1.101,192.168.1.102,192.168.1.103,192.168.1.104 80 7s grafana-ingress <none> grafana.microk8s.hhii.ampere 192.168.1.101,192.168.1.102,192.168.1.103,192.168.1.104 80 7s prometheus-ingress <none> prometheus.microk8s.hhii.ampere 192.168.1.101,192.168.1.102,192.168.1.103,192.168.1.104 80 7s
4.Access them on the browser with the credential admin / admin via the links below:
- http://grafana.microk8s.hhii.ampere/
- http://prometheus.microk8s.hhii.ampere/
- http://alertmanager.microk8s.hhii.ampere/
 Fig5. Observability Ingress
5.To access Grafana, enter the link from step 3.a and use the credential admin / prom-operator to login to it web UI
 Fig6. Grafana web UI
6.Click Dashboard → Manage → Default → “Kubernetes / Compute Resources / Pod”
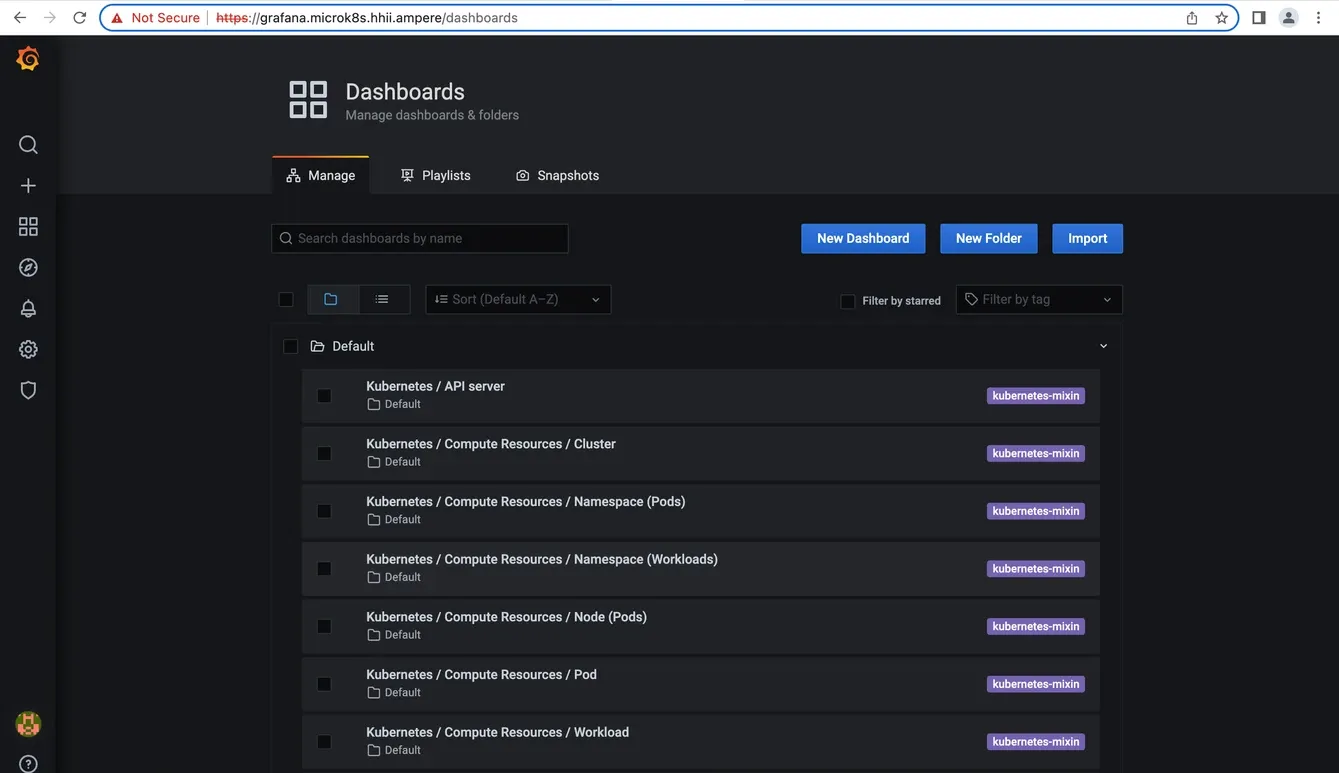 Fig7. Grafana dashboards
7.Choose Dashboard → Manage → Default → “Kubernetes / Compute Resources / Pod” in namespace vod-poc for the Video Processor workload
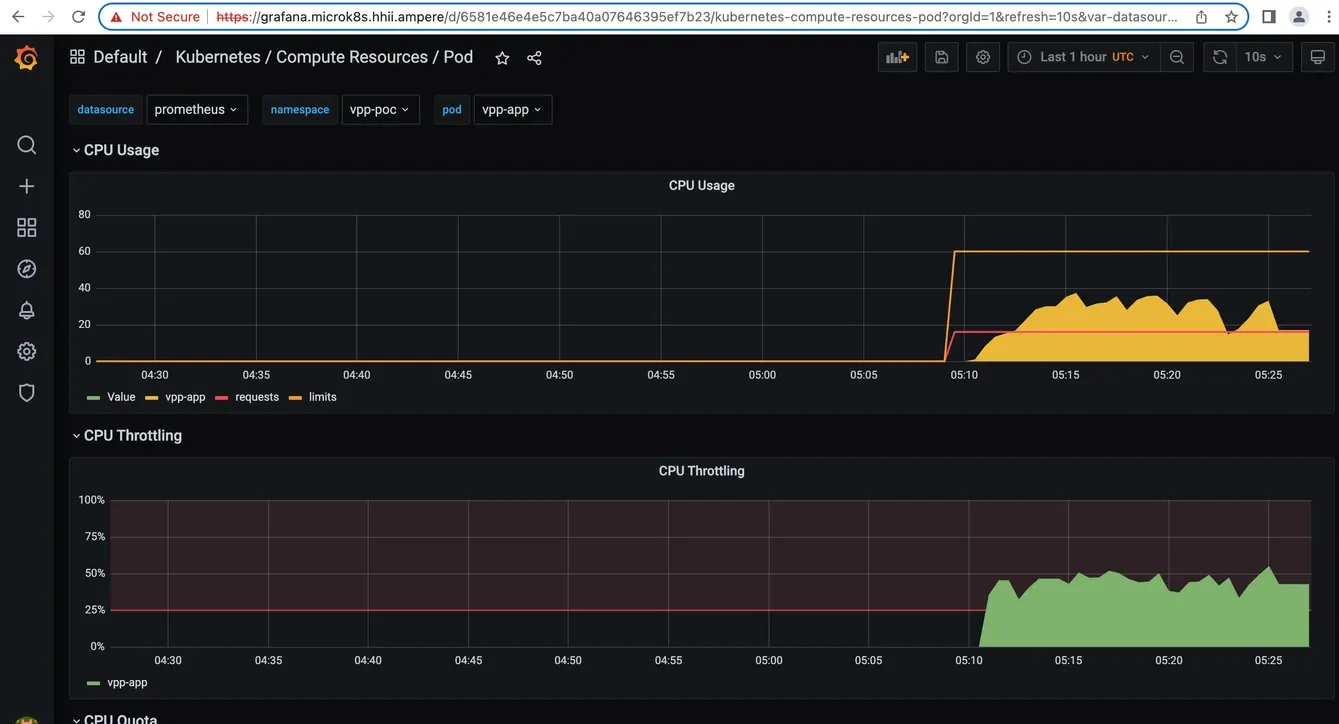 Fig8. Grafana dashboard details
Deploy MinIO on MicroK8s
1.Deploy MinIO on MicroK8s. Retrieve access key and access secret in the log message
altrauser@node1:~$ microk8s enable minio -c 100Gi -t tenant-1 -n 4 -v 8 Infer repository core for addon minio Infer repository core for addon dns Addon core/dns is already enabled Infer repository core for addon hostpath-storage Addon core/hostpath-storage is already enabled Download kubectl-minio % Total % Received % Xferd Average Speed Time Time Time Current Dload Upload Total Spent Left Speed 0 0 0 0 0 0 0 0 --:--:-- --:--:-- --:--:-- 0 100 35.6M 100 35.6M 0 0 9658k 0 0:00:03 0:00:03 --:--:-- 10.4M Initialize minio operator namespace/minio-operator created serviceaccount/minio-operator created clusterrole.rbac.authorization.k8s.io/minio-operator-role created clusterrolebinding.rbac.authorization.k8s.io/minio-operator-binding created customresourcedefinition.apiextensions.k8s.io/tenants.minio.min.io created service/operator created deployment.apps/minio-operator created serviceaccount/console-sa created secret/console-sa-secret created clusterrole.rbac.authorization.k8s.io/console-sa-role created clusterrolebinding.rbac.authorization.k8s.io/console-sa-binding created configmap/console-env created service/console created deployment.apps/console created ----------------- To open Operator UI, start a port forward using this command: kubectl minio proxy -n minio-operator ----------------- Create default tenant with: Name: tenant-1 Capacity: 100Gi Servers: 4 Volumes: 8 Storage class: microk8s-hostpath TLS: no Prometheus: no + /var/snap/microk8s/common/plugins/kubectl-minio tenant create tenant-1 --storage-class microk8s-hostpath --capacity 100Gi --servers 4 --volumes 8 --namespace minio-operator --enable-audit-logs=false --disable-tls --enable-prometheus=false W0305 22:24:24.618967 1065499 warnings.go:70] unknown field "spec.pools[0].volumeClaimTemplate.metadata.creationTimestamp" Tenant 'tenant-1' created in 'minio-operator' Namespace Username: {MinIO Access Key ID} Password: {MinIO Access Key} Note: Copy the credentials to a secure location. MinIO will not display these again. APPLICATION SERVICE NAME NAMESPACE SERVICE TYPE SERVICE PORT MinIO minio minio-operator ClusterIP 80 Console tenant-1-console minio-operator ClusterIP 9090 + set +x ================================ Enabled minio addon. You can manage minio tenants using the kubectl-minio plugin. For more details, use microk8s kubectl-minio --help
2.Prepare Ingress for MinIO console
cat << EOF > minio-tenant-1-ingress.yaml kind: Ingress apiVersion: networking.k8s.io/v1 metadata: name: minio-console-ingress namespace: minio-operator annotations: kubernetes.io/ingress.class: public nginx.ingress.kubernetes.io/backend-protocol: HTTP nginx.ingress.kubernetes.io/configuration-snippet: | chunked_transfer_encoding off; nginx.ingress.kubernetes.io/proxy-body-size: '0' nginx.ingress.kubernetes.io/proxy-ssl-verify: 'off' nginx.ingress.kubernetes.io/rewrite-target: / nginx.ingress.kubernetes.io/server-snippet: | client_max_body_size 0; spec: rules: - host: console.minio.microk8s.hhii.ampere http: paths: - path: / pathType: Prefix backend: service: name: tenant-1-minio-svc port: number: 9090
3.Deploy ingress for MinIO console
ubuntu@node1:~/microservices/minio$ kubectl apply -f minio-tenant-1-ingress.yaml -n minio-tenant-1 ingress.networking.k8s.io/minio-console-ingress created
4.Create a configmap YAML file for MinIO on the namespace vpp-poc
ubuntu@node1:~/microservices/vpp$ cat << EOF > minio-credential.yaml apiVersion: v1 kind: ConfigMap metadata: name: miniocredentials data: credentials: | [default] aws_access_key_id={MinIO Access Key ID} aws_secret_access_key={MinIO Access Key} EOF
5.Apply the configmap on namespace vpp-poc
ubuntu@node1:~/microservices/vpp$ kubectl -n vpp-poc create -f minio-credential.yaml configmap/miniocredentials created
6.Upload the demo video files for VPP demo
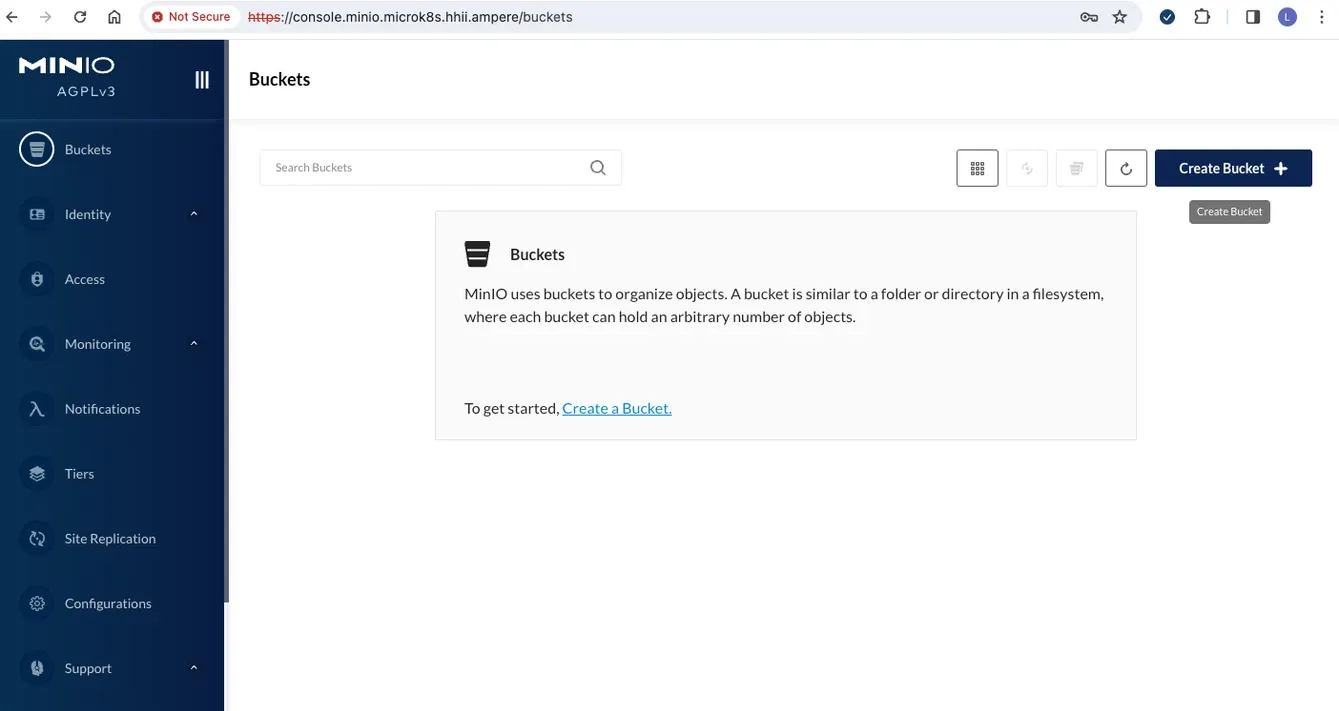 Fig9. Create bucket in MinIO web UI
 Fig10. Upload the demo video files
7.Run the 3 VPP demo apps, vpp-minio-app1-pod.yaml, vpp-minio-app2-pod.yaml and vpp-minio-app3-pod.yaml for testing
ubuntu@node1:~/microservices/vpp$ kubectl create -f vpp-minio-app1-pod.yaml -n vpp-poc pod/vpp-app1 created ubuntu@node1:~/microservices/vpp$ kubectl create -f vpp-minio-app2-pod.yaml -n vpp-poc pod/vpp-app2 created ubuntu@node1:~/microservices/vpp$ kubectl create -f vpp-minio-app3-pod.yaml -n vpp-poc pod/vpp-app3 created
8.Check the pods' status and logs on Kubernetes dashboard
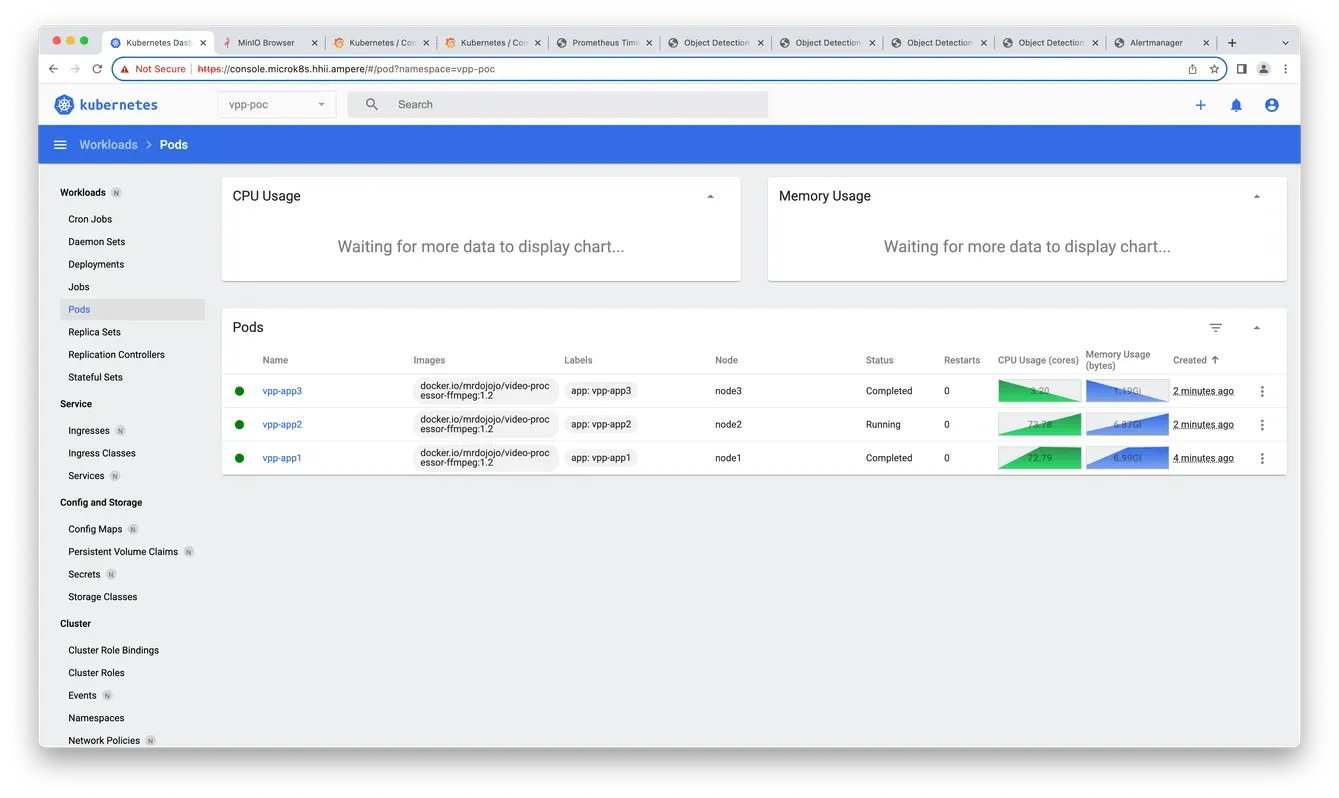 Fig11. Check the status
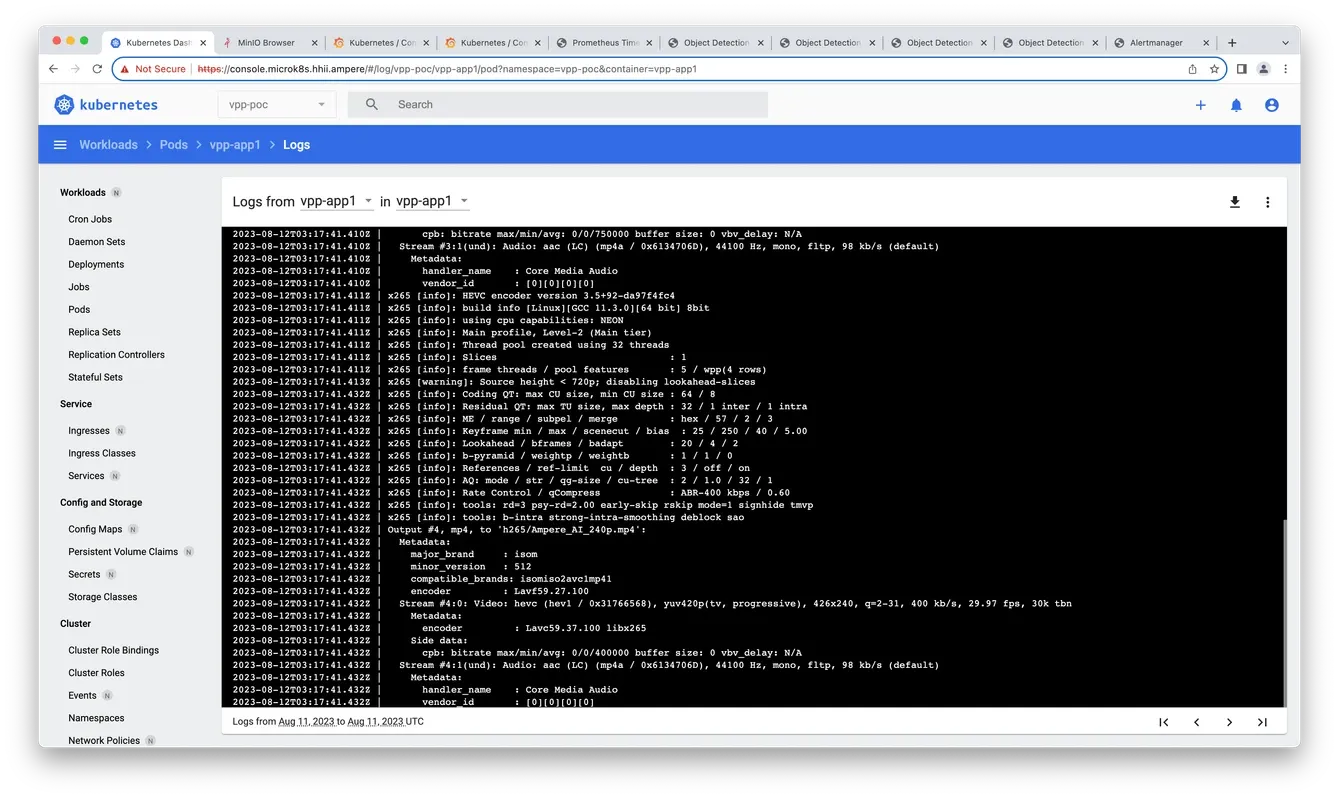 Fig12. Check the logs
9.Check Grafana for verifying the MinIO S3 compatible API
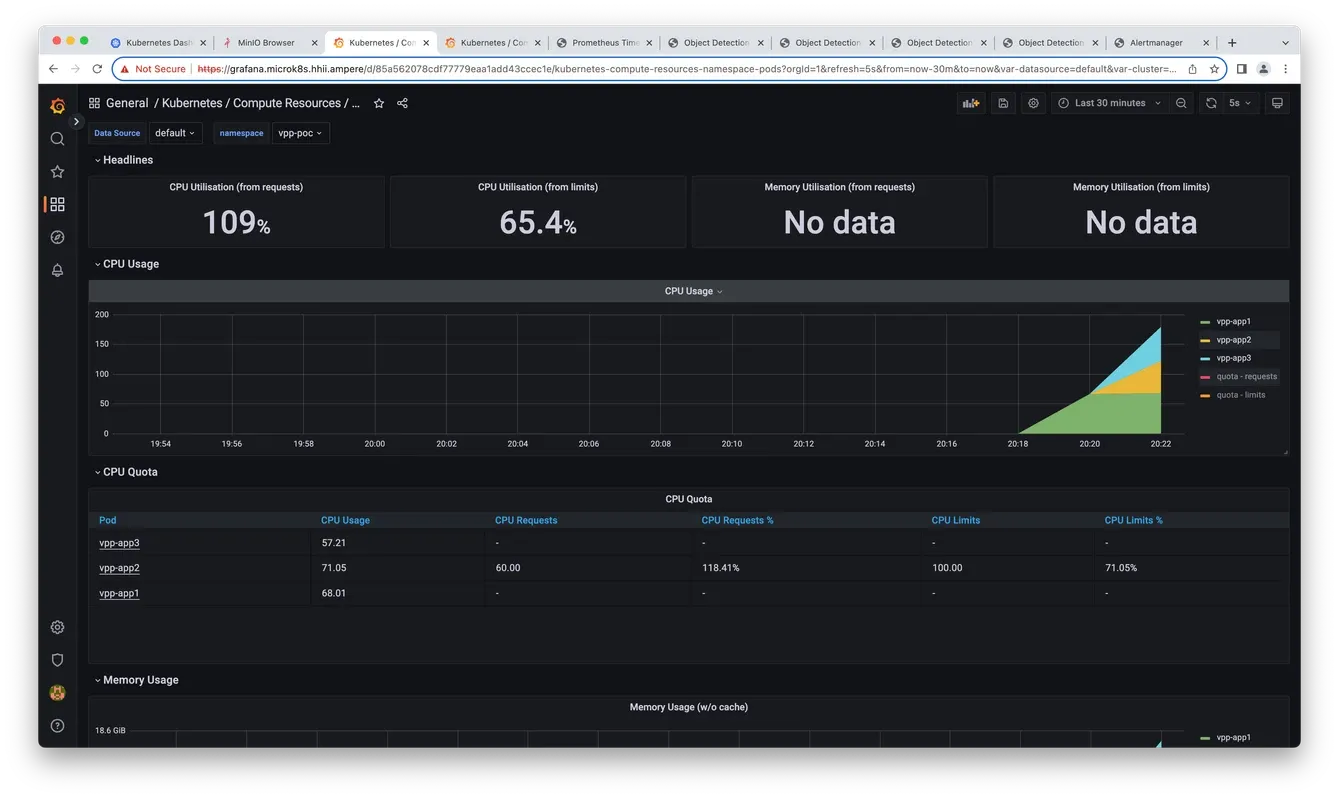 Fig13. Grafana monitor
10.MinIO object storage is ready for demo
Deploy Video on Demand PoC demo on MicroK8s
1.Access the target MicroK8s cluster with kubeconfig from your local host or directly on MicroK8s server
ubuntu@node1:~/microservices/vod$ kubectl get nodes -o wide -L kubernetes.io/arch NAME STATUS ROLES AGE VERSION INTERNAL-IP EXTERNAL-IP OS-IMAGE KERNEL-VERSION CONTAINER-RUNTIME ARCH node4 Ready <none> 26h v1.26.7 192.168.1.104 <none> Ubuntu 22.04.3 LTS 5.15.0-78-generic containerd://1.6.15 arm64 node3 Ready <none> 26h v1.26.7 192.168.1.103 <none> Ubuntu 22.04.3 LTS 5.15.0-78-generic containerd://1.6.15 arm64 node2 Ready <none> 26h v1.26.7 192.168.1.102 <none> Ubuntu 22.04.3 LTS 5.15.0-78-generic containerd://1.6.15 arm64 node1 Ready <none> 27h v1.26.7 192.168.1.101 <none> Ubuntu 22.04.3 LTS 5.15.0-78-generic containerd://1.6.15 arm64
2.Obtain the source code from the 2 GitHub repos:
- https://github.com/AmpereComputing/nginx-hello-container
- https://github.com/AmpereComputing/nginx-vod-module-container
ubuntu@node1:~/microservices/vod$ git clone https://github.com/AmpereComputing/nginx-hello-container ubuntu@node1:~/microservices/vod$ git clone https://github.com/AmpereComputing/nginx-vod-module-container
3.Create a namespace as vod-poc
ubuntu@node1:~/microservices/vod$ kubectl create ns vod-poc namespace/vod-poc created
4.Deploy NGINX web server container in StatefulSet with its PVC template, service, and ingress
ubuntu@node1:~/microservices/vod$ kubectl -n vod-poc create -f nginx-hello-container/MicroK8s/nginx-front-app.yaml service/nginx-front-app-svc created statefulset.apps/nginx-front-app created ingress.networking.k8s.io/nginx-front-app-ingress created
5.Deploy NGINX VOD container in StatefulSet with its PVC template, service, and ingress
ubuntu@node1:~/microservices/vod$ kubectl -n vod-poc create -f nginx-vod-module-container/MicroK8s/nginx-vod-app.yaml service/nginx-vod-app-svc created statefulset.apps/nginx-vod-app created ingress.networking.k8s.io/nginx-vod-app-ingress created
6.Get the deployment status in vod-poc namespace
ubuntu@node1:~/microservices/vod$ kubectl get pod,pvc -n vod-poc -owide NAME READY STATUS RESTARTS AGE IP NODE NOMINATED NODE READINESS GATES pod/nginx-vod-app-0 0/1 Pending 0 5s <none> <none> <none> <none> pod/nginx-front-app-0 0/1 ContainerCreating 0 11s <none> node2 <none> <none> NAME STATUS VOLUME CAPACITY ACCESS MODES STORAGECLASS AGE VOLUMEMODE persistentvolumeclaim/nginx-front-app-pvc-nginx-front-app-0 Bound pvc-2ff96d61-71d5-4d5f-9a0a-91cdcb831a7e 50Gi RWO fastdata-hostpath 11s Filesystem persistentvolumeclaim/nginx-vod-app-pvc-nginx-vod-app-0 Bound pvc-bdb1711f-d432-483a-9bcc-bd49b3d7d03c 50Gi RWO fastdata-hostpath 5s Filesystem ubuntu@node1:~/microservices/vod$ kubectl get pod,pvc -n vod-poc -owide NAME READY STATUS RESTARTS AGE IP NODE NOMINATED NODE READINESS GATES pod/nginx-front-app-0 1/1 Running 0 39s 10.1.104.25 node2 <none> <none> pod/nginx-vod-app-0 1/1 Running 0 33s 10.1.104.27 node2 <none> <none> pod/nginx-vod-app-1 0/1 Pending 0 3s <none> <none> <none> <none> pod/nginx-front-app-1 0/1 ContainerCreating 0 9s <none> node3 <none> <none> NAME STATUS VOLUME CAPACITY ACCESS MODES STORAGECLASS AGE VOLUMEMODE persistentvolumeclaim/nginx-front-app-pvc-nginx-front-app-0 Bound pvc-2ff96d61-71d5-4d5f-9a0a-91cdcb831a7e 50Gi RWO fastdata-hostpath 39s Filesystem persistentvolumeclaim/nginx-vod-app-pvc-nginx-vod-app-0 Bound pvc-bdb1711f-d432-483a-9bcc-bd49b3d7d03c 50Gi RWO fastdata-hostpath 33s Filesystem persistentvolumeclaim/nginx-vod-app-pvc-nginx-vod-app-1 Pending fastdata-hostpath 3s Filesystem persistentvolumeclaim/nginx-front-app-pvc-nginx-front-app-1 Bound pvc-3cffdf35-b810-49ec-a219-7b213fc3835f 50Gi RWO fastdata-hostpath 9s Filesystem ubuntu@node1:~/microservices/vod$ kubectl get pod,pvc -n vod-poc -owide NAME READY STATUS RESTARTS AGE IP NODE NOMINATED NODE READINESS GATES pod/nginx-front-app-0 1/1 Running 0 88s 10.1.104.25 node2 <none> <none> pod/nginx-vod-app-0 1/1 Running 0 82s 10.1.104.27 node2 <none> <none> pod/nginx-front-app-1 1/1 Running 0 58s 10.1.135.24 node3 <none> <none> pod/nginx-vod-app-1 1/1 Running 0 52s 10.1.135.25 node3 <none> <none> pod/nginx-front-app-2 1/1 Running 0 28s 10.1.166.159 node1 <none> <none> pod/nginx-vod-app-2 1/1 Running 0 22s 10.1.166.161 node1 <none> <none> NAME STATUS VOLUME CAPACITY ACCESS MODES STORAGECLASS AGE VOLUMEMODE persistentvolumeclaim/nginx-front-app-pvc-nginx-front-app-0 Bound pvc-2ff96d61-71d5-4d5f-9a0a-91cdcb831a7e 50Gi RWO fastdata-hostpath 88s Filesystem persistentvolumeclaim/nginx-vod-app-pvc-nginx-vod-app-0 Bound pvc-bdb1711f-d432-483a-9bcc-bd49b3d7d03c 50Gi RWO fastdata-hostpath 82s Filesystem persistentvolumeclaim/nginx-front-app-pvc-nginx-front-app-1 Bound pvc-3cffdf35-b810-49ec-a219-7b213fc3835f 50Gi RWO fastdata-hostpath 58s Filesystem persistentvolumeclaim/nginx-vod-app-pvc-nginx-vod-app-1 Bound pvc-74d0aa00-5499-4a64-8444-3b473fedcbdc 50Gi RWO fastdata-hostpath 52s Filesystem persistentvolumeclaim/nginx-front-app-pvc-nginx-front-app-2 Bound pvc-21dcdb59-46f9-48b0-aec2-41754f8f7bd5 50Gi RWO fastdata-hostpath 28s Filesystem persistentvolumeclaim/nginx-vod-app-pvc-nginx-vod-app-2 Bound pvc-b7f60824-9e64-4bff-80d5-fb8d853a6770 50Gi RWO fastdata-hostpath 22s Filesystem ubuntu@node1:~/microservices/vod$ kubectl get svc,ingress -n vod-poc -owide NAME TYPE CLUSTER-IP EXTERNAL-IP PORT(S) AGE SELECTOR service/nginx-front-app-svc ClusterIP 10.152.183.20 <none> 8080/TCP 109s app=nginx-front-app service/nginx-vod-app-svc NodePort 10.152.183.198 <none> 8080:30544/TCP 104s app=nginx-vod-app NAME CLASS HOSTS ADDRESS PORTS AGE ingress.networking.k8s.io/nginx-front-app-ingress <none> demo.microk8s.hhii.ampere 192.168.1.101,192.168.1.102,192.168.1.103,192.168.1.104 80 109s ingress.networking.k8s.io/nginx-vod-app-ingress <none> vod.microk8s.hhii.ampere 192.168.1.101,192.168.1.102,192.168.1.103,192.168.1.104 80 103s
7.Afterwards, we need to run an NGINX web server on the bastion node to host video and web bundle files for VOD PoC demo on MicroK8s.
8.You can prepare a tar ball file with those pre-transcoded video files (under vod-demo) and subtitle file (extension filename: vtt), and the 2nd tar ball for nginx-front-app with html, css, JavaScript, etc. (under nginx-front-demo):
$ tar -zcvf vod-demo.tgz vod-demo $ tar -zcvf nginx-front-demo.tgz nginx-front-demo
9.Create a sub-directory such as nginx-html , then move_ vod-demo.tgz_ & nginx-front-demo.tgz to nginx-html, then run the NGINX web server container with the directory
% mkdir nginx-html % mv vod-demo.tgz nginx-html % cd nginx-html % docker run -d --rm -p 8080:8080 --name nginx-html --user 1001 -v $PWD:/usr/share/nginx/html docker.io/mrdojojo/nginx-hello-app:1.1-arm64
10.Go back to Rancher portal for deploying those bundle files to VOD pods
- For nginx-front-app pods, execute the command to access the NGINX container in the pod, nginx-front-app-0
% kubectl -n vod-poc exec -it pod/nginx-front-app-0 -- sh / # cd /usr/share/nginx/html/ /usr/share/nginx/html # wget http://[Bastion node's IP address]:8080/nginx-front-demo.tgz /usr/share/nginx/html # tar zxvf nginx-front-demo.tgz /usr/share/nginx/html # sed -i "s,http://\[vod-demo\]/,http://vod.microk8s.hhii.ampere/,g" *.html /usr/share/nginx/html # rm -rf nginx-front-demo.tgz
- Repeat step 8.a for other 2 pods, nginx-front-app-1 and nginx-front-app-2
- For nginx-vod-app pods, execute the command to access the nginx container in the pod, nginx-vod-app-0
% kubectl -n vod-poc exec -it pod/nginx-vod-app-0 -- sh / # cd /opt/static/videos/ /opt/static/videos # wget http://[Bastion node's IP address]:8080/vod-demo.tgz /opt/static/videos # tar zxvf vod-demo.tgz /opt/static/videos # rm -rf vod-demo.tgz /opt/static/videos # exit
- Repeat step 8.c for other 2 pods, nginx-vod-app-1 and nginx-vod-app-2
11.With MinIO Object storage:
# wget -O nginx-front-demo.tgz "https://console.minio.microk8s.hhii.ampere/vod-poc/nginx-front-demo.tgz?[token]" --no-check-certificate wget -O nginx-front-demo.tgz "https://console.minio.microk8s.hhii.ampere/vod-poc/nginx-front-demo.tgz?X-Amz-Algorithm=AWS4-HMAC-SHA256&X-Amz-Credential=s4ojRTFTZjfEgO0XXpr7%2F20230812%2F%2Fs3%2Faws4_request&X-Amz-Date=20230812T033632Z&X-Amz-Expires=432000&X-Amz-SignedHeaders=host&X-Amz-Signature=0efeb49e7854713cc11706c93186cef576aa5dcf01b9b2424458f804af032846" \ --no-check-certificate wget -O vod-demo.tgz "https://console.minio.microk8s.hhii.ampere/vod-poc/vod-demo.tgz?X-Amz-Algorithm=AWS4-HMAC-SHA256&X-Amz-Credential=s4ojRTFTZjfEgO0XXpr7%2F20230812%2F%2Fs3%2Faws4_request&X-Amz-Date=20230812T033929Z&X-Amz-Expires=432000&X-Amz-SignedHeaders=host&X-Amz-Signature=bbc452e245066b42614d244c711d075241a132a9009713560531319eee092e5f" \ --no-check-certificate
12.Get the domain name A records publish to DNS server
192.168.1.101 demo.microk8s.hhii.ampere A 10min 192.168.1.102 demo.microk8s.hhii.ampere A 10min 192.168.1.103 demo.microk8s.hhii.ampere A 10min 192.168.1.104 demo.microk8s.hhii.ampere A 10min 192.168.1.101 vod.microk8s.hhii.ampere A 10min 192.168.1.102 vod.microk8s.hhii.ampere A 10min 192.168.1.103 vod.microk8s.hhii.ampere A 10min 192.168.1.104 vod.microk8s.hhii.ampere A 10min
13.Afterwards, open a browser to access the http://demo.microk8s.hhii.ampere for testing VOD PoC demo on MicroK8s
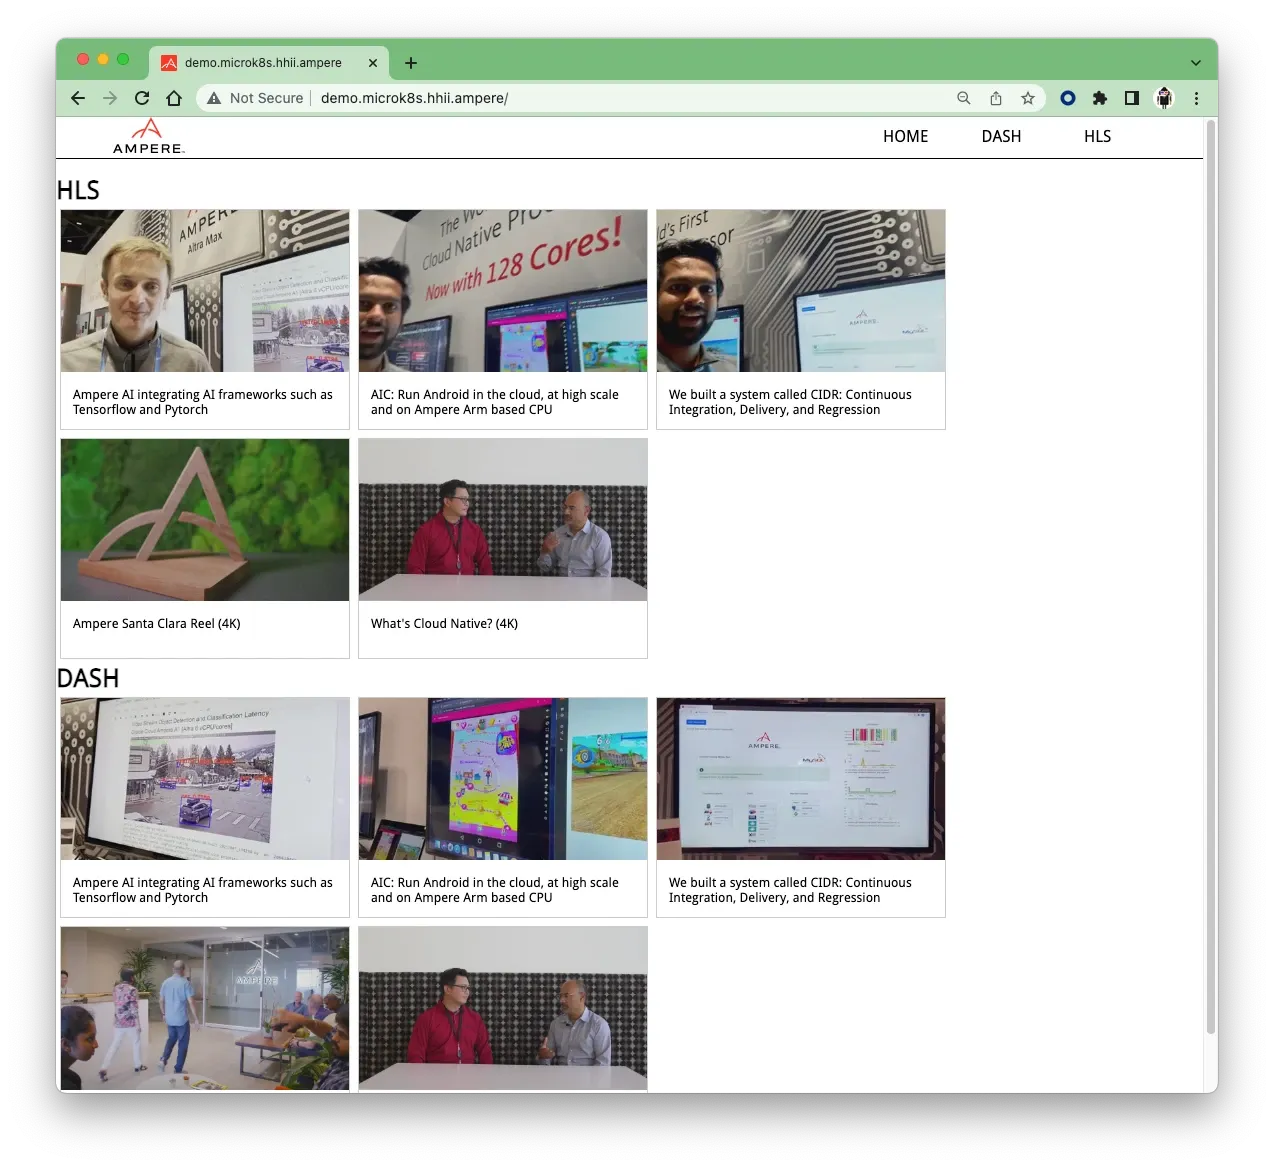 Fig14. VOD demo web UI
14.Click one of rectangles, the browser will bring the HTML5 video player for streaming video.
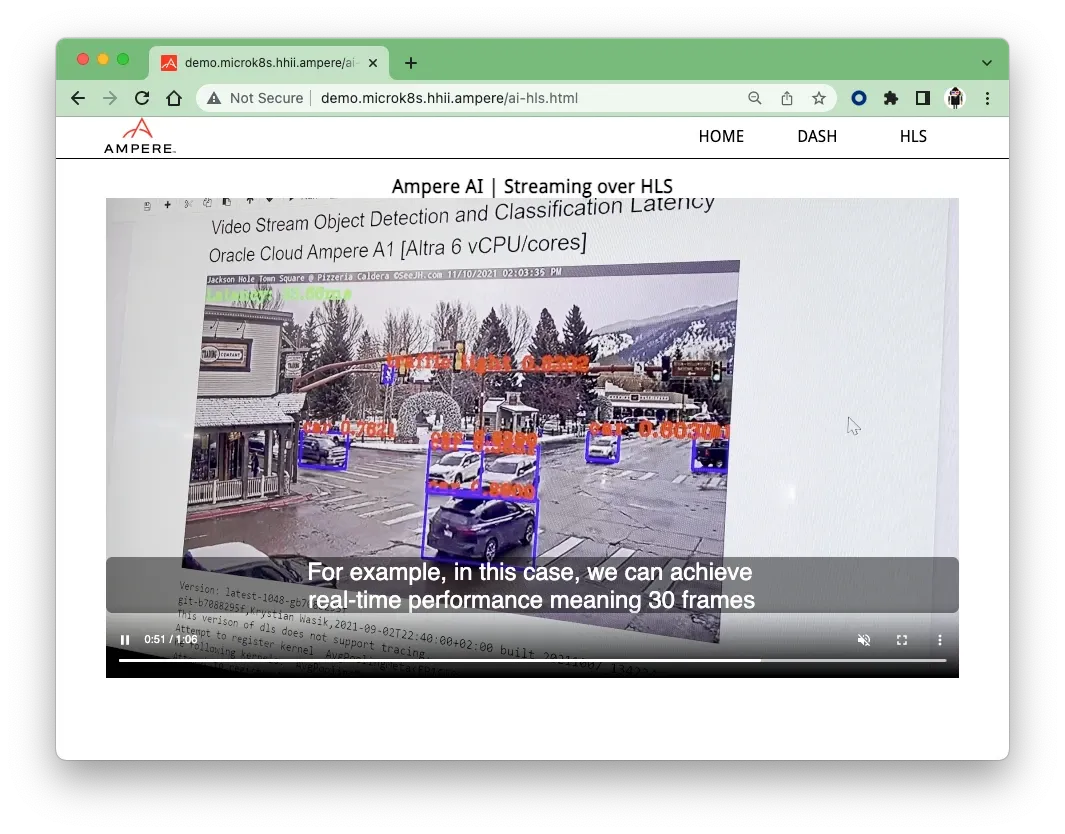 Fig 15. Video Streaming playbacks on HTML5 Video player
15.The VOD PoC demo on MicroK8s is ready
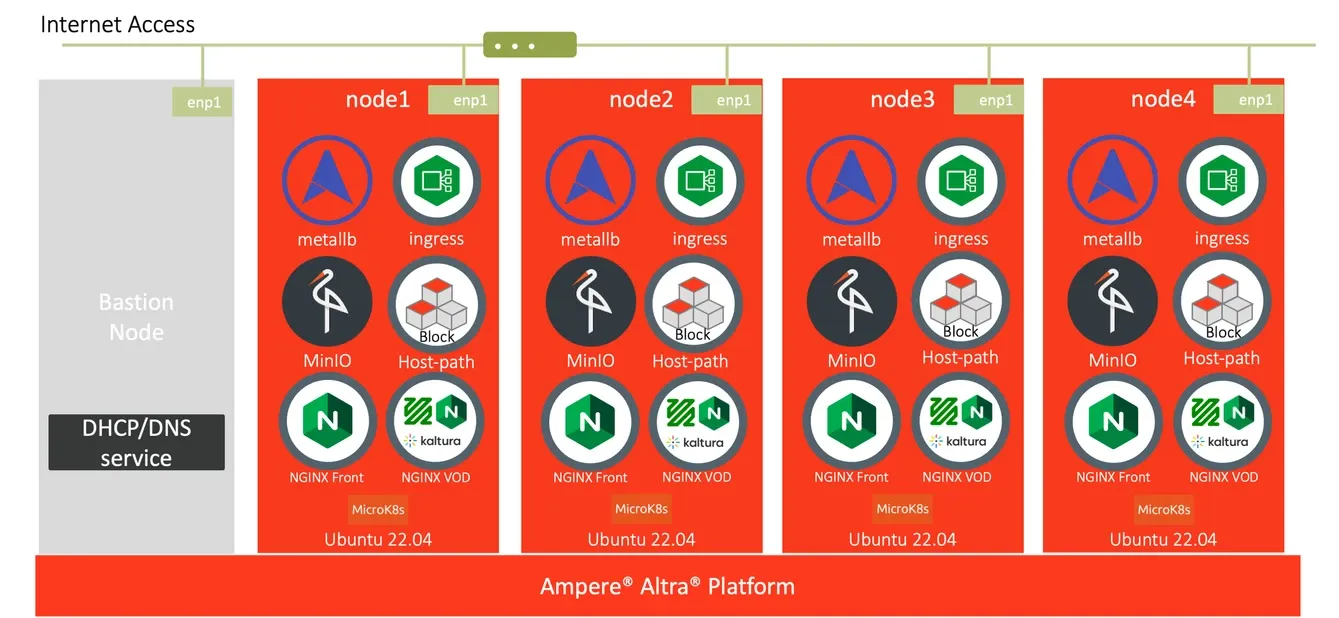 Fig16. VOD workloads on Canonical MicroK8s v1.26
Ampere Computing LLC
4655 Great America Parkway Suite 601
Santa Clara, CA 95054


