
Adding AArch64 to your GitHub CI with GitHub Actions and Ampere® Altra®

If you, like millions of other software developers, use GitHub to manage and share your projects, there’s a good chance that you are already familiar with GitHub’s inbuilt CI tooling, GitHub Actions. This is an easy way to trigger a “build-and-test" cycle from a “git push” to your main branch. In this article, we will walk through using a custom runner on an Ampere A1 instance on Oracle Cloud to build and test your project on AArch64. In a future article, we will build on this introduction to produce a downloadable container artifact automatically in the process.
Let’s get started!
The Project
In order to focus on the tooling here, and not so much on the program, I am going to use a basic project in C, built with make, as a test program. The project will print the numbers from 1 to 100, with each multiple of 3 replaced by “Fizz,” each multiple of 5 replaced by “Buzz,” and multiples of 15 replaced by “FizzBuzz.” We just want something with a build step, and to verify our build for a different architecture, we will use a compiled, rather than interpreted, program.
Getting Started
Before we get started with a custom runner, we are going to make sure that our build works with the default GitHub hosted runners. Following the GitHub Actions quickstart example, we add a simple file ".github/workflows/fizzbuzz.yml" to our repository:
[dneary@fedora workflows]$ cat fizzbuzz.yml
name: Custom GitHub Actions runner Demo
on: [push]
jobs:
Build-and-Run-FizzBuzz:
runs-on: ubuntu-latest
steps:
- run: echo "🎉 The job was automatically triggered by a ${{ github.event_name }} event."
- run: echo "🔎 The name of your branch is ${{ github.ref }} and your repository is ${{ github.repository }}."
- name: Check out repository code
uses: actions/checkout@v3
- run: echo "🖥️ The workflow is now ready to test your code on the runner."
- name: Compile project in repository
run: |
make clean && make
- run: echo "🍏 This job's status is ${{ job.status }}."
- name: Execute command created
run: |
./fizzbuzz
- run: echo "🍏 This job's status is ${{ job.status }}." This very simply checks out the project into a GitHub hosted runner, running Ubuntu 20.04, runs “make clean && make” to build the project, and finally runs the generated executable to test it. By checking the Actions tab of our project, we can see that the action has been picked up by GitHub, and is running after each push:
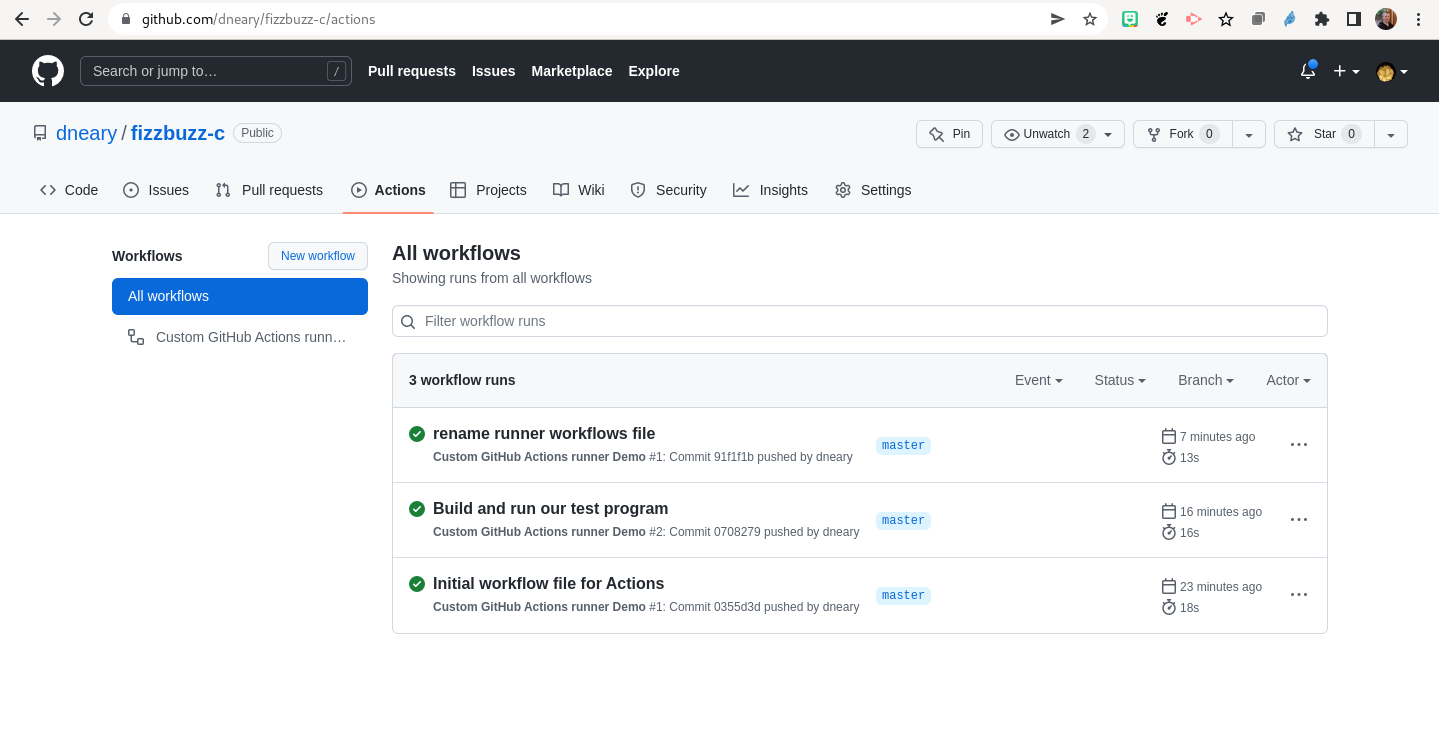
Adding a Custom GitHub Actions Runner
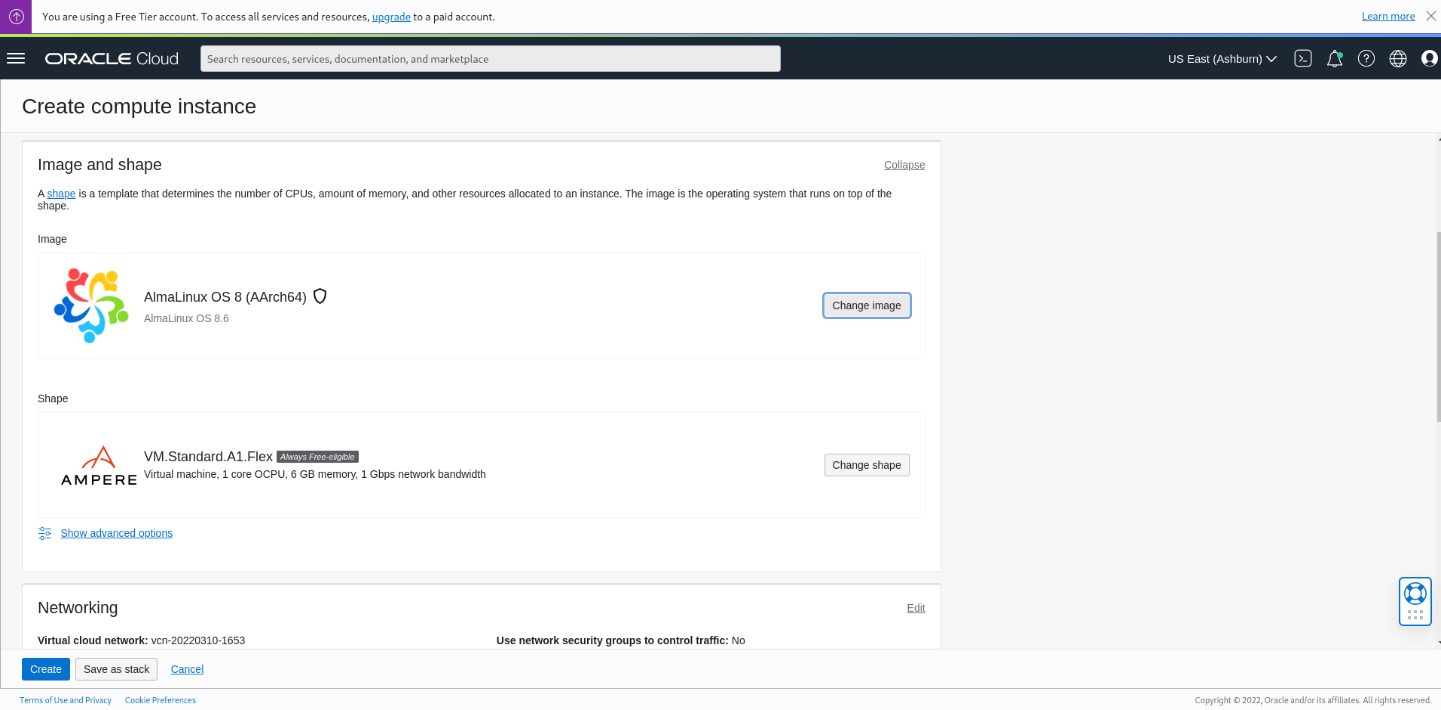
Now that we have a build working on x86, we can add a custom runner for AArch64 builds. We will use an Ampere A1 instance on Oracle Cloud Infrastructure, running AlmaLinux 8.6. To do this, we will create an account on Oracle Cloud, and from the Oracle Cloud Compute dashboard, we will start a new instance, and choose the Ampere “shape,” and from “Partner Images,” the AlmaLinux 8.6 OS image. For convenience, we generate a new key-pair, and save the public and private keys.
Once our instance is running, we will verify that we can connect to it, and that it is running the right distribution:
ssh -i {private key file} opc@{public IP address of instance} </br>
Activate the web console with:
systemctl enable --now cockpit.socket
Last login: Tue Jul 5 21:57:43 2022 from
[opc@custom-github-runner ~]$ uname -a
Linux custom-github-runner 4.18.0-372.9.1.el8.aarch64 #1 SMP Tue May 10 12:17:42 UTC 2022 aarch64 aarch64 aarch64 GNU/Linux
You should see something like the console output above. Now we need to install the GitHub Runner client onto our instance and have it register with GitHub.
Before installing the client, I will note that there are some risks with self-hosted runners: The github.com documentation points out that forks of repositories can be modified to run code you did not authorize on your runner by creating a pull request. As a result, GitHub advises using self-hosted runners only for private repositories.
With that said, let’s get started! To enable the runner for a single repository, navigate to the repository page, and go to “Settings->Actions->Runners.” Once you choose the operating system and architecture, you will see instructions on setting up the runner client.
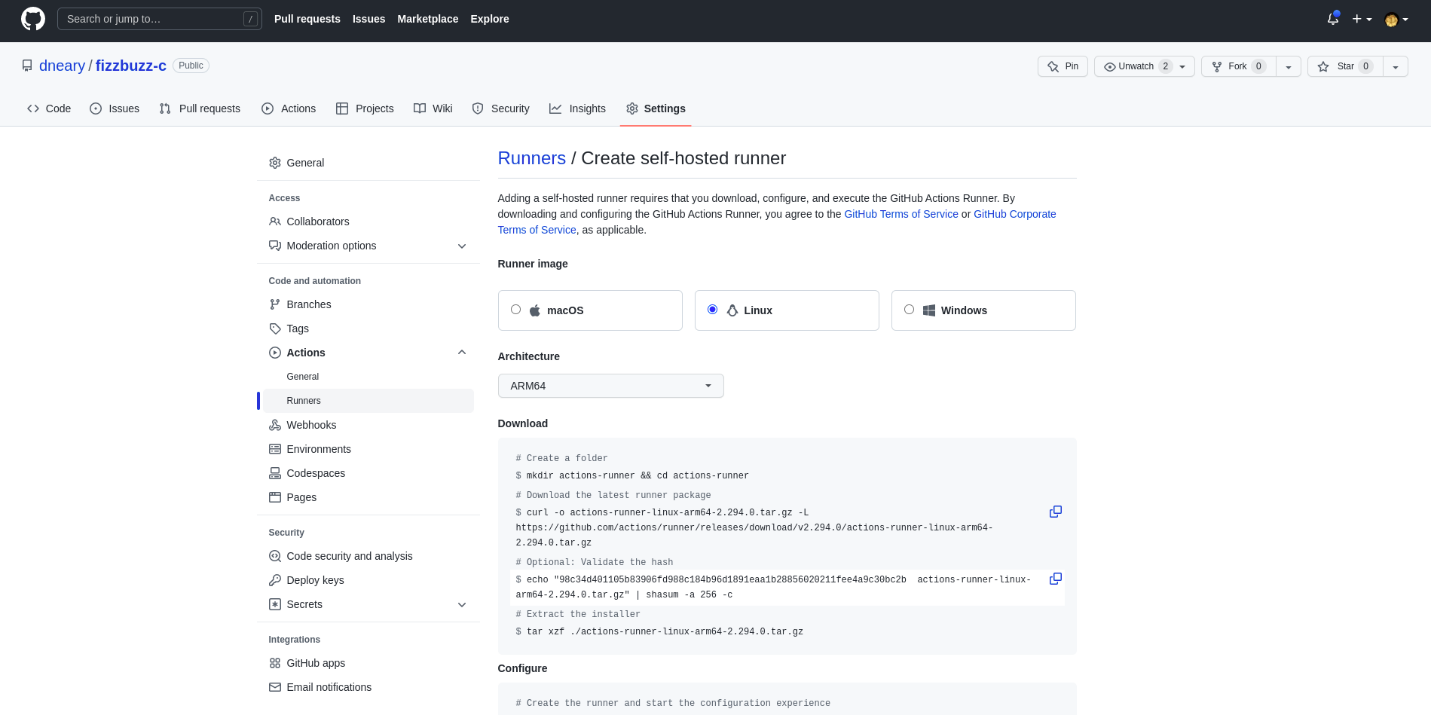
When I followed the instructions above, I needed to slightly modify the command used for the checksum verification. On AlmaLinux and other Red Hat Enterprise Linux derivatives, instead of “shasum -I 256” I ran “sha256sum” instead. The installation process identifies if you are missing dependencies, and a helper script is provided to install them on your distribution, if you are. When you run the configuration script, there are a few questions to answer before starting the runner, I just used the default options.
After registering the runner, we will edit the workflow file to add a run on our self-hosted AArch464 runner to a run of the job. We use the “build matrix” feature of GitHub Actions to run on multiple OSes with each commit. The “Build-and-Run-FizzBuzz" job now looks like this:
jobs:
Build-and-Run-FizzBuzz: </br>
strategy: </br>
matrix: </br>
os: [ubuntu-latest, [self-hosted, linux, ARM64]] </br>
runs-on: ${{ matrix.os }} </br>
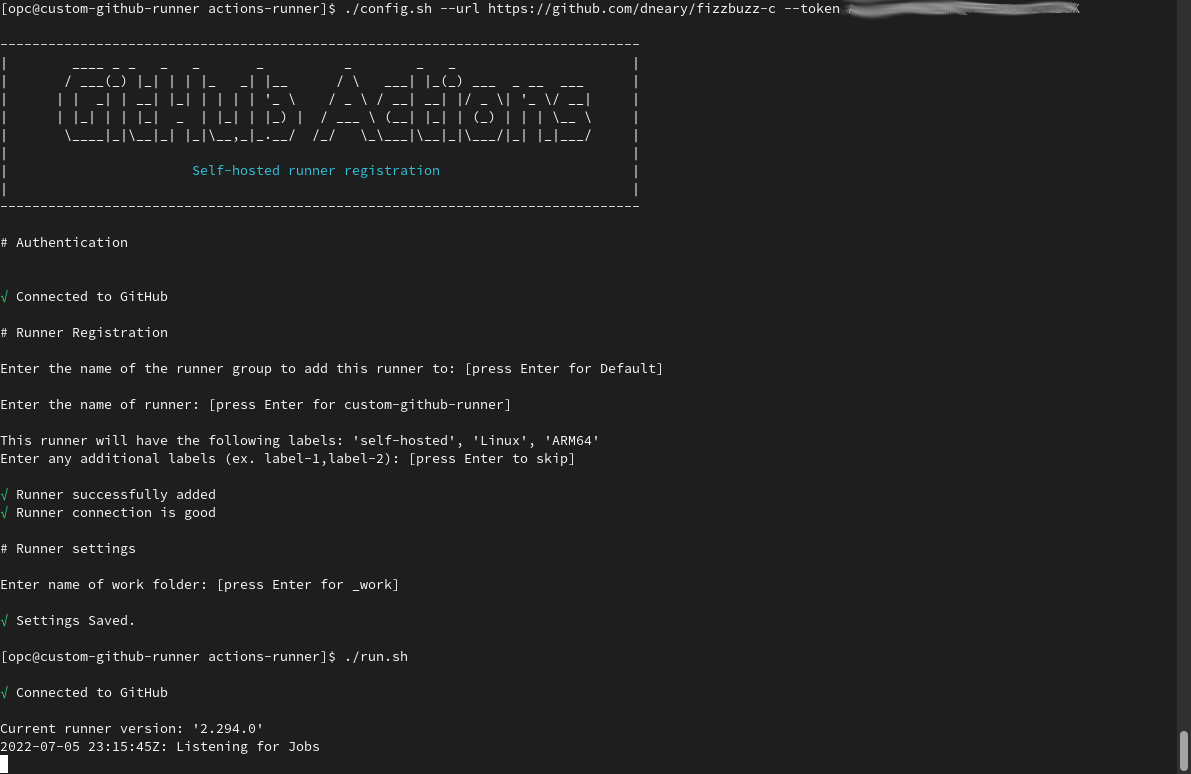
… We leave the rest of the file unchanged. And sure enough, on the console of our runner, we can see the job executing:
2022-07-05 23:15:45Z: Listening for Jobs
2022-07-05 23:35:44Z: Running job: Build-and-Run-FizzBuzz (self-hosted, linux, ARM64)
2022-07-05 23:35:49Z: Job Build-and-Run-FizzBuzz (self-hosted, linux, ARM64) completed with result: Failed
We have progress! Our build failed, but this is new! The Actions page shows us what the issue is:
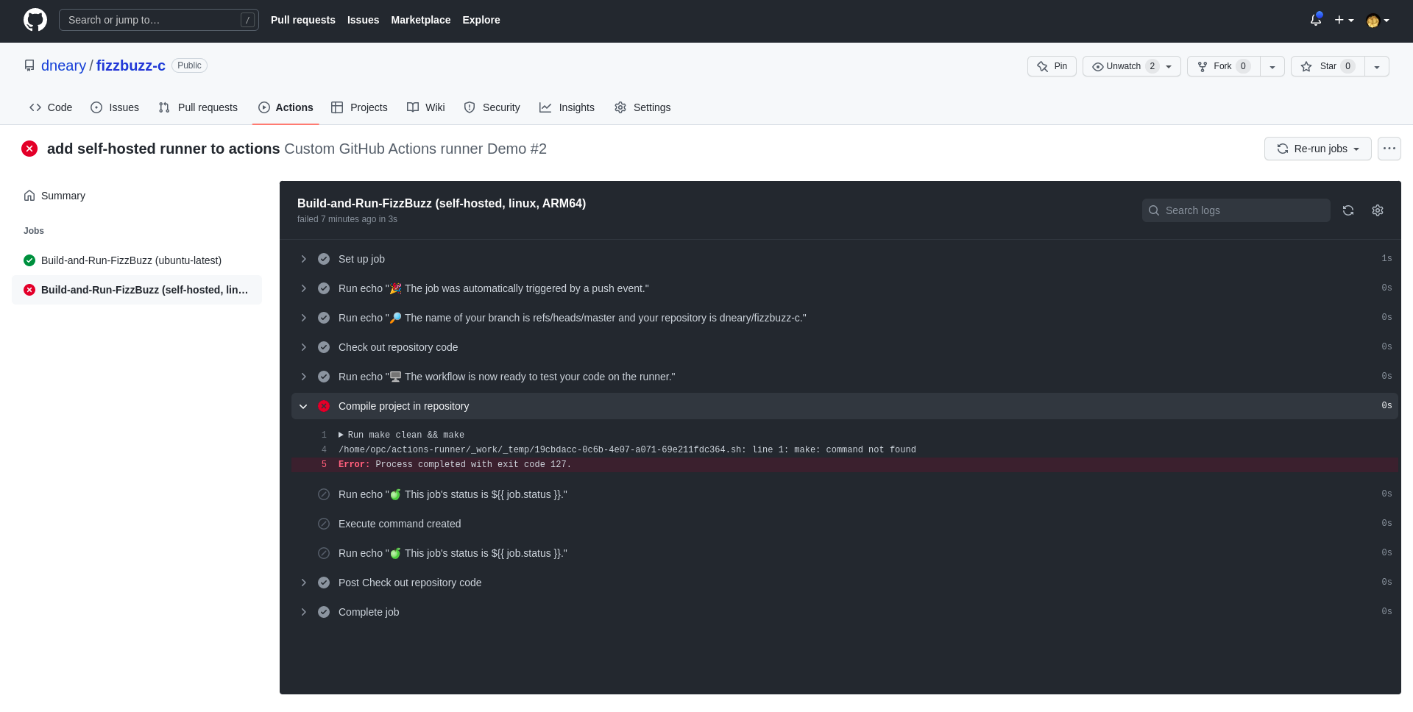
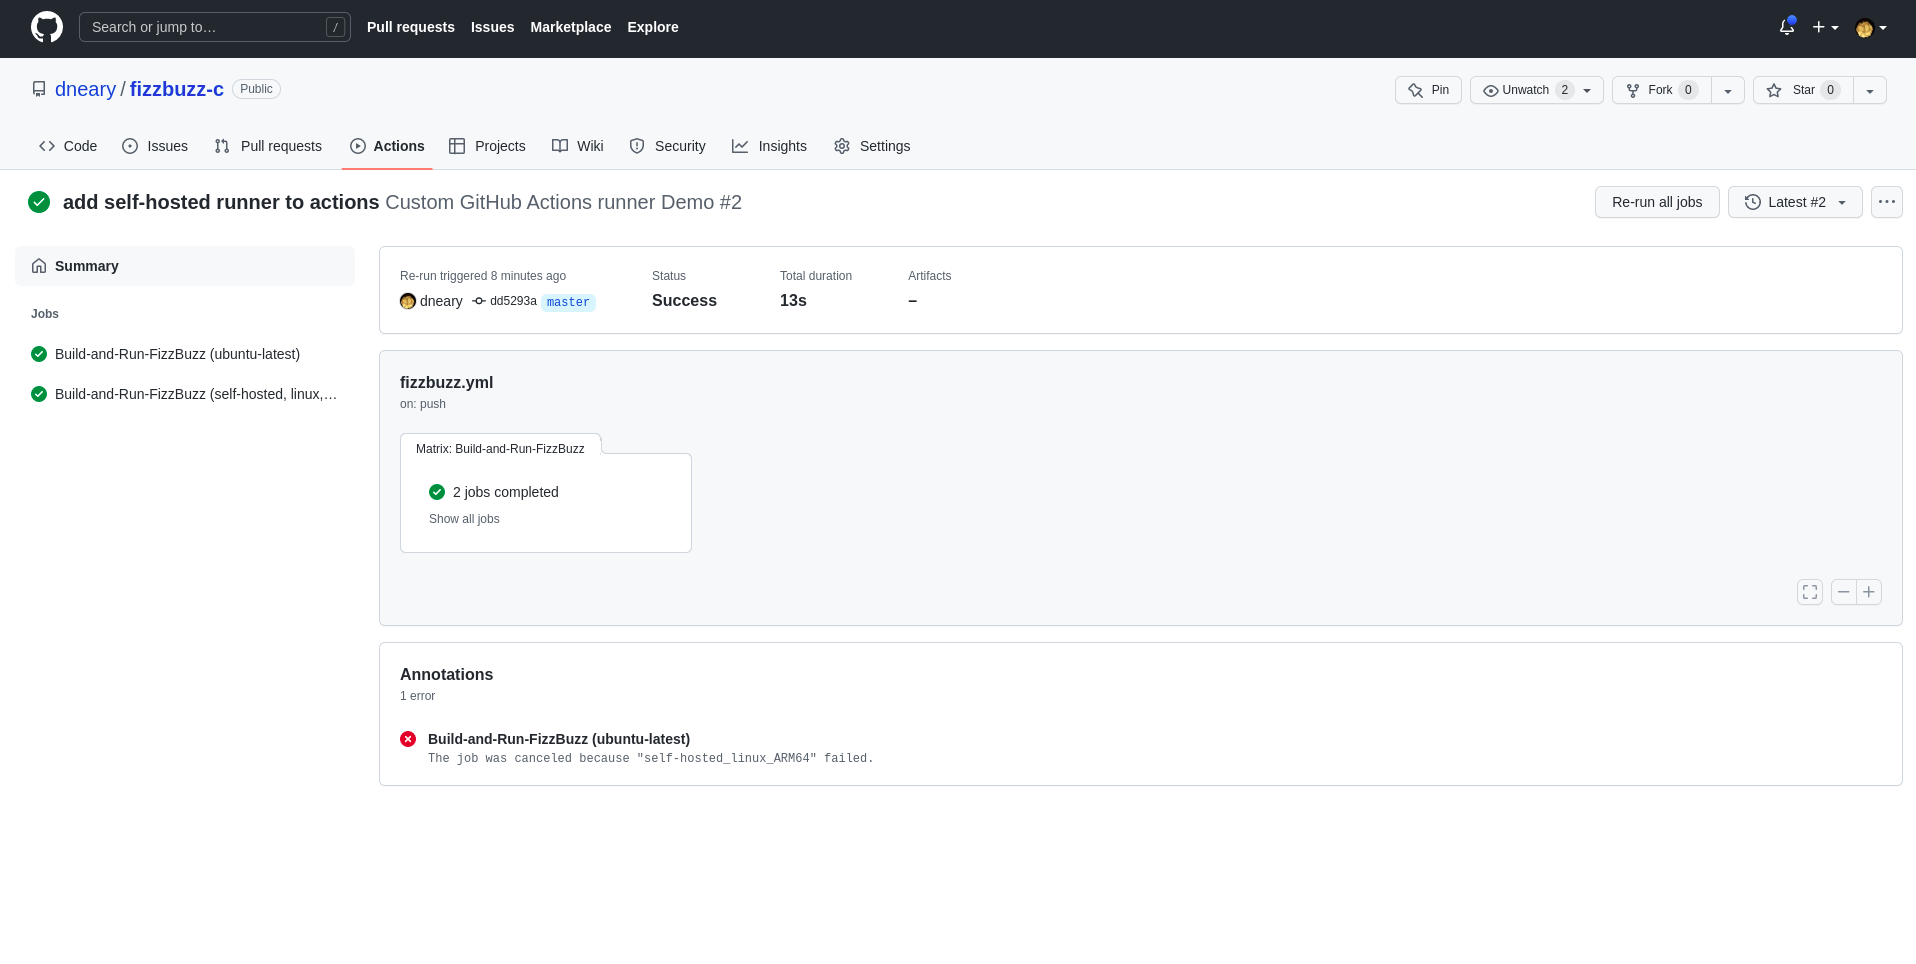
We forgot to install the necessary developer tools in our runner. After installing make, GCC, and all their dependencies, we can rerun our failed jobs from the Actions dashboard, and after this small adjustment... our build and test run succeeds!
What’s next?
The next steps will be to use containers with developer tools pre-installed, as our build nodes. This will help us avoid pesky issues of missing developer tools on our host. We will also want to build a multi-arch container with our executable pre-installed, and upload it to a container registry, as part of our build process. But that’s all for today!
Ampere Computing LLC
4655 Great America Parkway Suite 601
Santa Clara, CA 95054


