
Introducing OpenMandriva on OCI Ampere A1 with Terraform

Ampere Computing is committed to providing our customers with the widest range of options possible for running cloud native workloads on Ampere® Altra® Multi Core Server Processors. These options include the choice of operating systems, such as OpenMandriva.
The roots of the OpenMandriva project are in Mandrake Linux and its traditions. The OpenMandriva community is passionate about free software, working together, and as a worldwide community, they make technical and strategic decisions in a collaborative manner. The OpenMandriva community has worked hard to achieve the “it just works” experience for Aarch64 and Ampere platforms and developers who choose to build and run solutions.
OpenMandriva is now available within Oracle’s Cloud Infrastructure (OCI) for use on OCI Ampere A1 shapes. Like other Linux distributions, OpenMandriva supports Cloud-Init for the configuration of metadata for cloud instances. This allows you to automate your OpenMandriva workloads, when deploying to https://openmandriva.org/ a cloud platform.
OpenMandriva tends to pull changes in quickly from upstream, so you will have all the latest and greatest packages available. This also includes the kernel. Spoiler alert, they are already testing with Linux kernel 6.0 on Ampere-based platforms.
We were recently able to donate an Ampere® Mt. Collins platform with the dual socket configuration using Ampere Altra® and Altra® Max processors, to accelerate the development of the distribution on Aarch64, and the distribution has already seen some positive results.
“Building libreoffice took it 2 hours, 8 minutes compared to 4 hours, 4 minutes on the Threadripper. […] Now, for the first time, we have Aarch64 packages churned out at a much faster rate than their x86_64 and znver1 counterparts - to the extent that I was curious about running an x86_64 environment in qemu on the Altra and running an x86_64 builder in there.” For those unfamiliar with OpenMandriva Linux uses ‘dnf’, similar package management tooling to Fedora or Red Hat based distributions and includes open-source software stacks available for installation easily.
Requirements
In this tutorial, we will use the DevOps tool Terraform to launch an OpenMandriva virtual machine on Oracle OCI Ampere A1 compute platform while passing in some metadata to configure it. Before you start:
- Install Terraform on your system. (If you are using OpenMandriva on your system as well, simply dnf install terraform).
- Sign up to Oracle OCI “Always Free” Account and find your credentials for API use
Using the oci-ampere-a1 terraform module
The oci-ampere-a1 terraform module code supplies the minimal amount of information to quickly have working Ampere A1 shapes on OCI “Always Free”. It has been updated to include the ability to easily select OpenMandriva as an option. To keep things simple from an OCI perspective, the root compartment will be used (compartment id and tenancy id are the same) when launching any shapes. Additional tasks performed by the oci-ampere-a1 terraform module:
- Operating system image id discovery in the user region.
- Dynamically creating sshkeys to use when logging into the shape.
- Dynamically getting region, availability zone and image id.
- Creating necessary core networking configurations for the tenancy
- Rendering metadata to pass into the Ampere A1 shape.
- Launch 1 to 4 Ampere A1 shapes with metadata and ssh keys.
- Output IP information to connect to the shape.
Configuration with terraform.tfvars
We will quickly configure Terraform using a terraform.tfvars in the project directory.
Please note that Compartment OCID are the same as Tenancy OCID for Root Compartment. The following is an example of what terraform.tfvars should look like:
tenancy_ocid = "ocid1.tenancy.oc1..aaaaaaaabcdefghijklmnopqrstuvwxyz1234567890abcdefghijklmnopq" user_ocid = "ocid1.user.oc1..aaaaaaaabcdefghijklmnopqrstuvwxyz0987654321zyxwvustqrponmlkj" fingerprint = "a1:01:b2:02:c3:03:e4:04:10:11:12:13:14:15:16:17" private_key_path = "/home/bwayne/.oci/oracleidentitycloudservice_bwayne-08-09-14-59.pem"
For more information regarding how to get your OCI credentials please refer to the following reading material:
Creating ~/.oci/config
After setting up the API Key Authentication, still on the API Keys page in the OCI console, click the 3 dots next to the API key you’ve created, and select “View Configuration file”.
Copy the generated configuration to a file called ~/.oci/config (creating the ~/.oci directory first if necessary), and replace “path to your private keyfile” with the file name of your private key (~/.oci/oci_api_key.pem if you’ve stayed with the suggestions in the documentation).
Creating the main.tf
To use the terraform module you must open your favorite text editor and create a file called main.tf. Copy the following code to supply a custom cloud-init template:
variable "tenancy_ocid" {} variable "user_ocid" {} variable "fingerprint" {} variable "private_key_path" {} locals { cloud_init_template_path = "${path.cwd}/cloud-init.yaml.tpl" } module "oci-ampere-a1" { source = "github.com/amperecomputing/terraform-oci-ampere-a1" tenancy_ocid = var.tenancy_ocid user_ocid = var.user_ocid fingerprint = var.fingerprint private_key_path = var.private_key_path # Optional # oci_vcn_cidr_block = "10.2.0.0/16" # oci_vcn_cidr_subnet = "10.2.1.0/24" oci_os_image = "openmandriva" instance_prefix = "ampere-a1-openmandriva" oci_vm_count = "1" ampere_a1_vm_memory = "24" ampere_a1_cpu_core_count = "4" cloud_init_template_file = local.cloud_init_template_path } output "oci_ampere_a1_private_ips" { value = module.oci-ampere-a1.ampere_a1_private_ips } output "oci_ampere_a1_public_ips" { value = module.oci-ampere-a1.ampere_a1_public_ips }
Creating a cloud init template.
Using your favorite text editor create a file named cloud-init.yaml.tpl in the same directory as the main.tf you previously created. Copy the following content into the text file and save it. (Obviously, you can adjust the list of extra packages you want to install. task-devel is a metapackage that pulls in C and C++ compilers and headers for some basic libraries.)
#cloud-config package_update: true package_upgrade: true packages: - tmux - rsync - git - curl - bzip2 - python - lib64python-devel - python-pip - task-devel - bzip2 - screen groups: - ampere system_info: default_user: groups: [ampere] runcmd: - echo 'OCI Ampere OpenMandriva Example' >> /etc/motd
Running Terraform
Executing terraform is broken into three commands. First you must initialize the terraform project with the modules and necessary plugins to support proper execution. The following command will do that:
terraform init
Below is output from a ‘terraform init’ execution within the project directory.

After ‘terraform init’ is executed it is necessary to run ‘plan’ to see the tasks, steps and objects that will be created by interacting with the cloud APIs. Executing the following from a command line will do so:
terraform plan
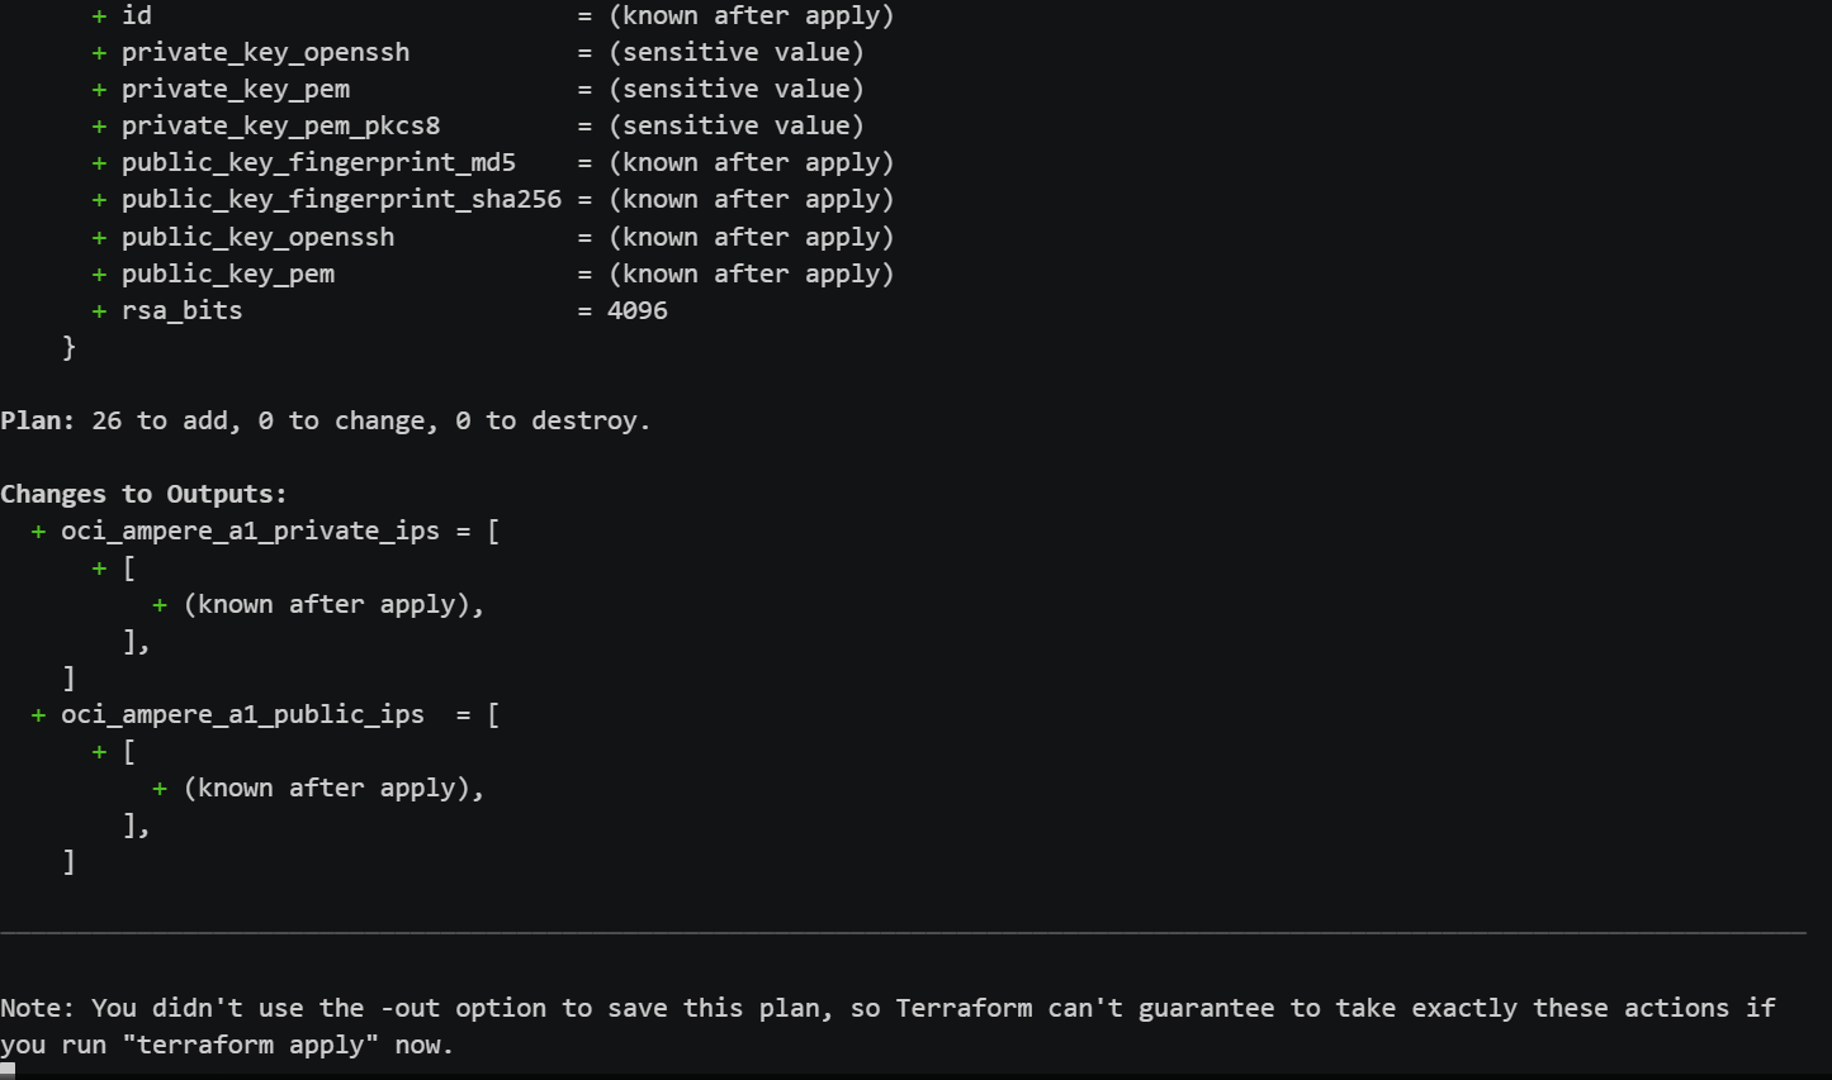
The output from a ‘terraform plan’ execution in the project directory will look like the following:
Finally, you will execute the ‘apply’ phase of the terraform execution sequence. This will create all the objects, execute all the tasks, and display any output that is defined. Executing the following command from the project directory will automatically execute without requiring any additional interaction:
terraform apply -auto-approve
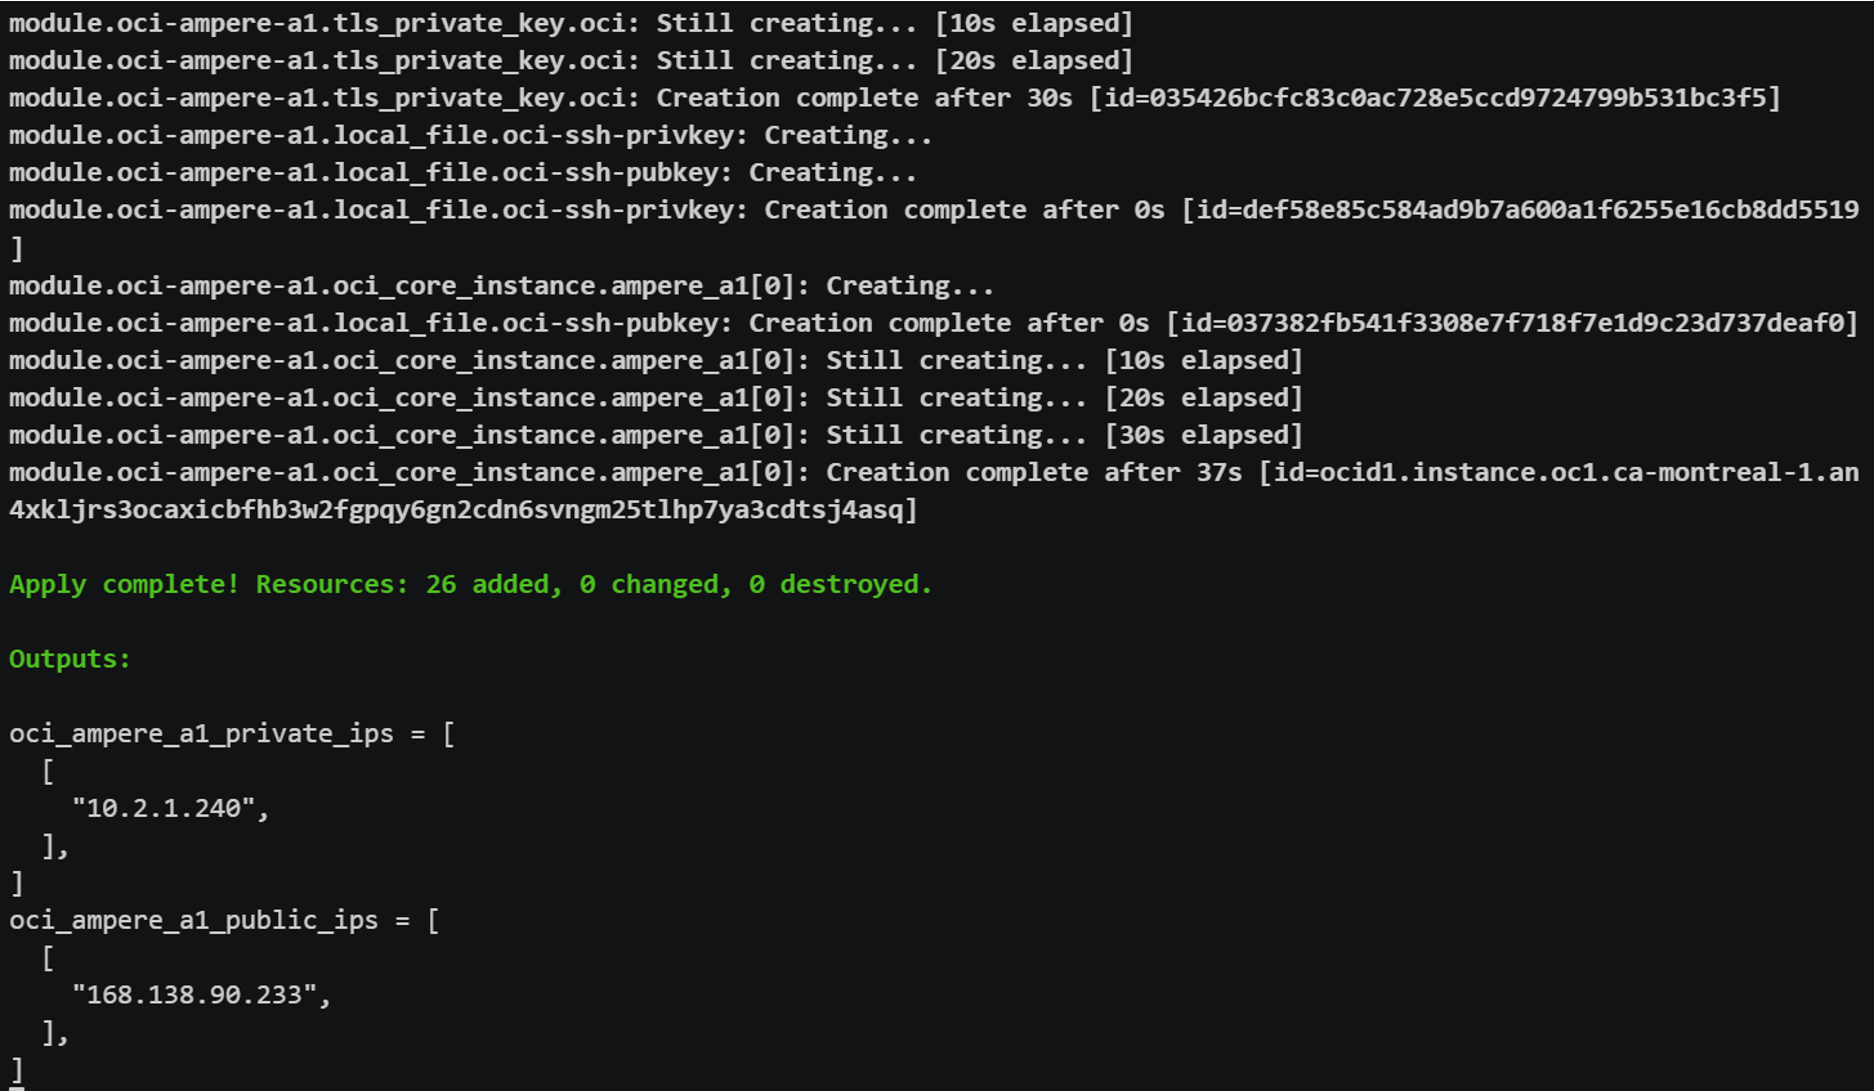
The following is an example of output from a ‘apply’ run of terraform from within the project directory:
Logging in
Next you will need to login with the dynamically generated sshkey that will be sitting in your project directory. The default user for OpenMandriva shapes is ‘omv.’ To log in take the IP address from the output above and run the following ssh command:
ssh -i ./oci-is_rsa omv@
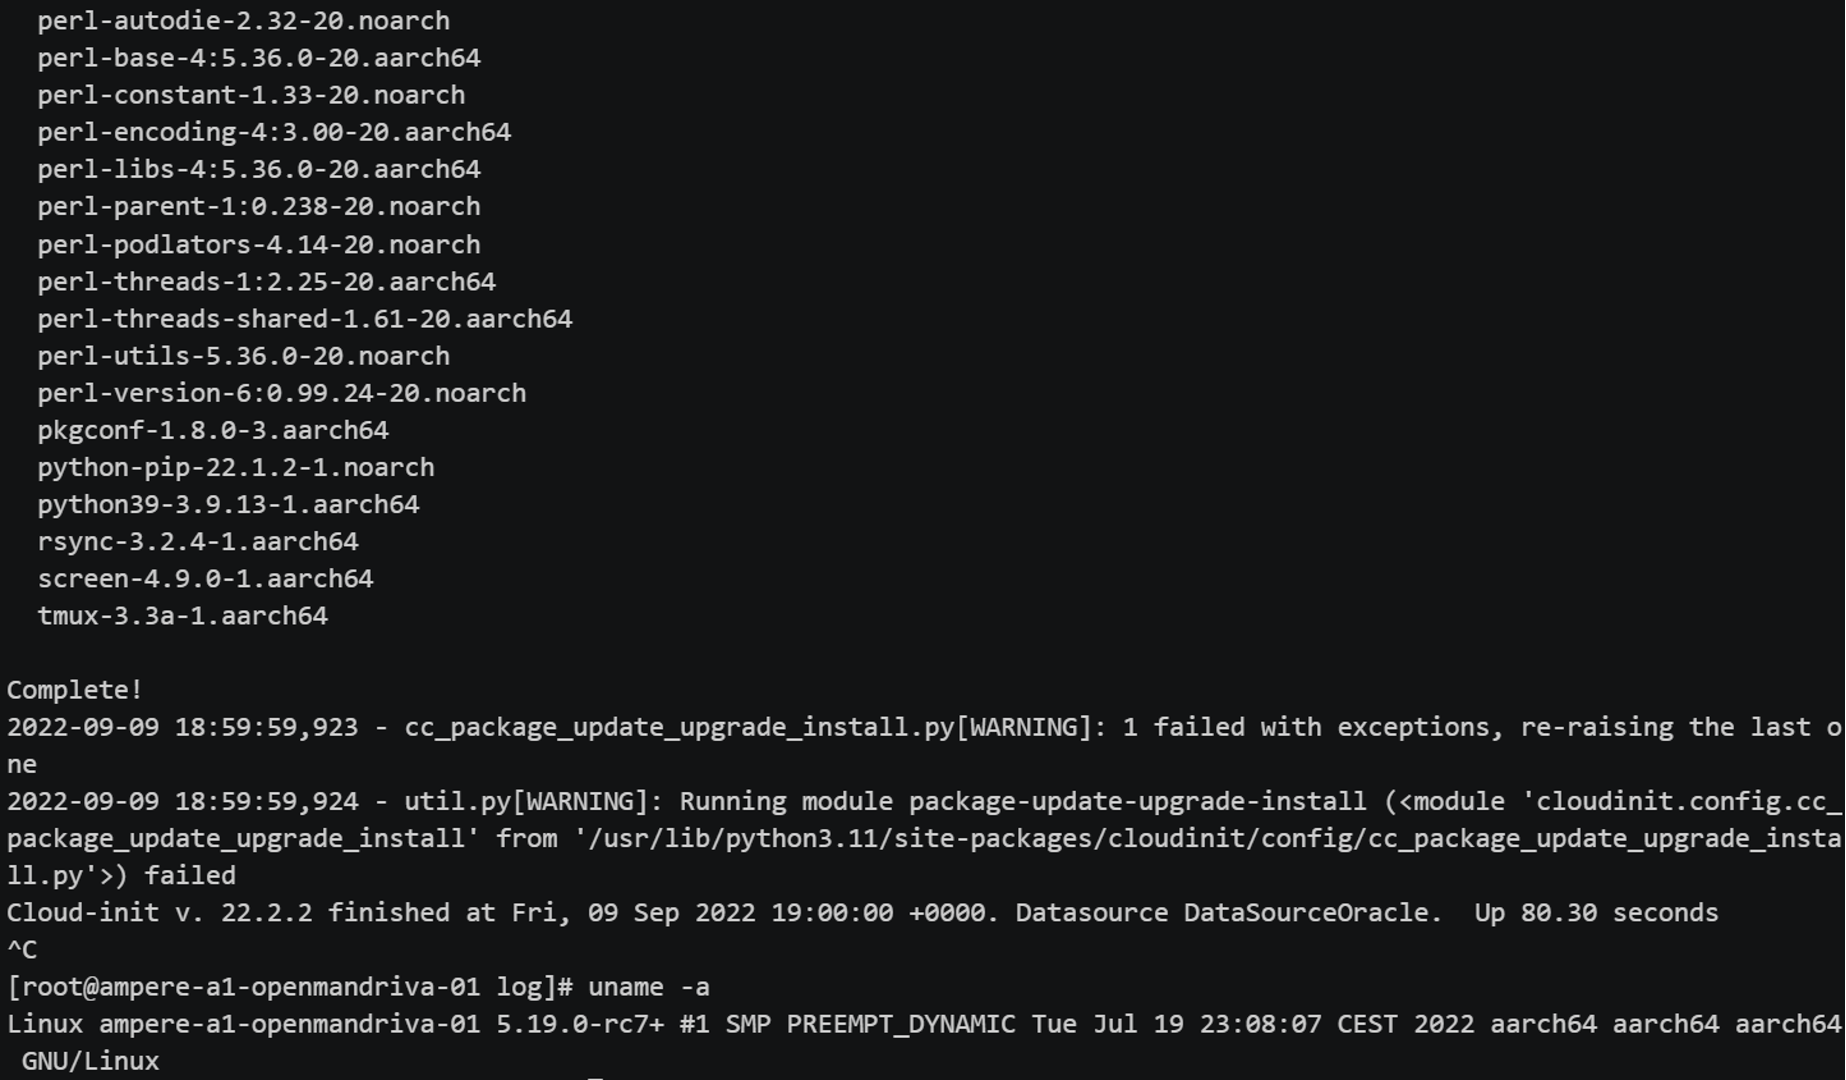
You should be automatically logged in after running the command. The following is output from sshing into an shape and then running ‘sudo cat /var/log/messages’ to verify cloud-init execution and package installation:
Destroying when done
You now should have a fully running and configured OpenMandriva shape. When finished, you will need to execute the ‘destroy’ command to remove all created objects in a ‘leave no trace’ manner. Execute the following from a command to remove all created objects when finished:
terraform destroy -auto-approve
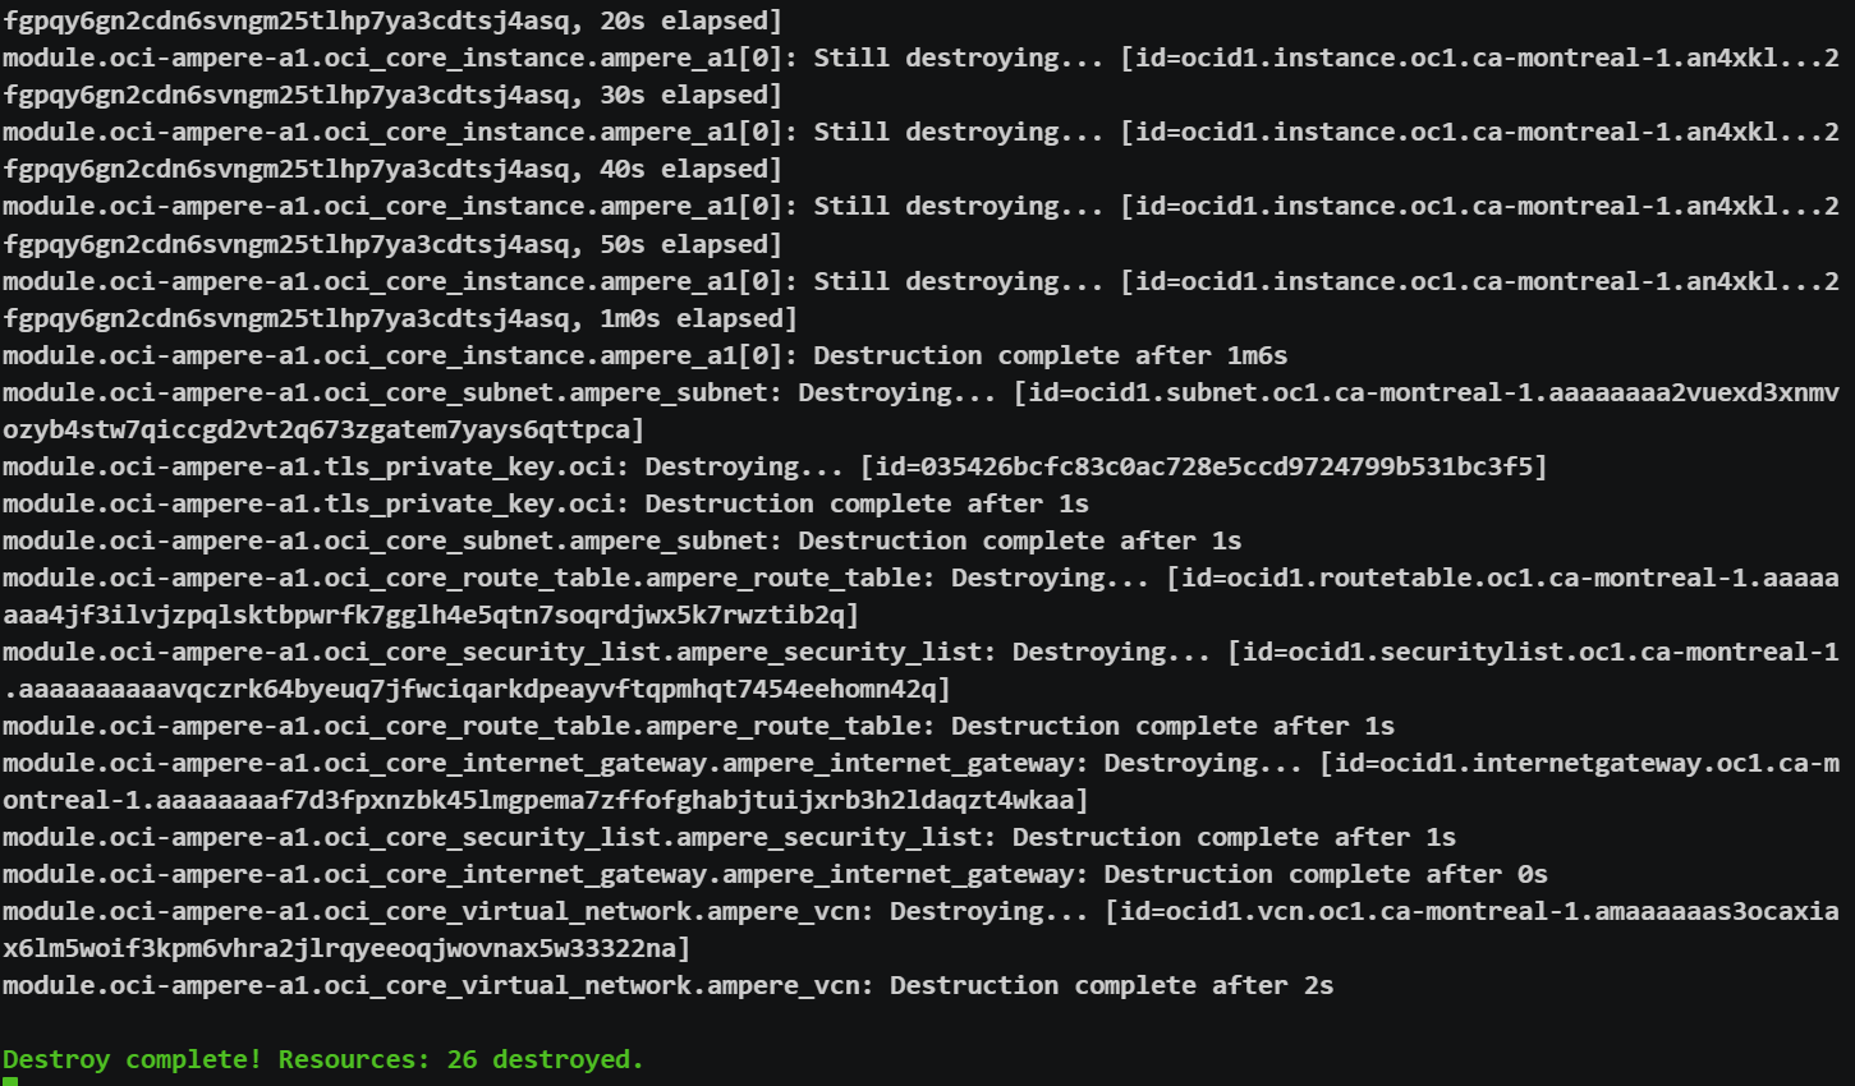
The following is an example output of the ‘terraform destroy’ when used on this project.
Modifying the cloud-init file and then performing the same workflow will allow you to get interacting quickly. At this point you should know how to quickly get automating using OpenMandriva with Ampere’s multi core processors on the Cloud!
Related Content
Ampere Computing LLC
4655 Great America Parkway Suite 601
Santa Clara, CA 95054


