

Creating Ampere AI Virtual Machines on Google Cloud
Tutorial
Creating Ampere AI Virtual Machines on Google Cloud
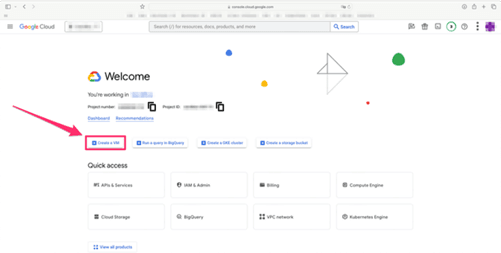
- In Google Cloud dashboard please click on “Create a VM” field
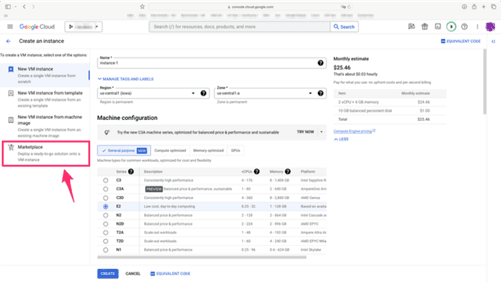
- Select "Marketplace"
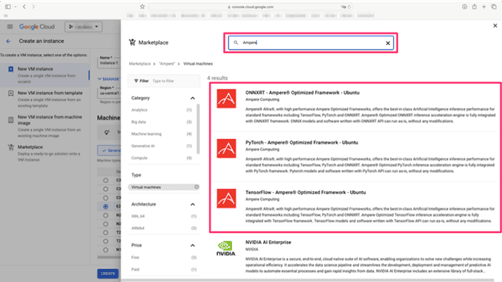
- Type in “Ampere” into the search box and then select your VM image of choice
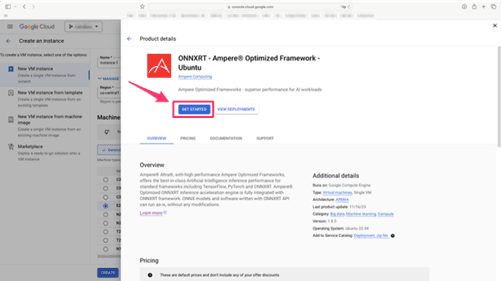
- Click on “GET STARTED” to deploy the VM image
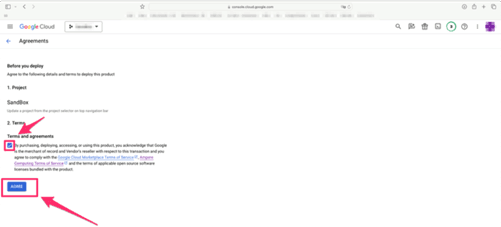
- Accept the terms and conditions by ticking the box and then clicking on “AGREE”
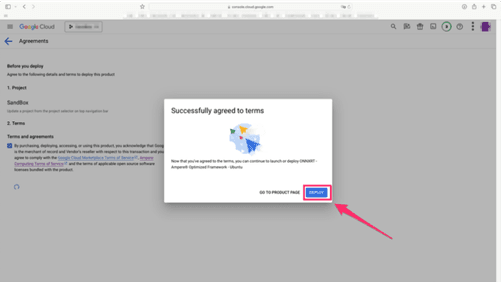
- In the next window select “DEPLOY"
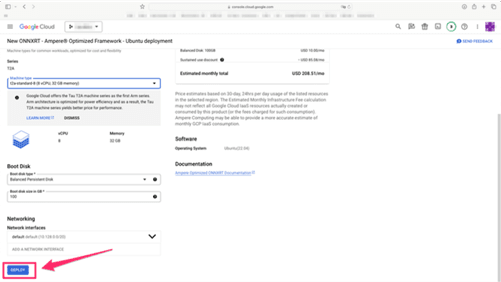
- Name the VM to your liking by modifying the highlighted field
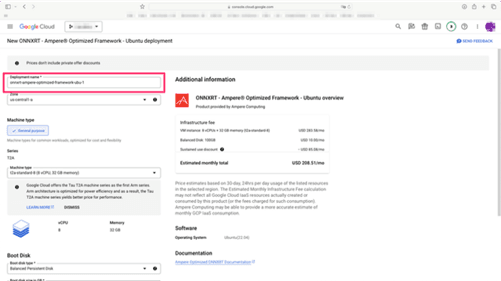
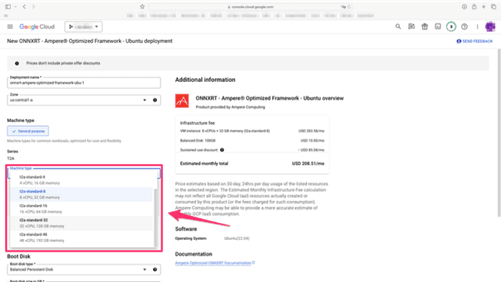
- Select machine type that will match your requirements.
- Scroll down and click on “DEPLOY"
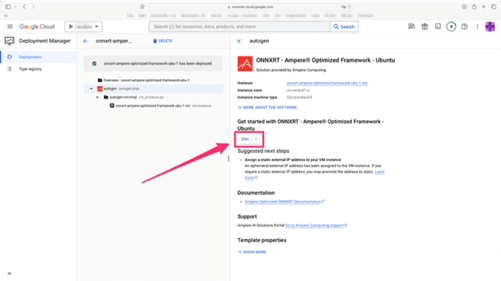
- Once the VM deploys successfully, click on “SSH” field to access your newly created VM
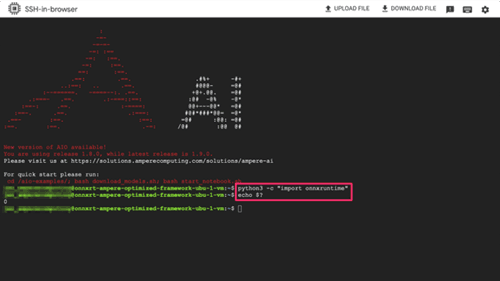
- Congratulations! You have successfully deployed VM with your chosen Ampere optimized framework. You can verify the image by importing your AI library in Python and checking the exit code value
Related Content
Created At : February 14th 2024, 5:55:12 pm
Last Updated At : November 5th 2024, 7:14:52 pm
Ampere Computing LLC
4655 Great America Parkway Suite 601
Santa Clara, CA 95054


| | |
© 2025 Ampere Computing LLC. All rights reserved. Ampere, Altra and the A and Ampere logos are registered trademarks or trademarks of Ampere Computing.
This site runs on Ampere Processors.