

Deploy Red Hat OpenShift 4.11 3-node Compact Cluster
with Assisted Installer on Ampere Altra platform
Overview
This tutorial explains how to deploy Red Hat OpenShift Container Platform 4.11 with Assisted Installer on Ampere Altra Platform. We will install Rook Ceph Operator for block storage, shared filesystems, and Object storage. Estimated time to complete this tutorial: 1 hour.
Cloud native computing is an approach in software development that utilizes cloud computing to "build and run scalable applications in modern, dynamic environments such as public, private, and hybrid clouds”.1 It’s growing rapidly on many kinds of workloads and use cases appearing in a large number of areas with all kinds of physical footprints. Developing and deploying applications in cloud native way is increasingly being adopted from small business to enterprises. At Ampere, we observe the trend of infrastructure providers and application owners wanting a consistent workload lifecycle and predictable performance across their business. We offer Ampere Altra CPU family with the values for cloud native workloads with High Availability (HA).
- High core counts in single socket processors
- Predictability for less jitter and lower latency, while protecting against noisy neighbor effects in the processor
- Linear Scalability to maximize heavily loaded server performance
- The most sustainable, low power architecture for power sensitive edge locations and more efficient data centers
- Scale-out computational horsepower with optimized video codecs for high performance video transcoding
The combination of Ampere Altra processors and Red Hat OpenShift 3-node Compact Cluster will be a great match for the scenarios below:
- CDN Edge cloud
- Video Service Providers
- Digital Service Providers
- Small & Medium Business who develop cloud native applications
- 5G User Plane Function (UPF)
Network overview for OpenShift 3-node Compact cluster on Ampere Altra platform
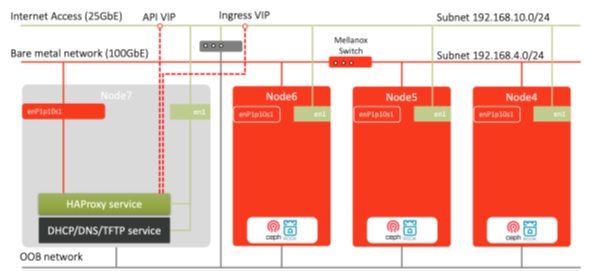
Prerequisites
- A DNS service like Bind (named) runing on the bastion node
- A HAProxy service as the external load balancer on the bastion node
Instructions
The following is the step-by-step guide to install OpenShift Container Platform 4.11 with Assisted Installer on Ampere Altra Platform:
1 - Login to http://cloud.redhat.com and click “OpenShift”, then click “Data Center” for“Bare Metal (Arm64)”, and “Create Cluster” for new cluster
2 - Click “Assisted Installer”
![]() Figure A-1
Figure A-1
3 - Provide domain name, cluster name and IP addresses for each node (if the static IP address option was chosen) for the cluster details.
- We used a local DNS for managing domain names under “hhii.amp” and use “ocp4” as the cluster name.
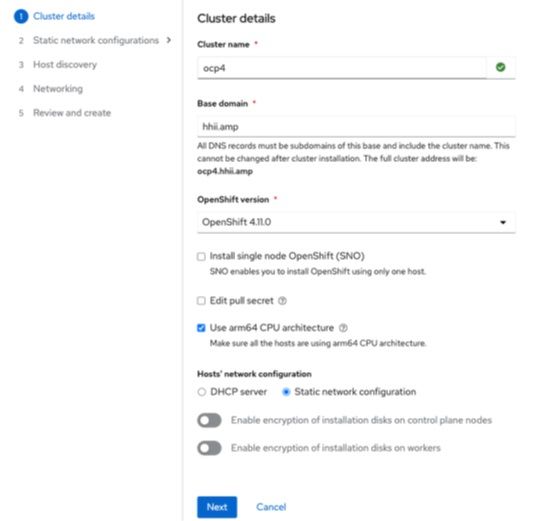 Figure A-2
- Enter the static IP address range, default gateway and DNS
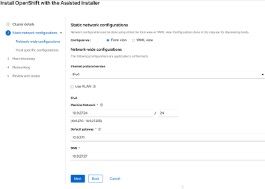 Figure A-3
- Enter all 3 hosts' MAC addresses and assigned IP addresses on the Internet-access NICs.
 Figure A-4
- When all 3 nodes' static network configurations are ready, click “Next” button to move to Step 3
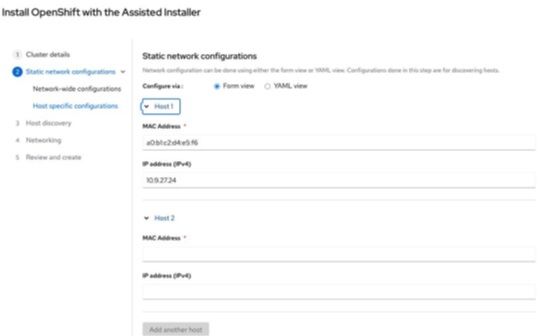 Figure A-5
- Click “Add host” on Step 3 Host discovery.
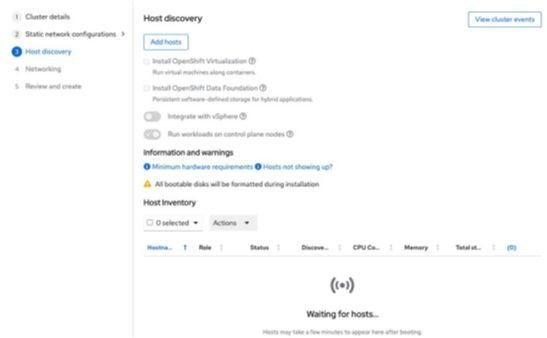 Figure A-6
- The web console will prompt a diagram for generating Discovery ISO image forprovisioning the target node. For provisioning bare metal, we choose “Full imagefile”.
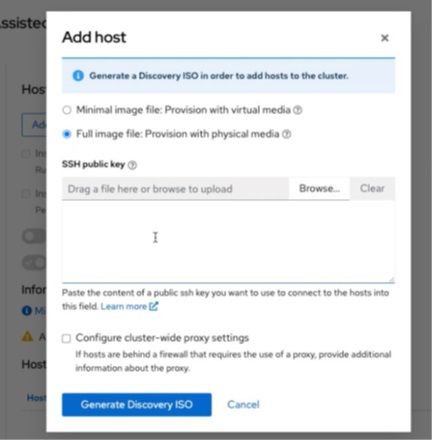 Figure A-7
- Drag an SSH public key file or enter the content of an SSH public key from thebastion node to access the target node later.Then click “Generate Discovery ISO” button, the web console will embed the SSHkey into the Discovery ISO image.
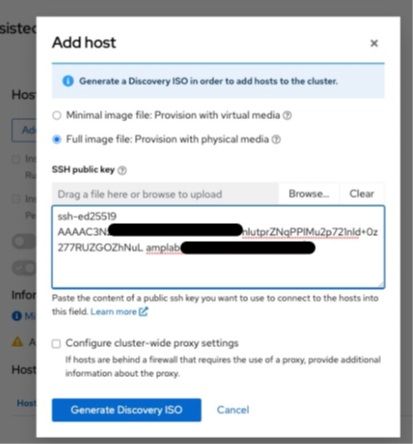 Figure A-8
- The web console will prompt the ISO URL or the wget commend for downloadingDiscovery ISO image.
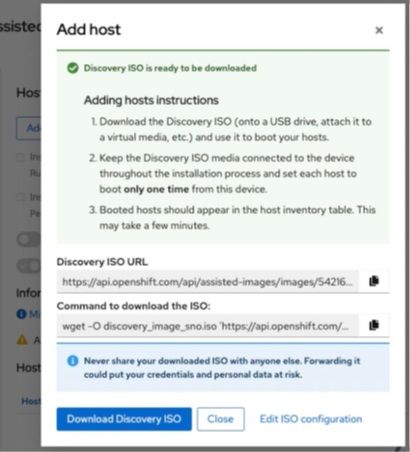 Figure A-9
4 - Prepare and download Discovery ISO image for OCP 4.11
$ wget -O discovery_image_ocp4.iso ['https://api.openshift.com/api/assisted-images/images/[TOKEN1]?arch=arm64&image_token=[IMAGE_TOKEN]&type=full-iso&version=4.11']('https://api.openshift.com/api/assisted-images/images/[TOKEN1]?arch=arm64&image_token=[IMAGE_TOKEN]&type=full-iso&version=4.11')
5 - Clean up the nodes for OCP 4.11 with Red Hat Enterprise Linux CoreOS Live CD. This stepis optional but needed if your hardware has been used for other projects or provisionedwith OS. Assume there are 9 NVMe drives (1x M.2 for OS and 8x U.2 for data storage)per node.
a.Download the live CD
$ wget "https://mirror.openshift.com/pub/openshift-v4/arm64/dependencies/rhcos/4.11/latest/rhcos-live.aarch64.iso"
b.Mount Live CD with KVM on BMC. Once the system is loaded, enter the scriptbelow to clean up the drives, then power-off the system.
$ for DISK in "/dev/nvme0n1" "/dev/nvme1n1" "/dev/nvme2n1" "/dev/nvme3n1" "/dev/nvme4n1" "/dev/nvme5n1" "/dev/nvme6n1" "/dev/nvme7n1" "/dev/nvme8n1" ; do echo $DISK && \ sgdisk --zap-all $DISK && \ dd if=/dev/zero of="$DISK" bs=1M count=100 oflag=direct,dsync && \ blkdiscard $DISK done $ poweroff
6 - Mount the Discovery ISO image for OCP 4.11 with KVM on BMC on the target node.
a. Click “Browser File” button on the top-right of KVM browser
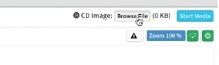 Figure A-10. Mount Discovery ISO image
b. The KVM dialog will prompt a window dialog for the target ISO image in adirectory, then choose discovery_image_sno.iso
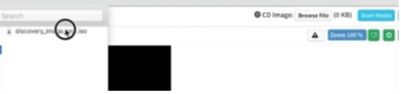 Figure A-11. Choose the ISO image
c. Click “Start Media” button to mount ISO image to the target node
 Figure A-12, Start to mount the ISO image
7 - We use ipmitool SOL function to monitor the installation
ipmitool -H [BMC IP address] -I lanplus -U [username] -P [password] sol activate
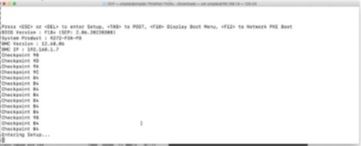 Figure A-13, IPMITool SOL function shows the node’s states
8 - When all 3 nodes are loaded with Red Hat Enterprise Linux CoreOS (RHCOS) and updatetheir status to http://cloud.redhat.com, the Assisted Installer web page will also showthe status for each phase on the cluster.
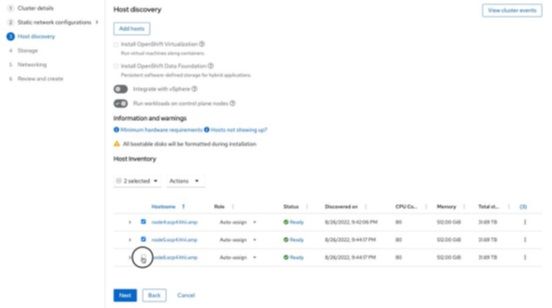 Figure A-14
9 - The page will show all storage devices and select one of them as boot drive for RHCOS,then click “Next” button
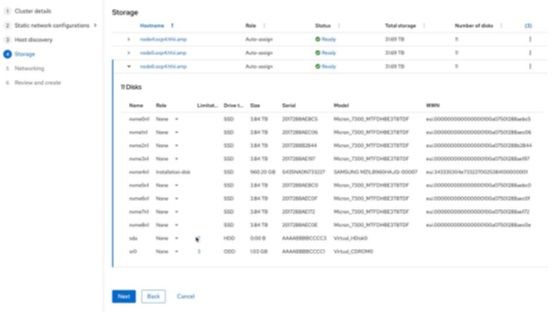 Figure A-15
10 - It shows the network information as “User-Managed Networking” including machinenetwork. Click the “Next” button to move to the next step
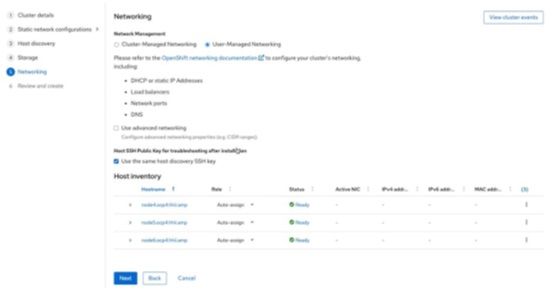 Figure A-16
11 - Review the OpenShift cluster configuration and then click “Install cluster” to start theAssisted Installation.
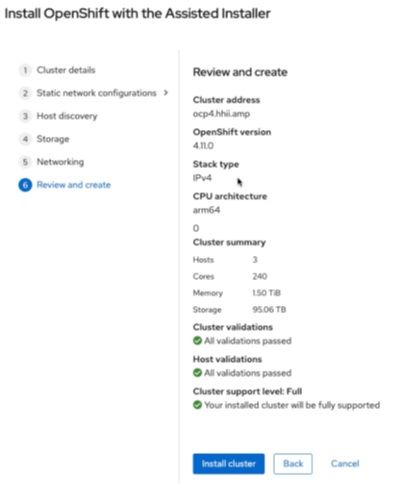 Figure A-17
12 - The Assisted Installer page shows the nodes are preparing for installation as the role of“Control Plane node, Worker”, node5 also labels the role of “bootstrap”
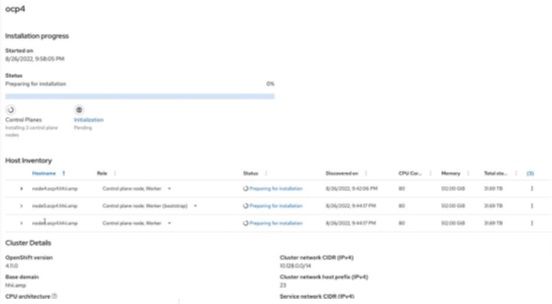 Figure A-18
13 - You can click the link of “Status” to find out which step the Assisted Install is working on
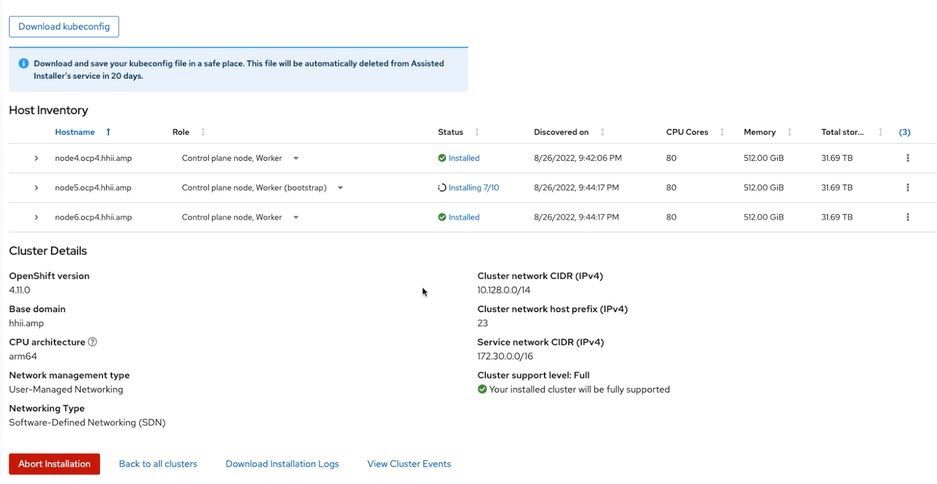 Figure A-19
14 - After 35 ~ 65 minutes (depending on the Internet bandwidth), the OpenShift 4.11 3-node compact cluster is ready.
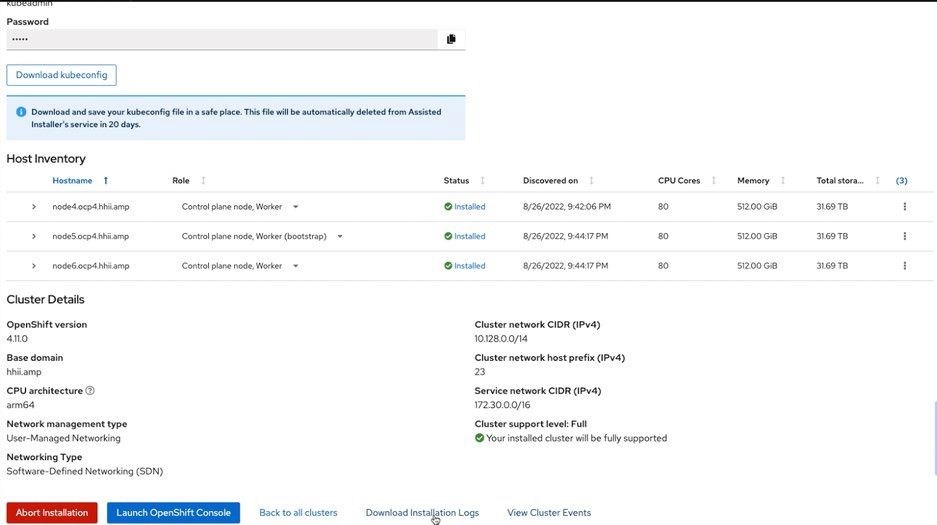 Figure A-20
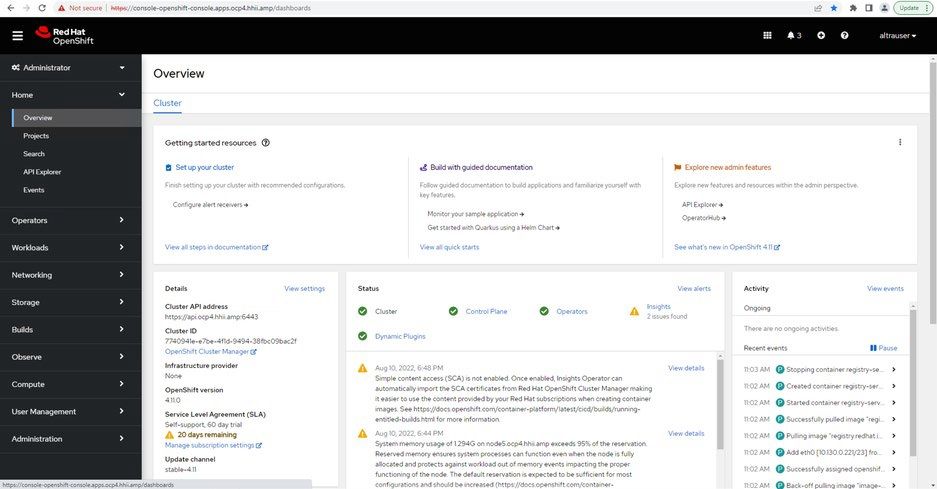
15 - You can access the OpenShift Console via the predefined URL: https://console-openshift-console.ocp4.hhii.amp
Deploy Rook Ceph Operator
- On the bastion node, use git to pull Rook Ceph Operator v.1.10.0
$ git clone --single-branch --branch v1.10.0 https://github.com/rook/rook.git $ mv rook rook-v1.10.0 $ cd rook-1.10.0/deploy/examples/
- Deploy CRDs, common, and operator yaml files
$ oc create -f crds.yaml -f common.yaml $ oc create -f operator-openshift.yaml $ oc create -f cluster.yaml $ oc create -f toolbox.yaml $ oc create -f csi/rbd/storageclass.yaml $ oc create -f csi/rbd/snapshotclass.yaml
- Set rook-ceph-block as the default StorageClass
$ oc patch storageclass rook-ceph-block -p '{"metadata": {"annotations":{"storageclass.kubernetes.io/is-default-class":"true"}}}'
- After a few minutes, the Ceph cluster is ready on rook-ceph project (namespace).
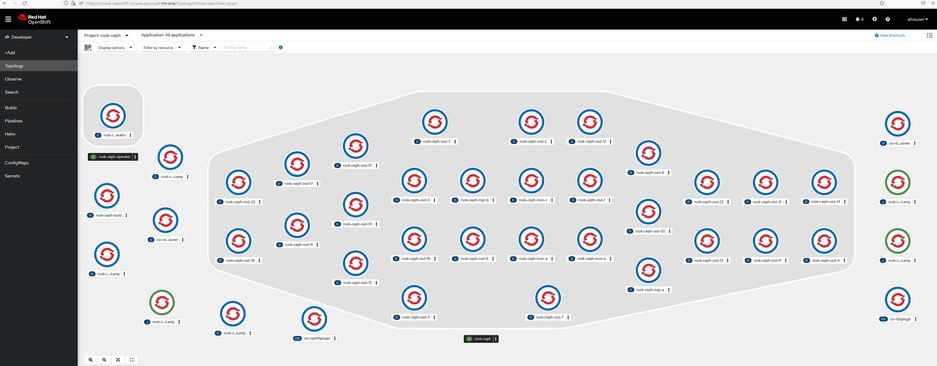 Figure A-22
- When all OSDs are in ready status, create a YAML file (test-pvc.yaml) for a Persistent Volume Claim (PVC) under rook-ceph project (namespace) for testing Ceph block storage
kind: PersistentVolumeClaim apiVersion: v1 metadata: name: test-pvc namespace: rook-ceph spec: accessModes: - ReadWriteOnce resources: requests: storage: 10Gi storageClassName: rook-ceph-block volumeMode: Filesystem
- Create a test PVC by CLI
$ oc create -f test-pvc.yaml
- Or create a PVC on OpenShift Console
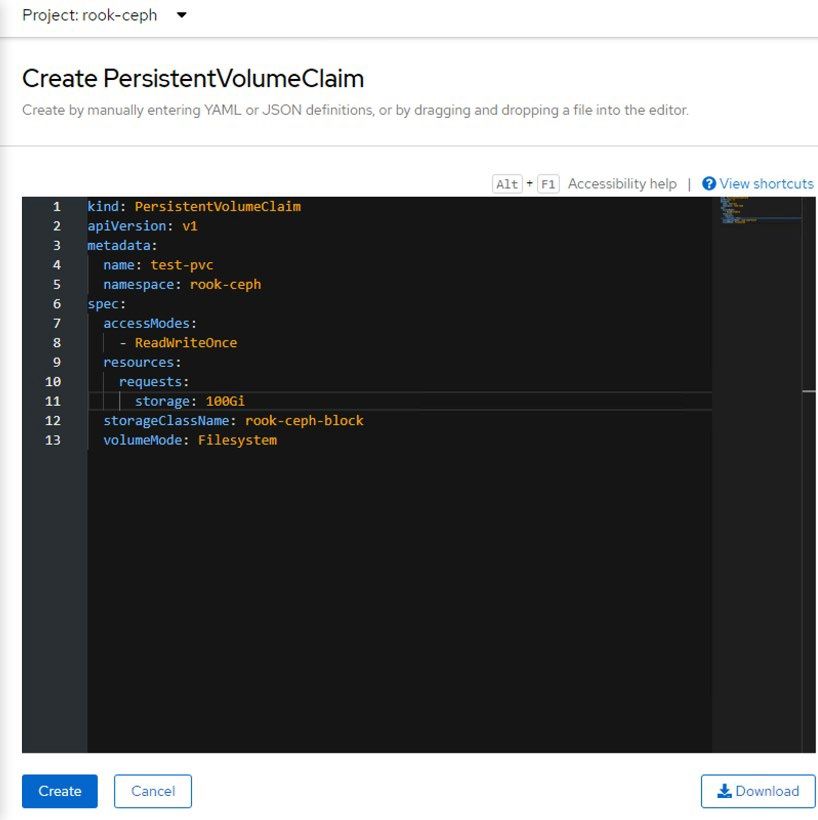 Figure A-23
- Then verify its status and PVC details on OpenShift Console (Project → PersistentVolumeClaim → test-pvc)
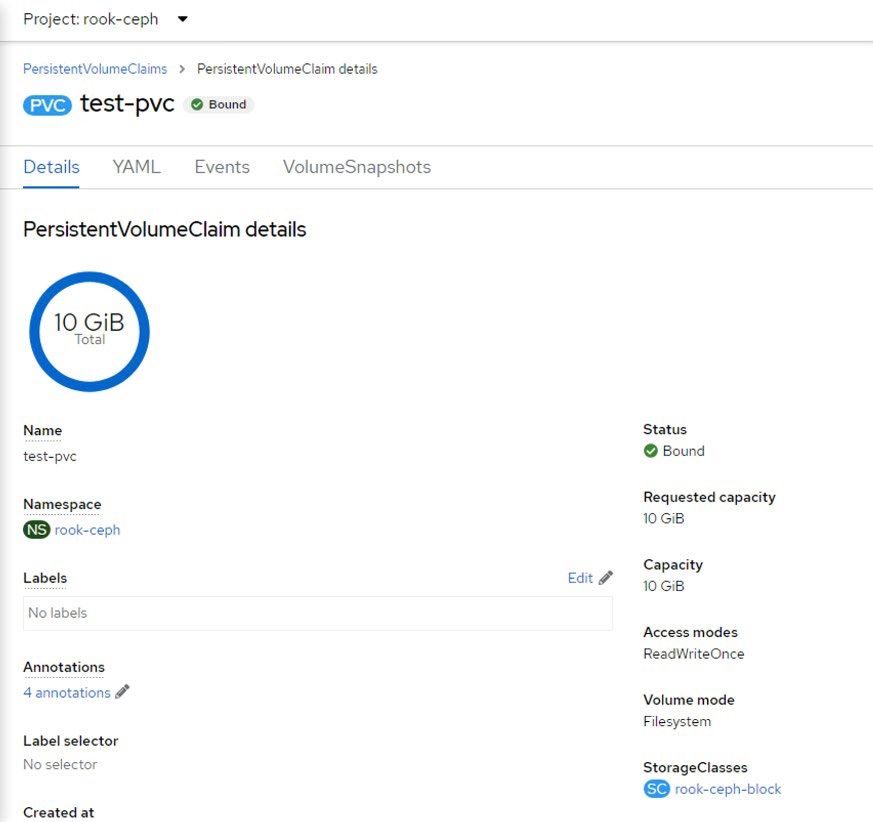 Figure A-24
- Use ceph-tool pod to verify Ceph cluster’s healthiness on bastion node
$ oc -n rook-ceph exec -it $(oc -n rook-ceph get pod -o name | egrep rook-ceph-tools ) -- /bin/bash bash-4.4$ ceph status cluster: id: 9b94ee02-a275-432d-bfef-fae1cf02a1aa health: HEALTH_OK services: mon: 3 daemons, quorum a,b,c (age 40h) mgr: a(active, since 40h), standbys: b osd: 24 osds: 24 up (since 40h), 24 in (since 40h) rgw: 1 daemon active (1 hosts, 1 zones) data: pools: 9 pools, 257 pgs objects: 411 objects, 928 KiB usage: 668 MiB used, 84 TiB / 84 TiB avail pgs: 257 active+clean bash-4.4$ ceph health detail HEALTH_OK bash-4.4$ exit
- Find the 3 YAML files, object-openshift.yaml, rgw-external.yaml, storageclass-bucket-delete.yaml, and change “my-store” to "object-store" in the 3 YAML files
- Edit rgw-external.yaml for changing port number from 80 to 443 for OpenShift
- Then deploy object storage related YAML files
$ oc create -f object-openshift.yaml $ oc create -f storageclass-bucket-delete.yaml $ oc create -f object-bucket-claim-delete.yaml $ oc create -f rgw-external.yaml
- The external URL Object storage service will be created like “http://rook-ceph-rgw-object-store-rook-ceph.apps.ocp4.hhii.amp/”
- [Add the section for testing the access credential later]
- Deploy service for Ceph dashboard
$ oc create -f dashboard-loadbalancer.yaml
- Create a route for the external access to Ceph Dashboard web UI under “Routes” section on OpenShift Console
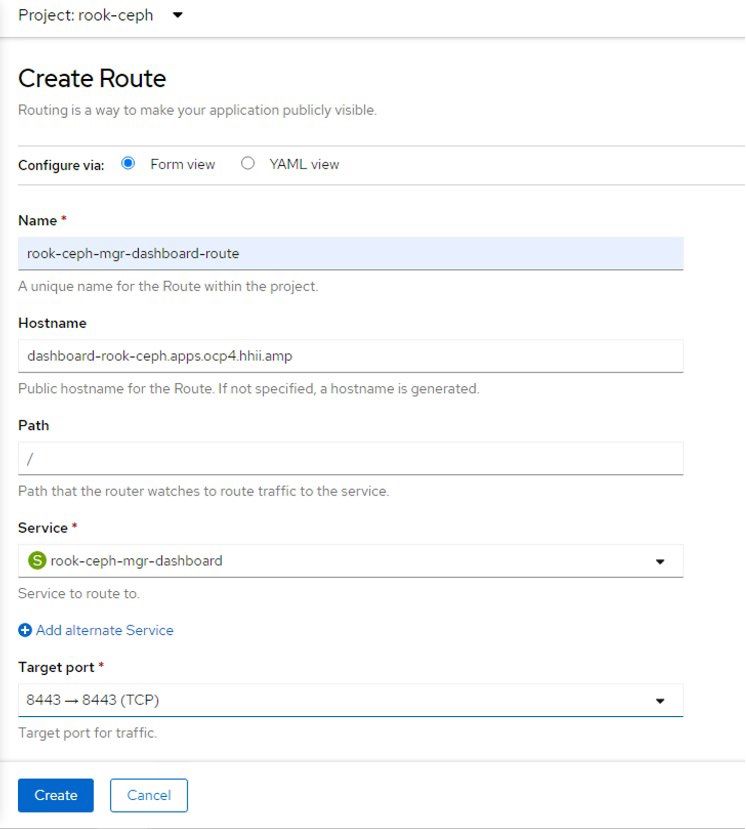 Figure A-25
- Check the Topology page again to review the external URLs for the endpoints of object-store pod and Ceph Cluster Dashboard (on rook-ceph-mgr-a pod)
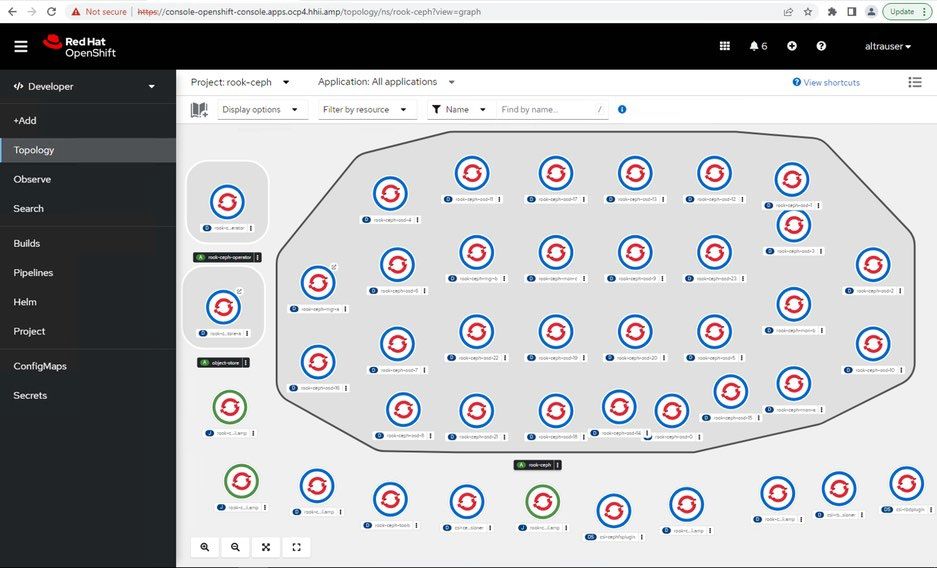 Figure A-26
- Obtain the generated password for Ceph Dashboard via the command below
$ oc -n rook-ceph get secret rook-ceph-dashboard-password -o jsonpath="{['data']['password']}" | base64 --decode && echo aaabbb123xxxyyy
- Click the link to access Ceph Dashboard with the credential for “admin”, the web UI will look like the one below
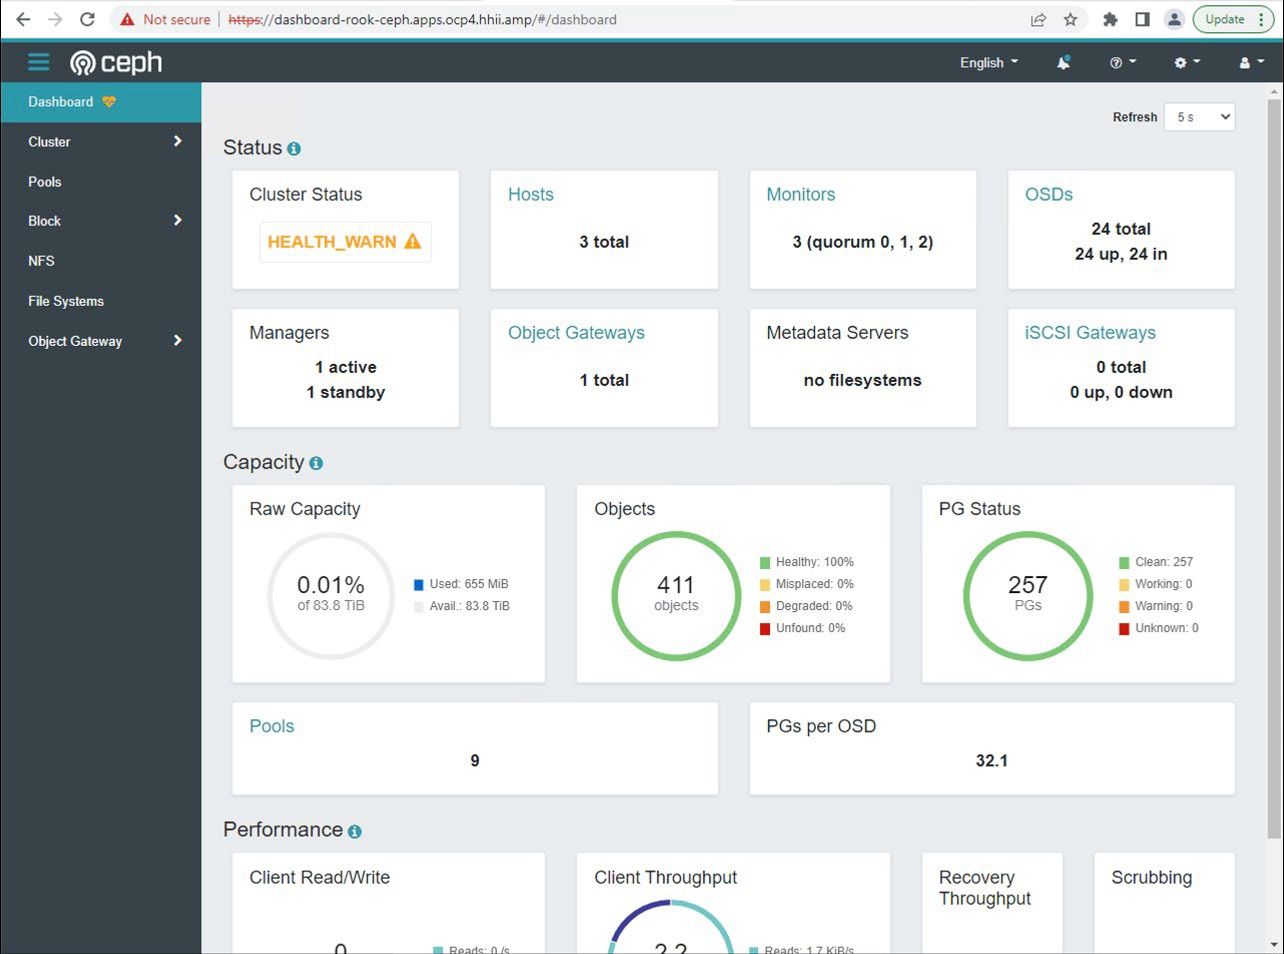 Figure A-27
- The 3-node compact OpenShift Cluster with Ceph Block storage and Object storage is ready for your next project!
Related Content
Ampere Computing LLC
4655 Great America Parkway Suite 601
Santa Clara, CA 95054


